Overview
WPRentals offers several ways to manage location fields for search and listing submission.
You can choose between:
- Google Places Autocomplete
- OpenStreet Places Autocomplete
- Manual Input
- Dropdown Selector for Cities and Areas
Which Location Setup Should You Choose?
Use the table below to decide which setup is best for your website.
| Setup | Best for | How City / Area are added |
|---|---|---|
| Google Places Autocomplete | Websites that want location suggestions from Google while typing. | The user starts typing and selects a suggestion from Google Places. |
| OpenStreet Places Autocomplete | Websites that want autocomplete without using Google Places. | The user starts typing and selects a suggestion from OpenStreet Places. |
| Manual Input | Websites that want owners/admins to type the City and Area manually. | The user types the City and Area as text. |
| Dropdown Selector | Websites that want owners/admins to select only predefined Cities and Areas. | The user selects City and Area from dropdowns populated from wp-admin taxonomies. |
Location Settings Overview
The main settings are found in:
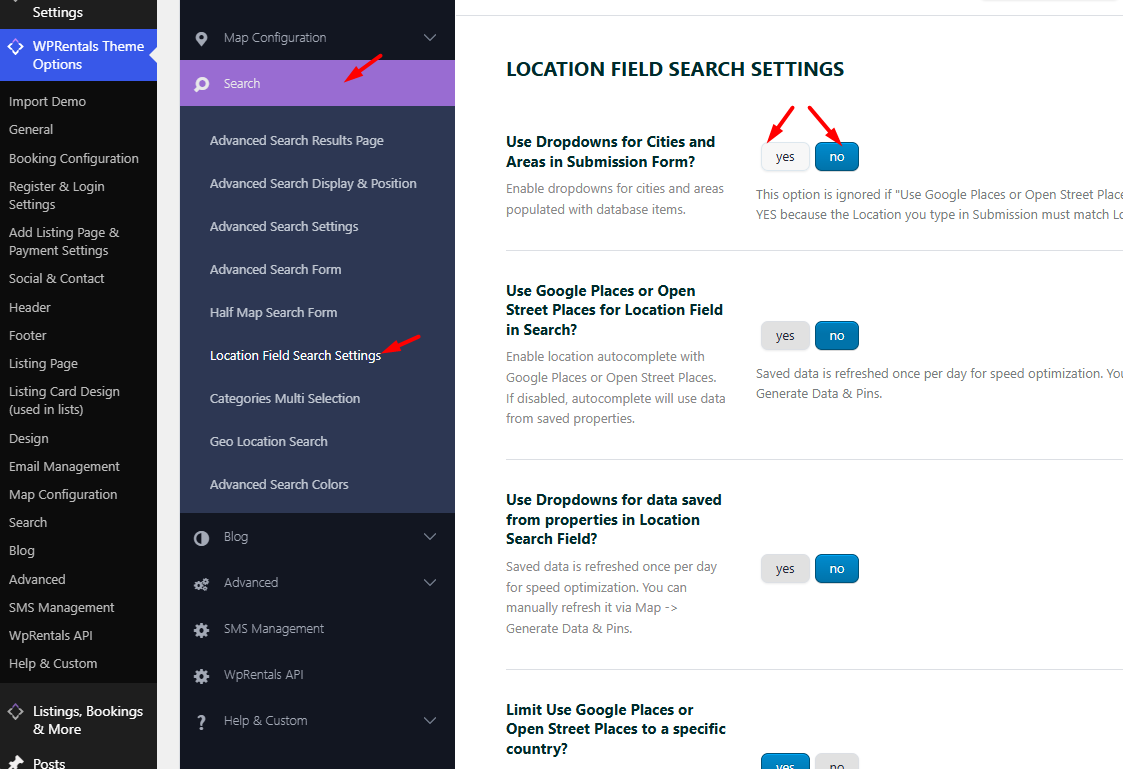
WPRentals Options > Search > Location Field Search Settings
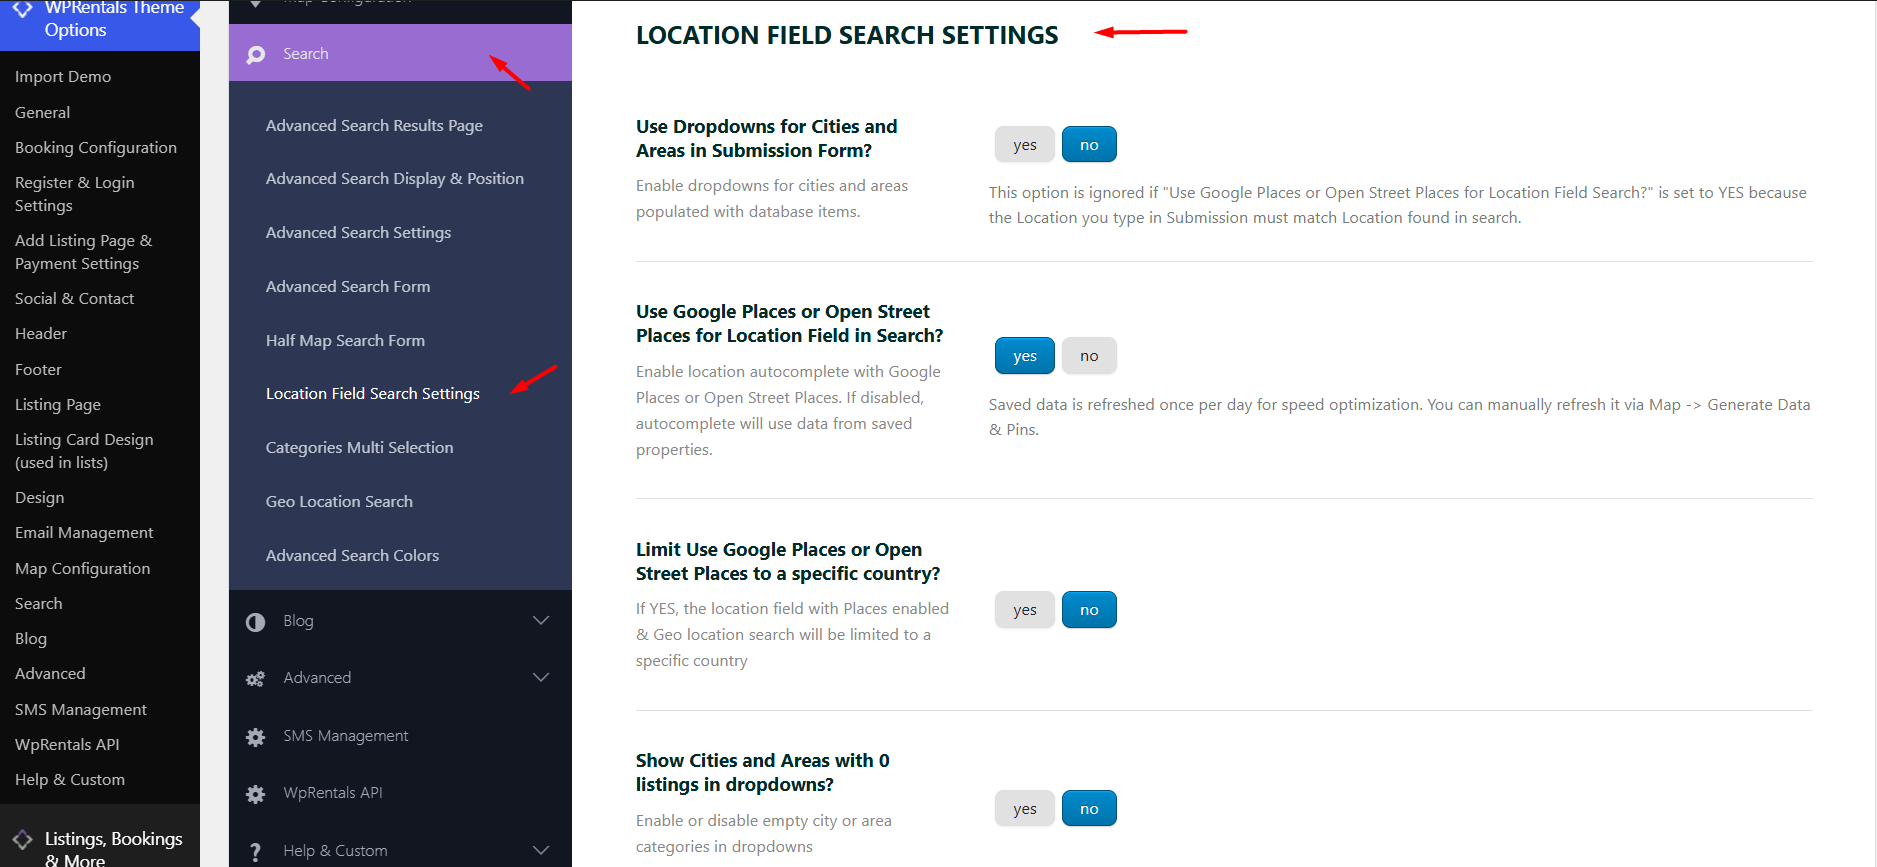
This section includes options for:
- Using Google Places or OpenStreet Places for the location field.
- Using dropdowns for locations saved from properties in the search field.
- Using dropdowns for Cities and Areas in the submission form.
Map and Places provider settings are managed from:
WPRentals Options > Map Configuration > Map General Settings
Google Places Autocomplete
Use this option if you want the City field to show location suggestions from Google Places while the user types.
What It Does
- Enables Google Places autocomplete.
- Allows users to start typing a location and select a Google suggestion.
- Saves location details such as City, Area, and Country, depending on the selected Google result.
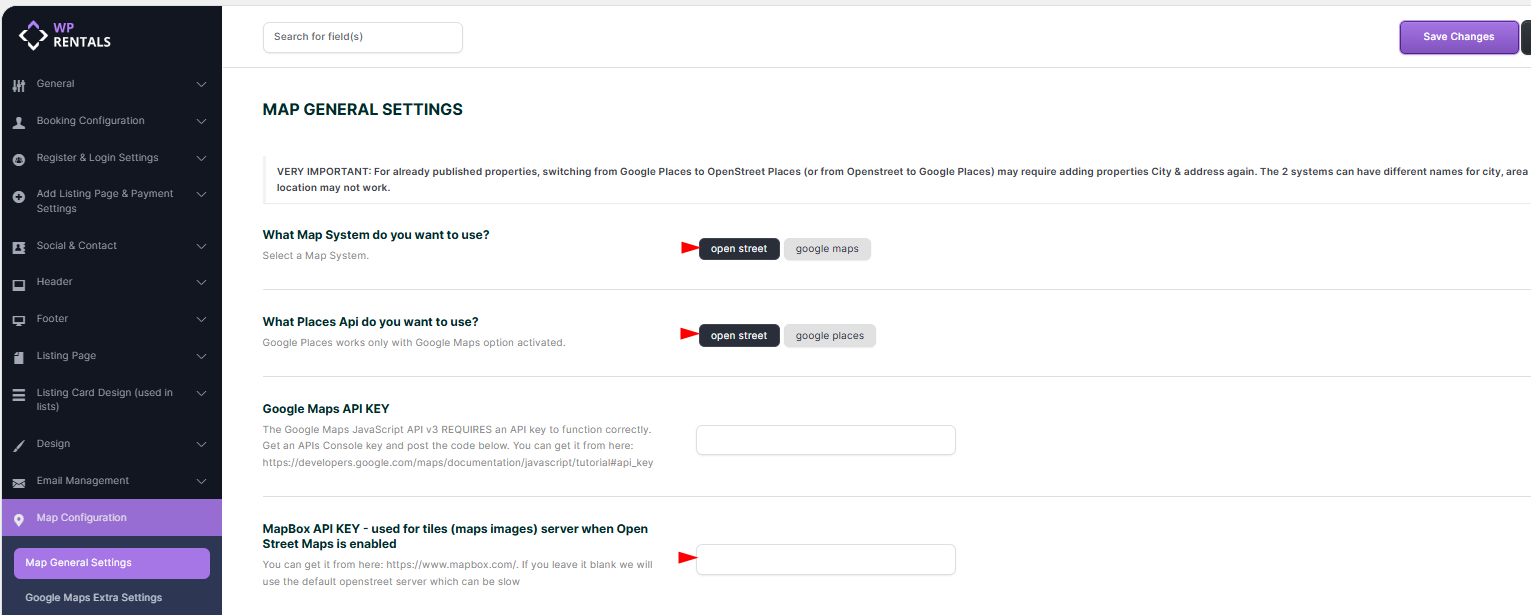
Step 1: Configure Map Settings
Go to:
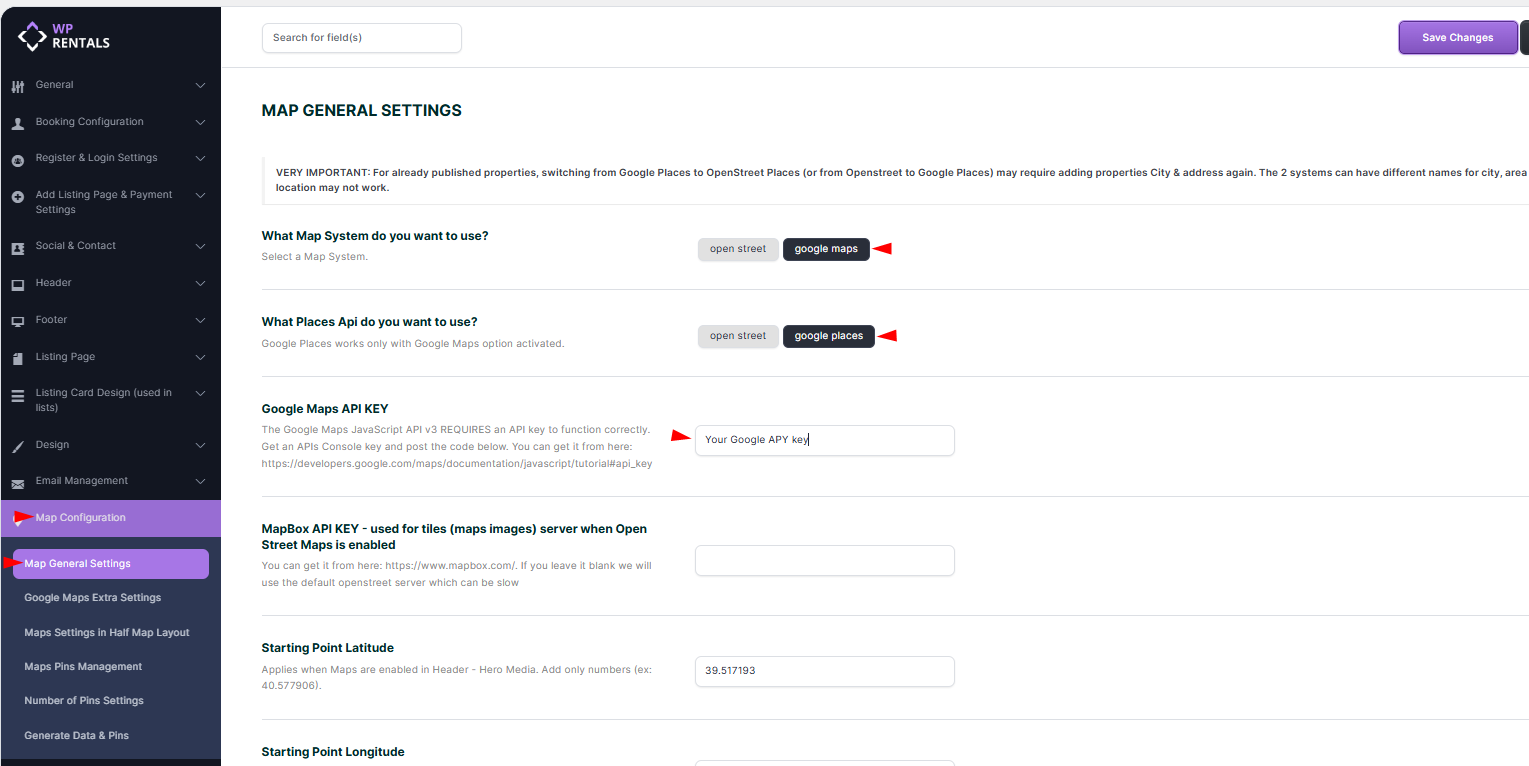
WPRentals Options > Map Configuration > Map General Settings
Then:
- Set What Map System do you want to use? to Google Maps.
- Enable or select Google Places for the Places API option.
- Add the API Key for Google Maps.
- Save changes.
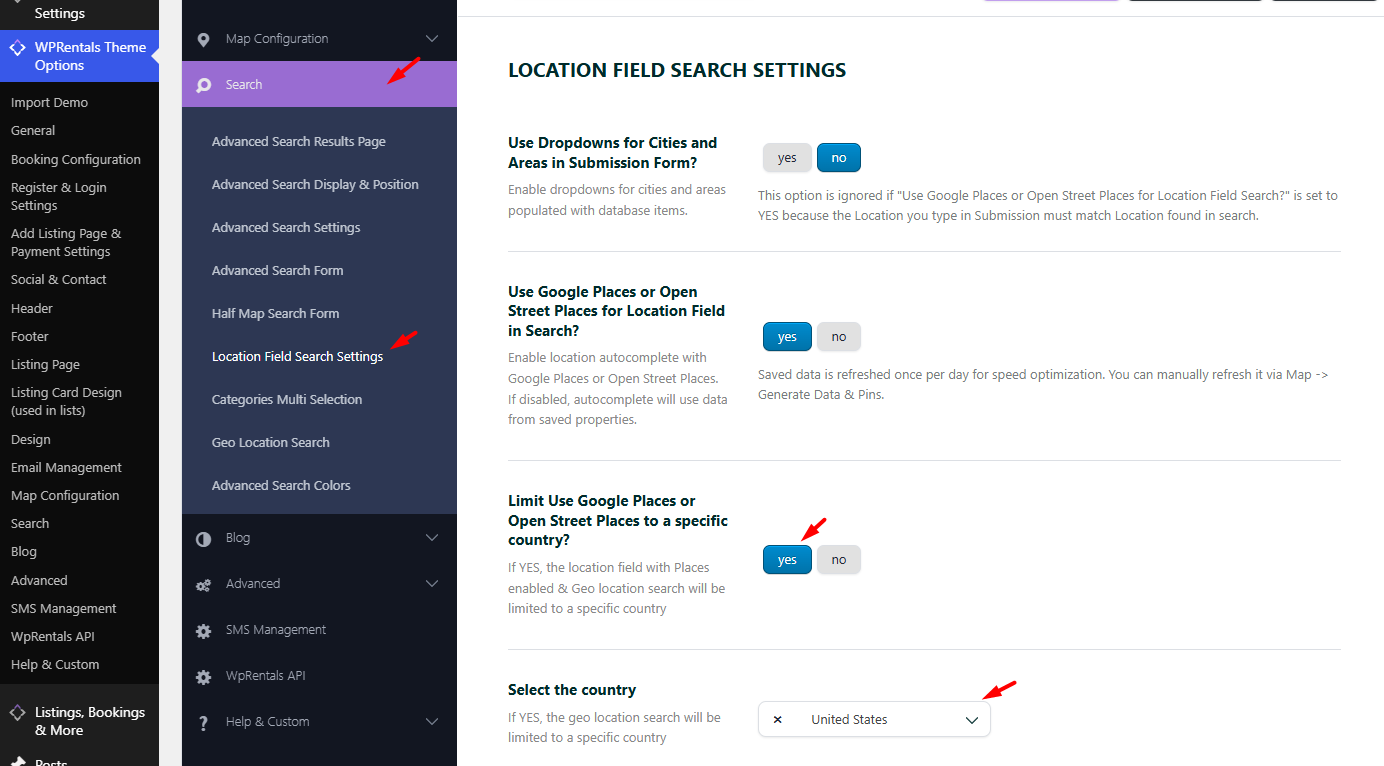
Optional: Limit Places Results to a Specific Country
You can limit Google Places or OpenStreet Places suggestions to a specific country.
This is useful if your website accepts listings only from one country.
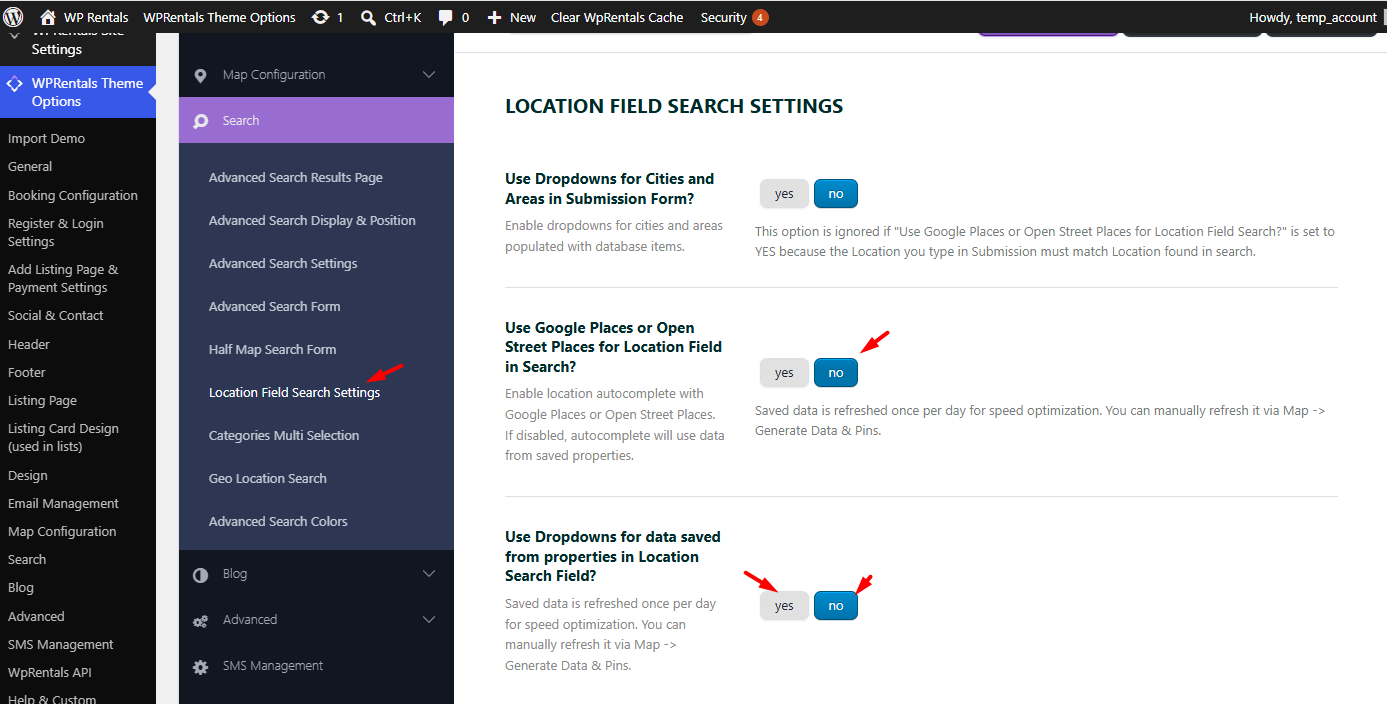
Step 2: Configure Location Field Settings
Go to:
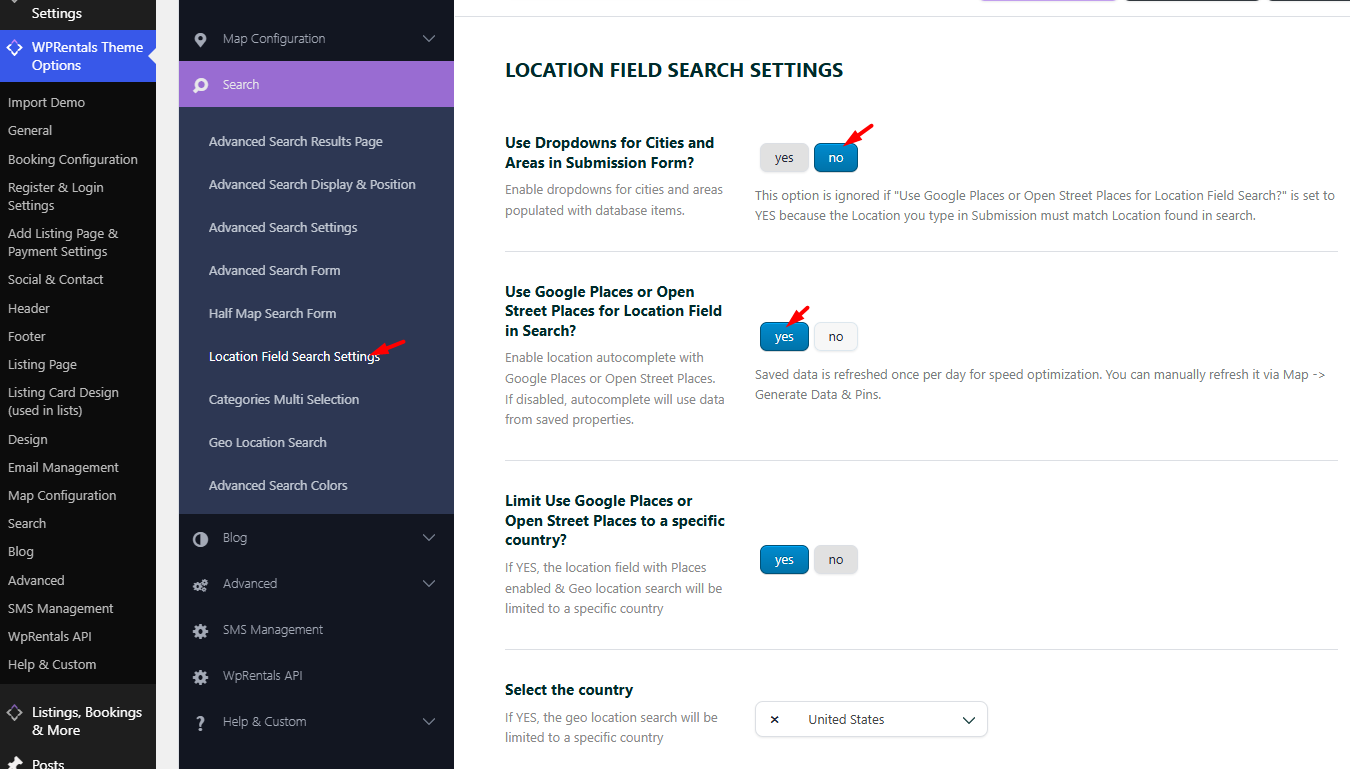
WPRentals Options > Search > Location Field Search Settings
Then:
- Set Use Dropdowns for Cities and Areas in Submission Form? to No.
- Set Use Google Places or Open Street Places for Location Field in Search? to Yes.
- Save changes.
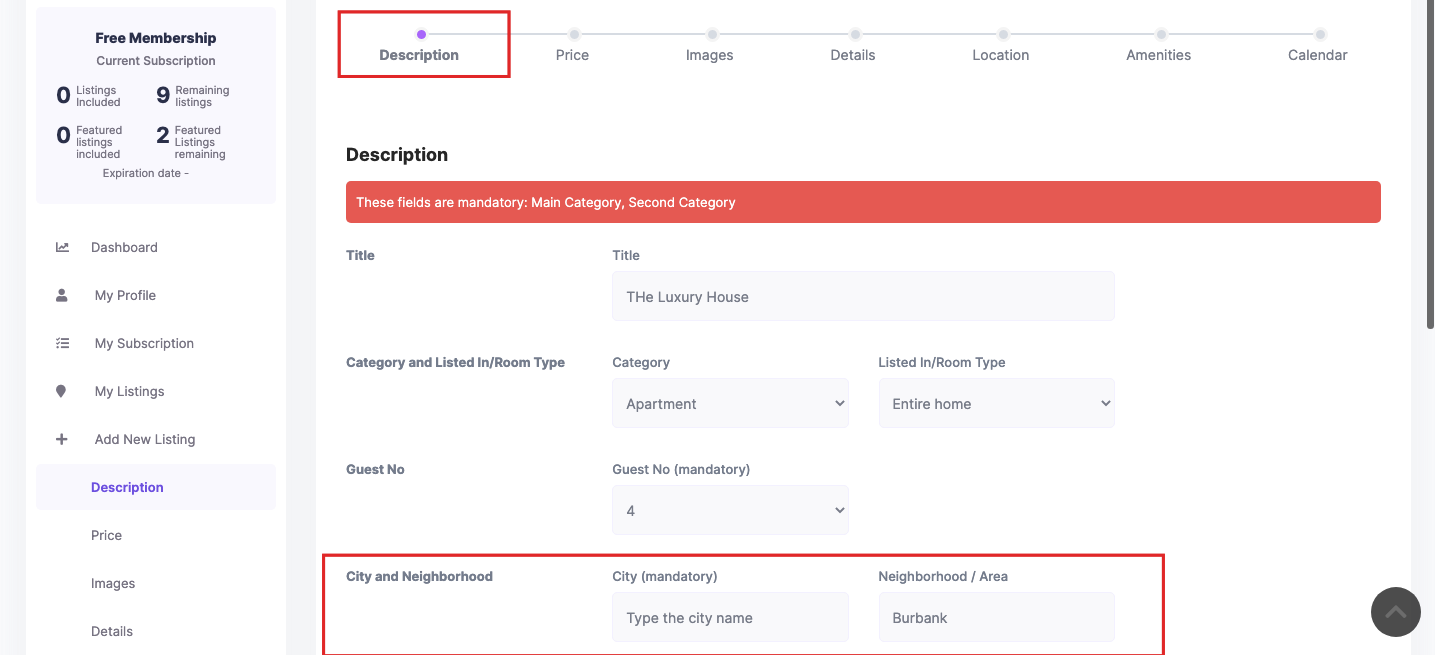
How It Works in the Submission Form
- Go to User Dashboard > Add New Listing.
- Fill in the required fields.
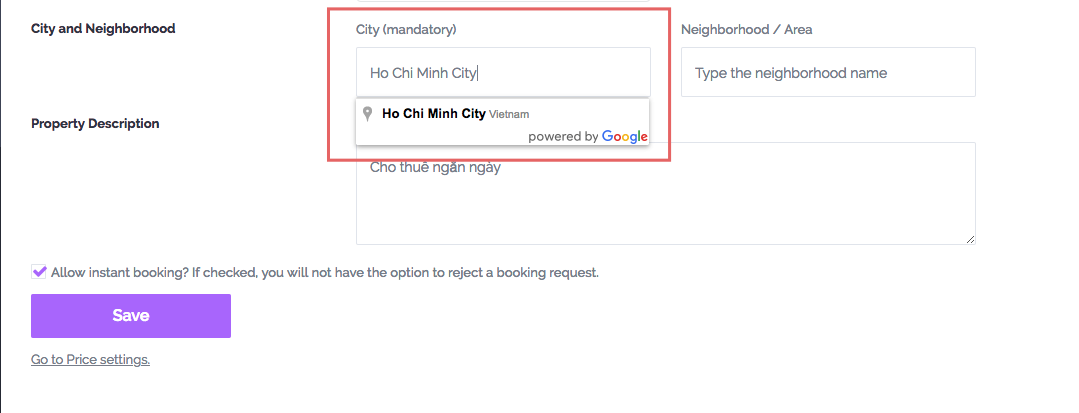
- In the City field, start typing a city name.
- A dropdown appears with suggestions from Google Places.
- Select the correct location from the dropdown.
- The Country and other location details are filled based on the selected suggestion.
- Complete the remaining listing details and publish the listing.


OpenStreet Places Autocomplete
Use this option if you want autocomplete suggestions without using Google Places.
What It Does
- Enables OpenStreet Places autocomplete.
- Allows users to start typing a location and select a suggestion.
- Saves location details such as City, Area, and Country, depending on the selected result.
Step 1: Configure Map Settings
Go to:
WPRentals Options > Map Configuration > Map General Settings
Then:
- Set What Map System do you want to use? to OpenStreet.
- Set What Places API do you want to use? to OpenStreet.
- Save changes.
Optional: Limit Places Results to a Specific Country
You can limit Google Places or OpenStreet Places suggestions to a specific country.
Step 2: Configure Location Field Settings
Go to:
WPRentals Options > Search > Location Field Search Settings
Then:
- Set Use Google Places or Open Street Places for Location Field in Search? to Yes.
- Set Use Dropdowns for Cities and Areas in Submission Form? to No.
- Save changes.
How It Works in the Submission Form
- Go to User Dashboard > Add New Listing.
- Fill in the required fields.
- In the City field, start typing a city name.
- A dropdown appears with suggestions from OpenStreet Places.
- Select the correct location from the dropdown.
- The Country and other location details are filled based on the selected suggestion.
- Complete the remaining listing details and publish the listing.
The autocomplete field appears in the submission form location fields, depending on the selected form setup.


Manual Input for City and Area
Use this option if you want owners/admins to manually type the City and Area when adding a listing.
What It Does
- Disables Google Places and OpenStreet Places autocomplete.
- Allows manual input for City and Area / Neighborhood.
- Uses a dropdown for Country selection.
Step 1: Configure Search Location Settings
Go to:
WPRentals Options > Search > Location Field Search Settings
Then:
- Set Use Google Places or Open Street Places for Location Field in Search? to No.
- Find Use Dropdowns for data saved from properties in Location Search Field?.
- Choose how the search location field should work:
- No – visitors can type locations in the search field.
- Yes – the search field uses dropdown choices based on locations saved from properties.
- Save changes.
Step 2: Configure the Submission Form
Go to:
WPRentals Options > Search > Location Field Search Settings
Then:
- Find Use Dropdowns for Cities and Areas in Submission Form?.
- Set it to No.
- Save changes.
How It Works in the Submission Form
- Go to User Dashboard > Add New Listing.
- Fill in the required fields.
- In the City field, manually type the city name.
- Manually enter the Area / Neighborhood.
- Select the Country from the dropdown list.
- Complete the remaining listing details and publish the listing.
Dropdown for Cities and Areas
Use this option if you want owners/admins to select only predefined Cities and Areas when adding a listing.
What It Does
- Displays dropdowns for Cities and Areas in the submission form.
- Dropdown options are populated from locations added in wp-admin.
- Prevents users from typing new city or area names directly in the submission form.
- Helps keep location names cleaner and more consistent
Go to WPRentals Options > Search > Location Field Search Settings
Then:
- Find Use Dropdowns for Cities and Areas in Submission Form?.
- Set it to Yes.
- Save changes.
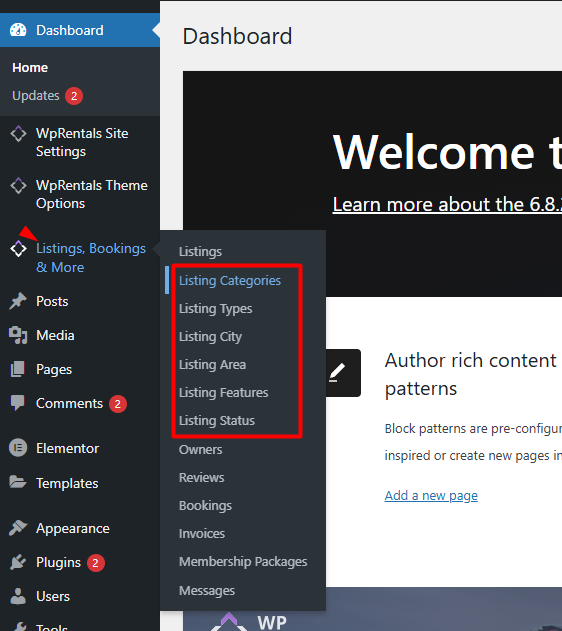
Step 3: Add Cities and Areas in wp-admin
Before users can select Cities and Areas from dropdowns, you must add them in wp-admin.
Go to:
Wp-admin > Listings > Cities and Areas
How It Works in the Submission Form
- Go to User Dashboard > Add New Listing.
- Fill in the required fields.
- Select the City from the dropdown.
- Select the Area from the dropdown.
- Select the Country from the dropdown list.
- Complete the location details, including County and State if needed.
- Complete the remaining listing details and publish the listing.


Important: Cities and Areas Are Independent
In the dropdown setup, Cities and Areas are independent dropdowns.
This means the Area dropdown is not automatically filtered based on the selected City.
Country: Array Warning on Listing Page
If you see a warning on the listing page or in the address details area that shows Country: Array, it means the Country value for that specific listing is missing or was not saved correctly.
This can happen when the site uses Google Places or OpenStreet Places autocomplete and the City/location was typed manually instead of selected from the autocomplete suggestions. In the autocomplete setup, the Country is saved together with the selected City/location result. If the suggestion is not selected, the Country may not be saved correctly.
How to fix the listing
- Go to wp-admin > Listings.
- Edit the listing that shows the warning.
- Check the location/address fields.
- If you use Google Places or OpenStreet Places autocomplete, type the City again and select the correct suggestion from the autocomplete dropdown.
- If you use manual input or dropdowns, select the correct Country from the Country field/dropdown.
- Update the listing.
- Clear all cache and check the listing page again.
If the warning is visible on the live site
Warnings like Country: Array usually become visible on the frontend when WordPress debug display is enabled.
On a live site, PHP warnings should not be displayed to visitors. They should be logged instead.
To hide warnings from visitors, disable debug display in wp-config.php.
define( 'WP_DEBUG', false);
define( 'WP_DEBUG_LOG', false );
define( 'WP_DEBUG_DISPLAY', false );
@ini_set( 'display_errors', 0 );WordPress debug documentation: