The Google Login API requires your server PHP version to be 8.1 or greater.
Help last updated: May 2026
WpRentals supports Google Login, which allows visitors to log in or register using their Google account instead of manually typing a username and email address.
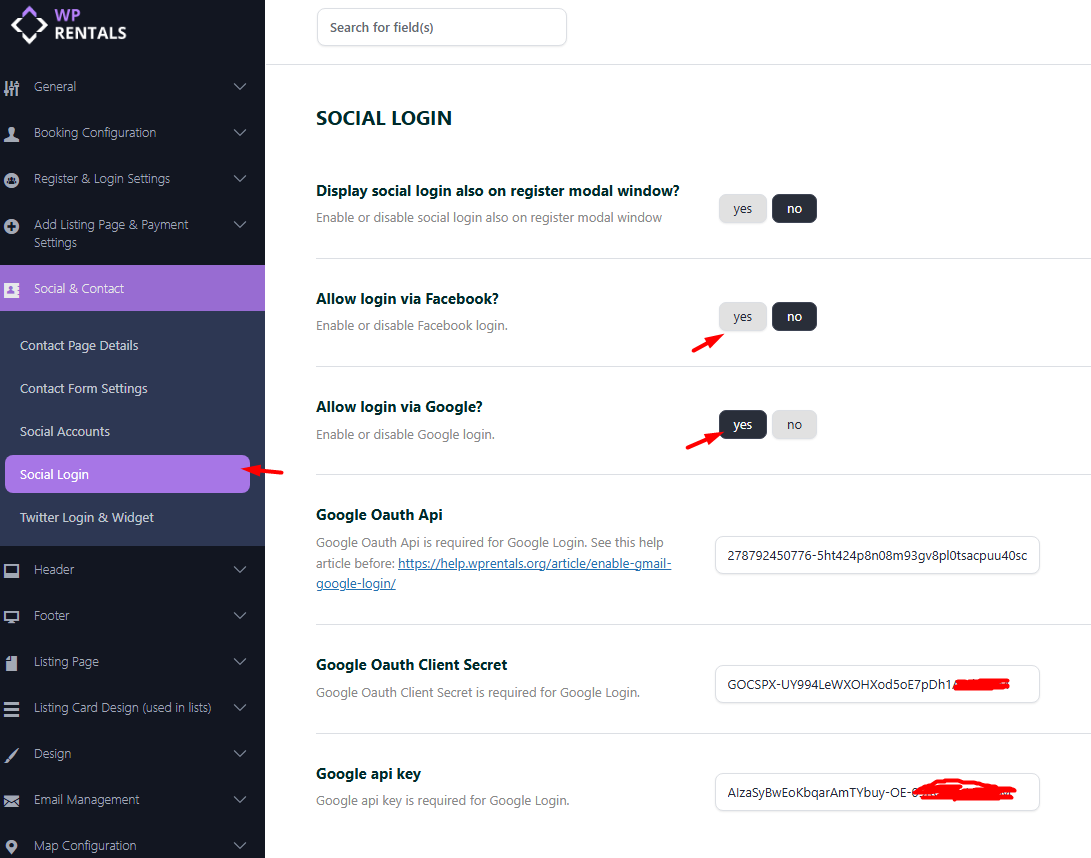
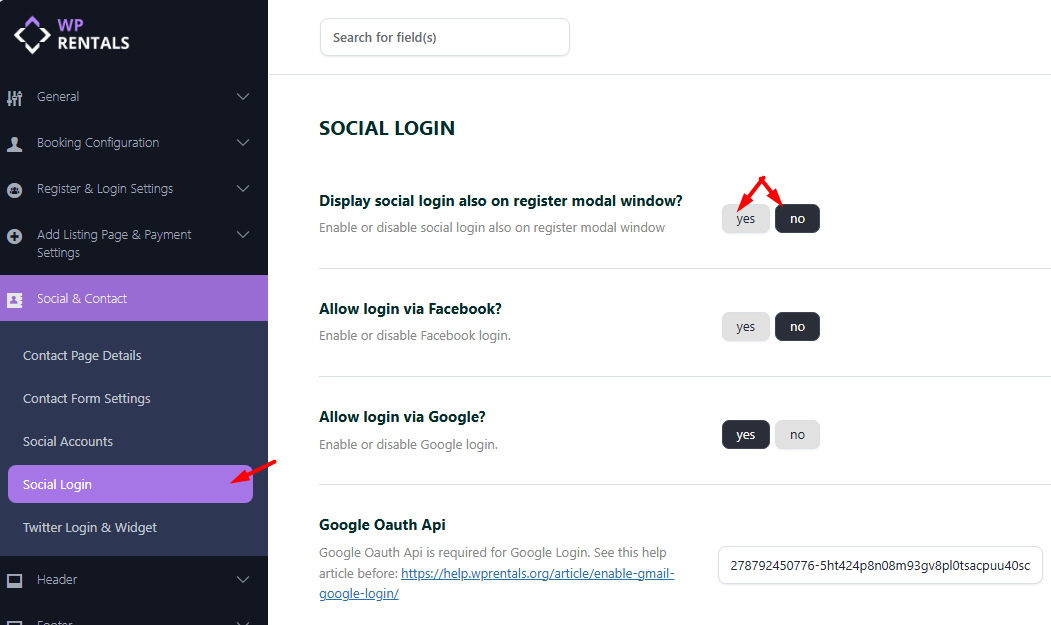
After Google Login is configured, the Google login button can appear on the WpRentals login modal. If you also want the button to show on the register modal, enable the option:
Display social login also on register modal window?
What Google Login does
Google Login lets users access the website with their Google account.
This can make login and registration faster because users do not need to manually type a username and email address in the WpRentals login/register form.
When a new visitor uses Google Login, WpRentals can create the user account automatically and assign the default role selected in Theme Options.
Where to enable Google Login
Go to:
Theme Options > Social and Contact > Social Login
Set:
Allow login via Google to Yes
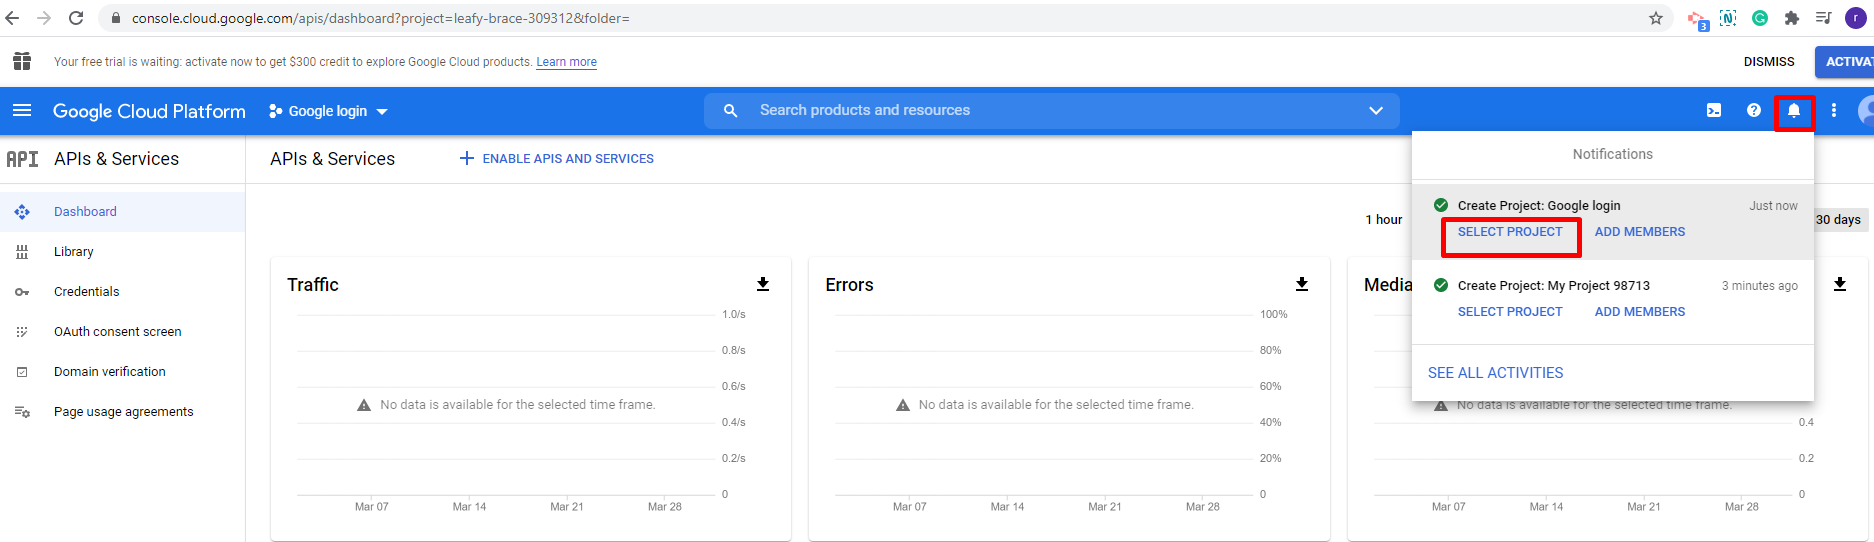
Step 1: Create a Google Project
- Go to https://console.developers.google.com.
- Log in with your Google account.
- Click Create Project.
- Add a project name, for example WpRentals Login.
- After the project is created, make sure the new project is selected at the top.


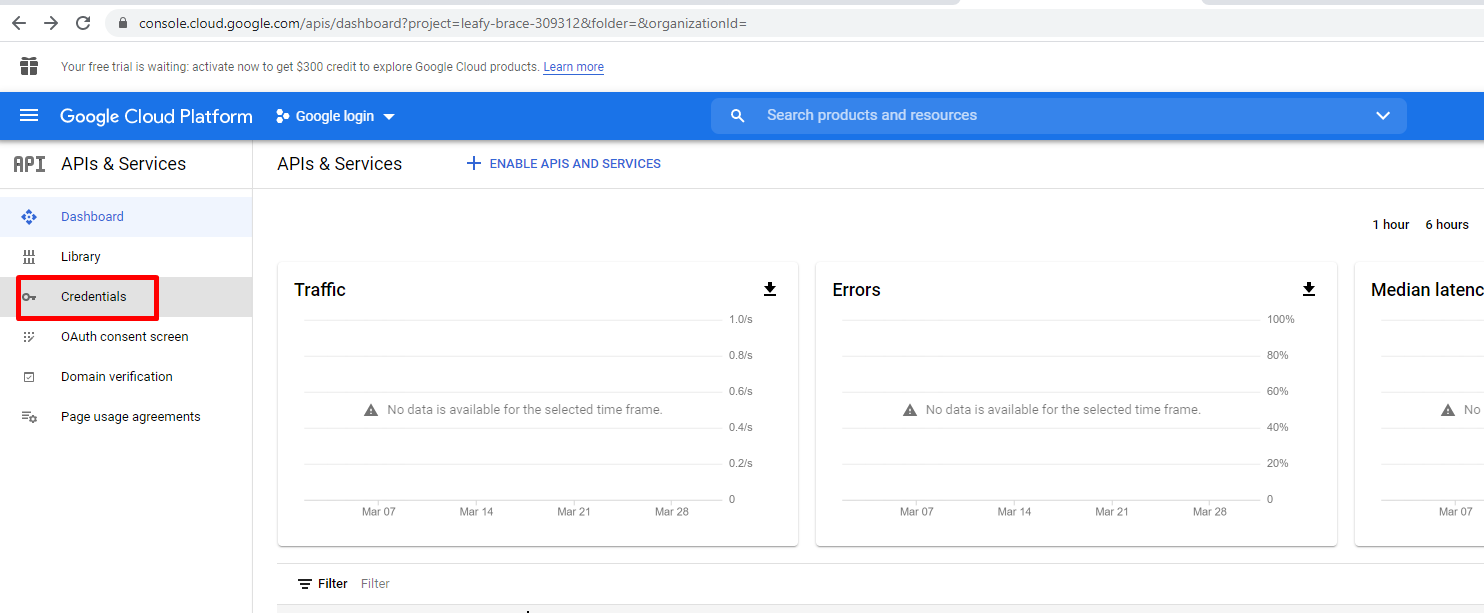
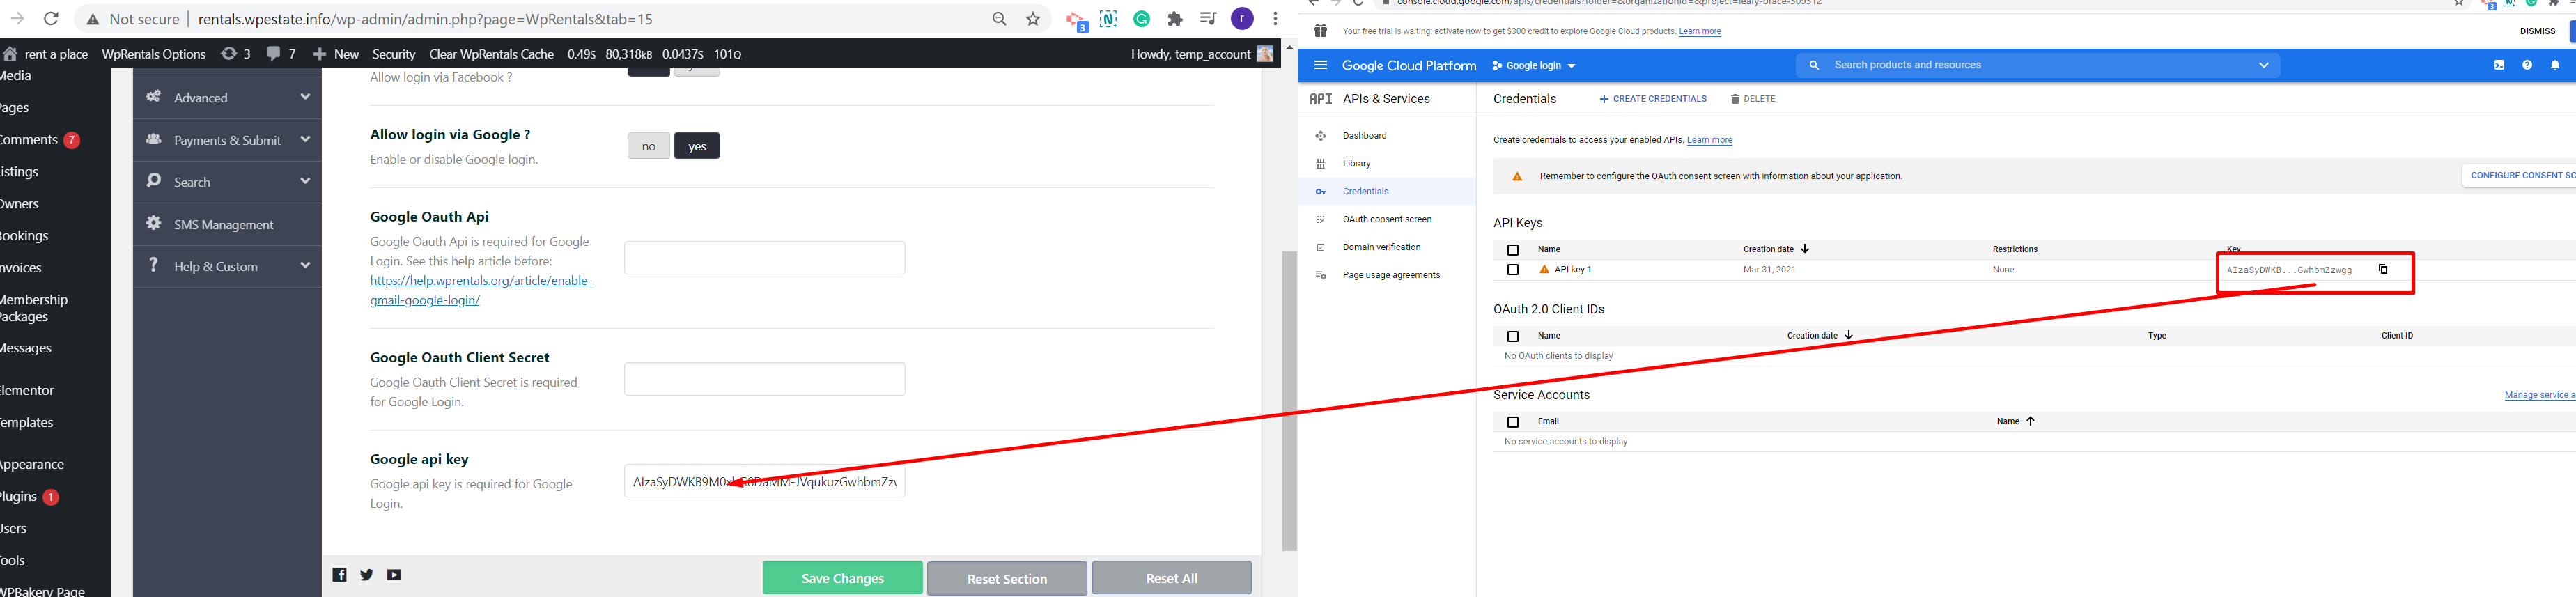
Step 2: Generate the Google API Key
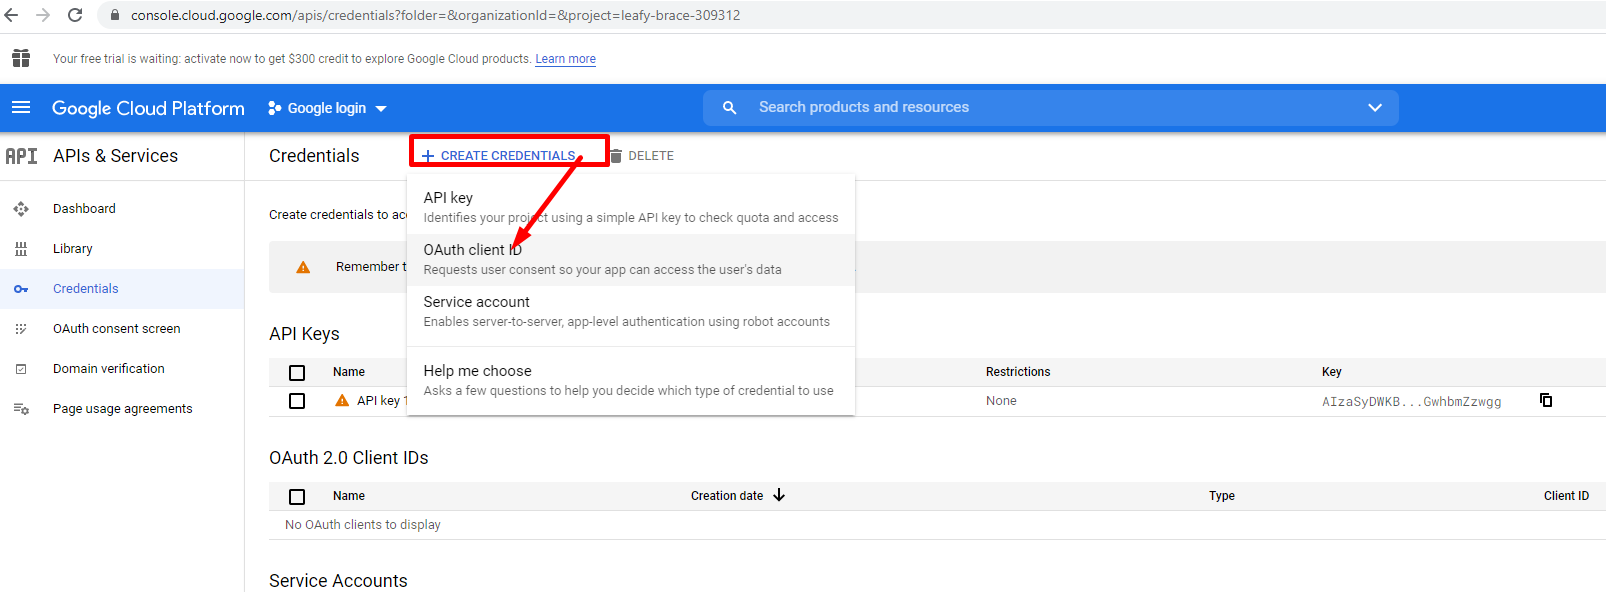
- Go to APIs & Services > Credentials.
- Click Create Credentials.
- Select API Key.
- Copy the generated API Key.
- You will later paste it in Theme Options > Social & Contact > Social Login > Google API Key.

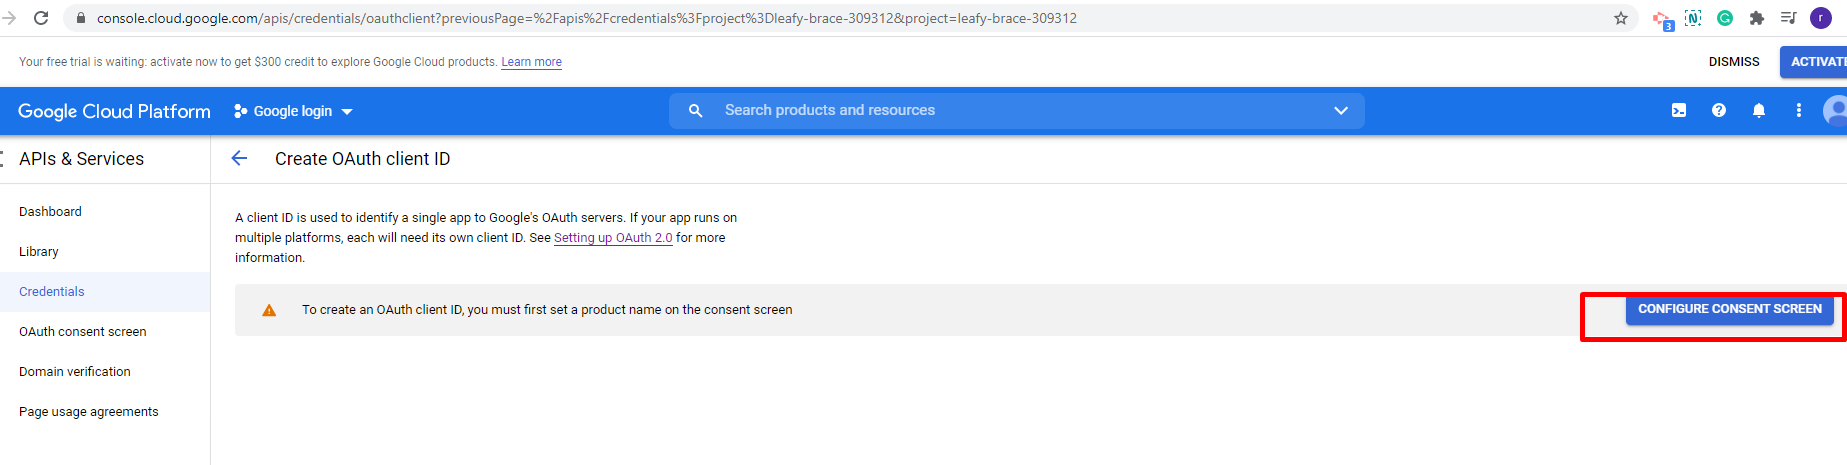
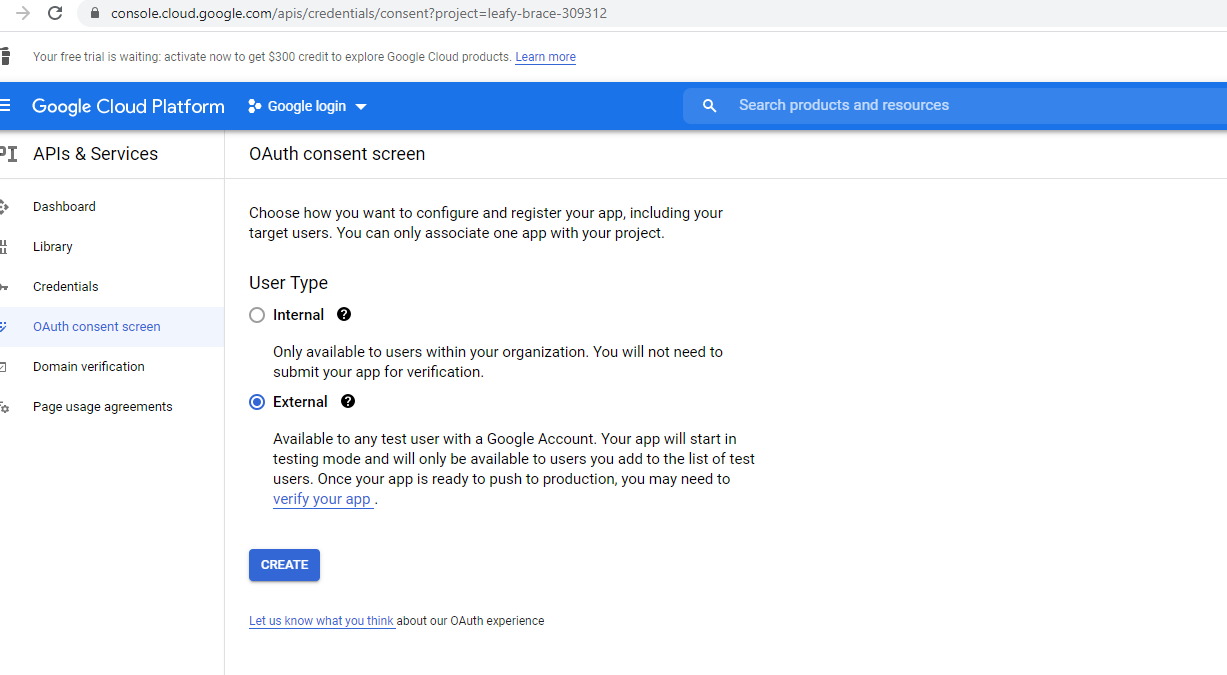
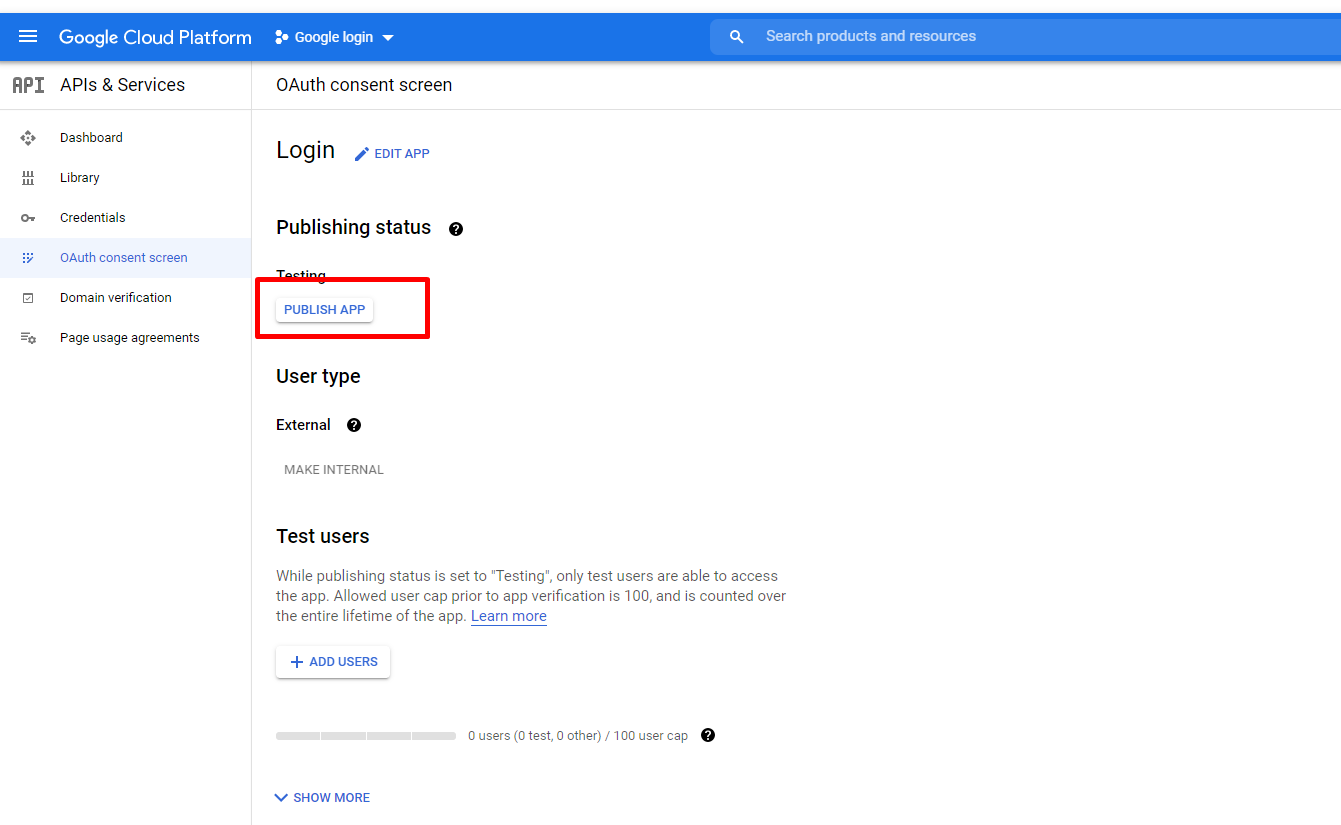
Step 3: Configure the OAuth Consent Screen
- In the left menu, go to OAuth consent screen.
- Choose External and click Create.
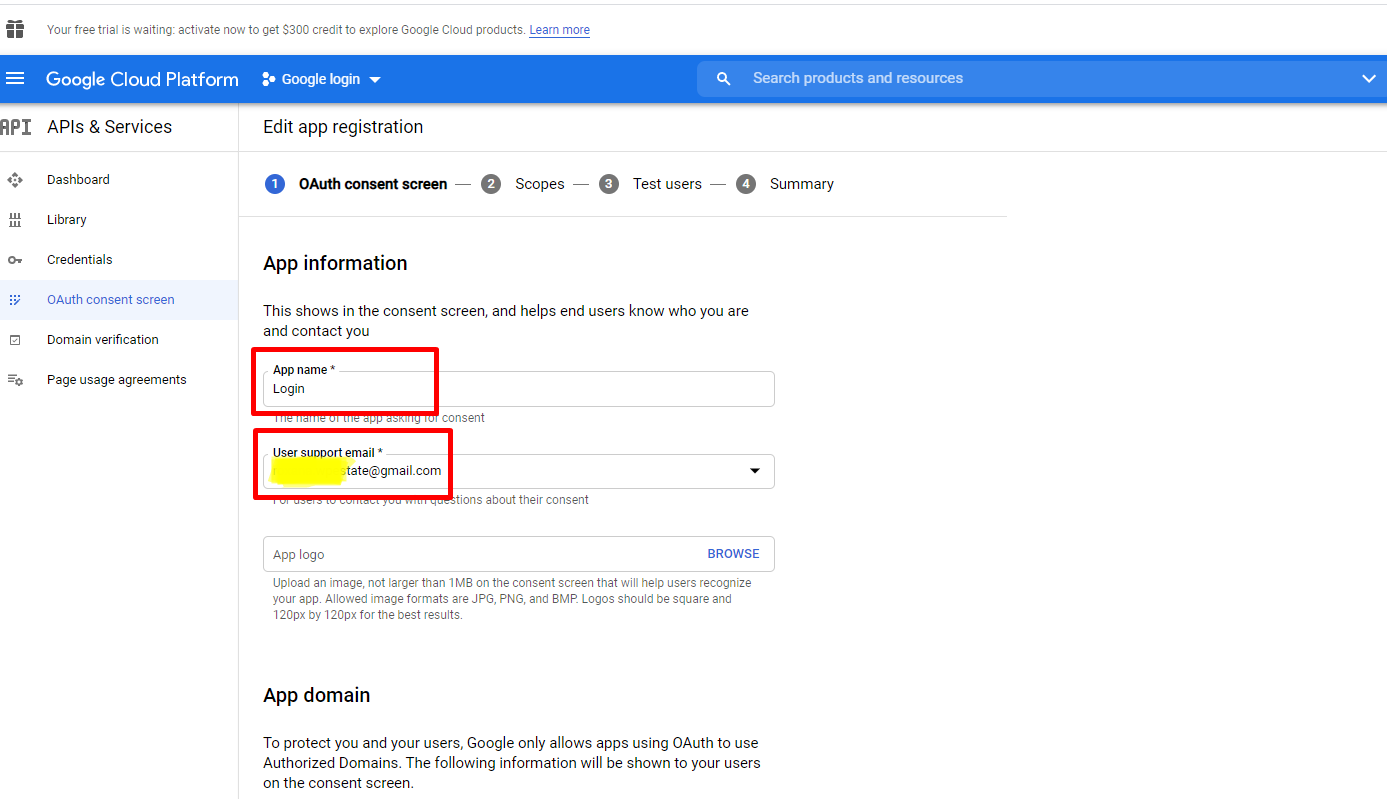
- Add the required app information, such as App Name and Support Email.
- You can skip optional scopes and optional user info fields.
- At the final step, click Back to Dashboard.
- Click Publish App to make the app live.


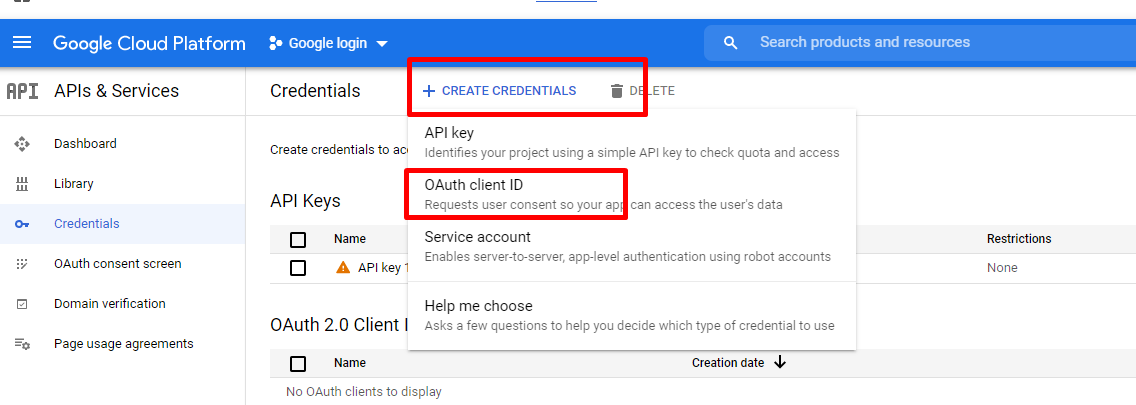
Step 4: Create the OAuth Client ID
- Go back to APIs & Services > Credentials.
- Click Create Credentials.
- Select OAuth Client ID.
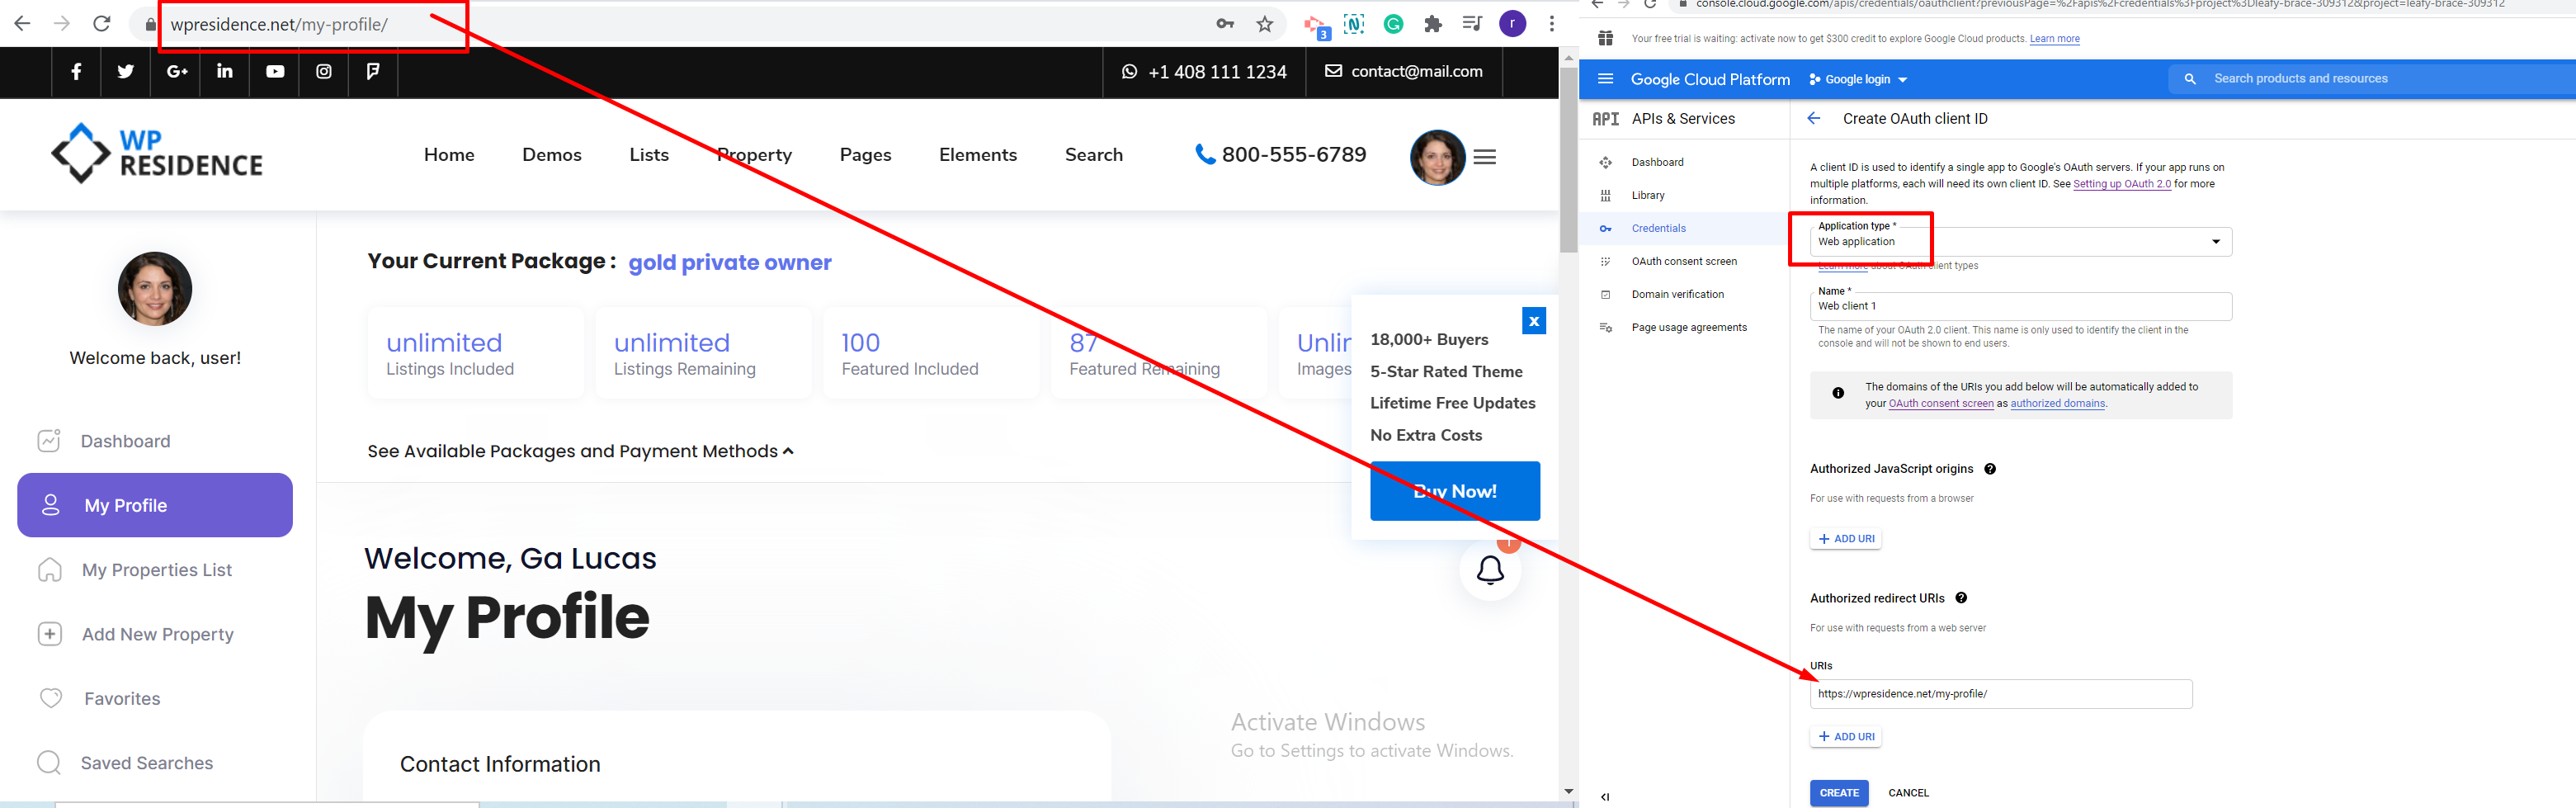
- Choose Web Application as the application type.
- In Authorized Redirect URIs, add your My Profile page URL.
- Click Create.
Example redirect URI:
https://yourdomain.com/my-profile/
After clicking Create, Google will show your:
- Client ID
- Client Secret
Copy these credentials. You must add them in WpRentals Theme Options.
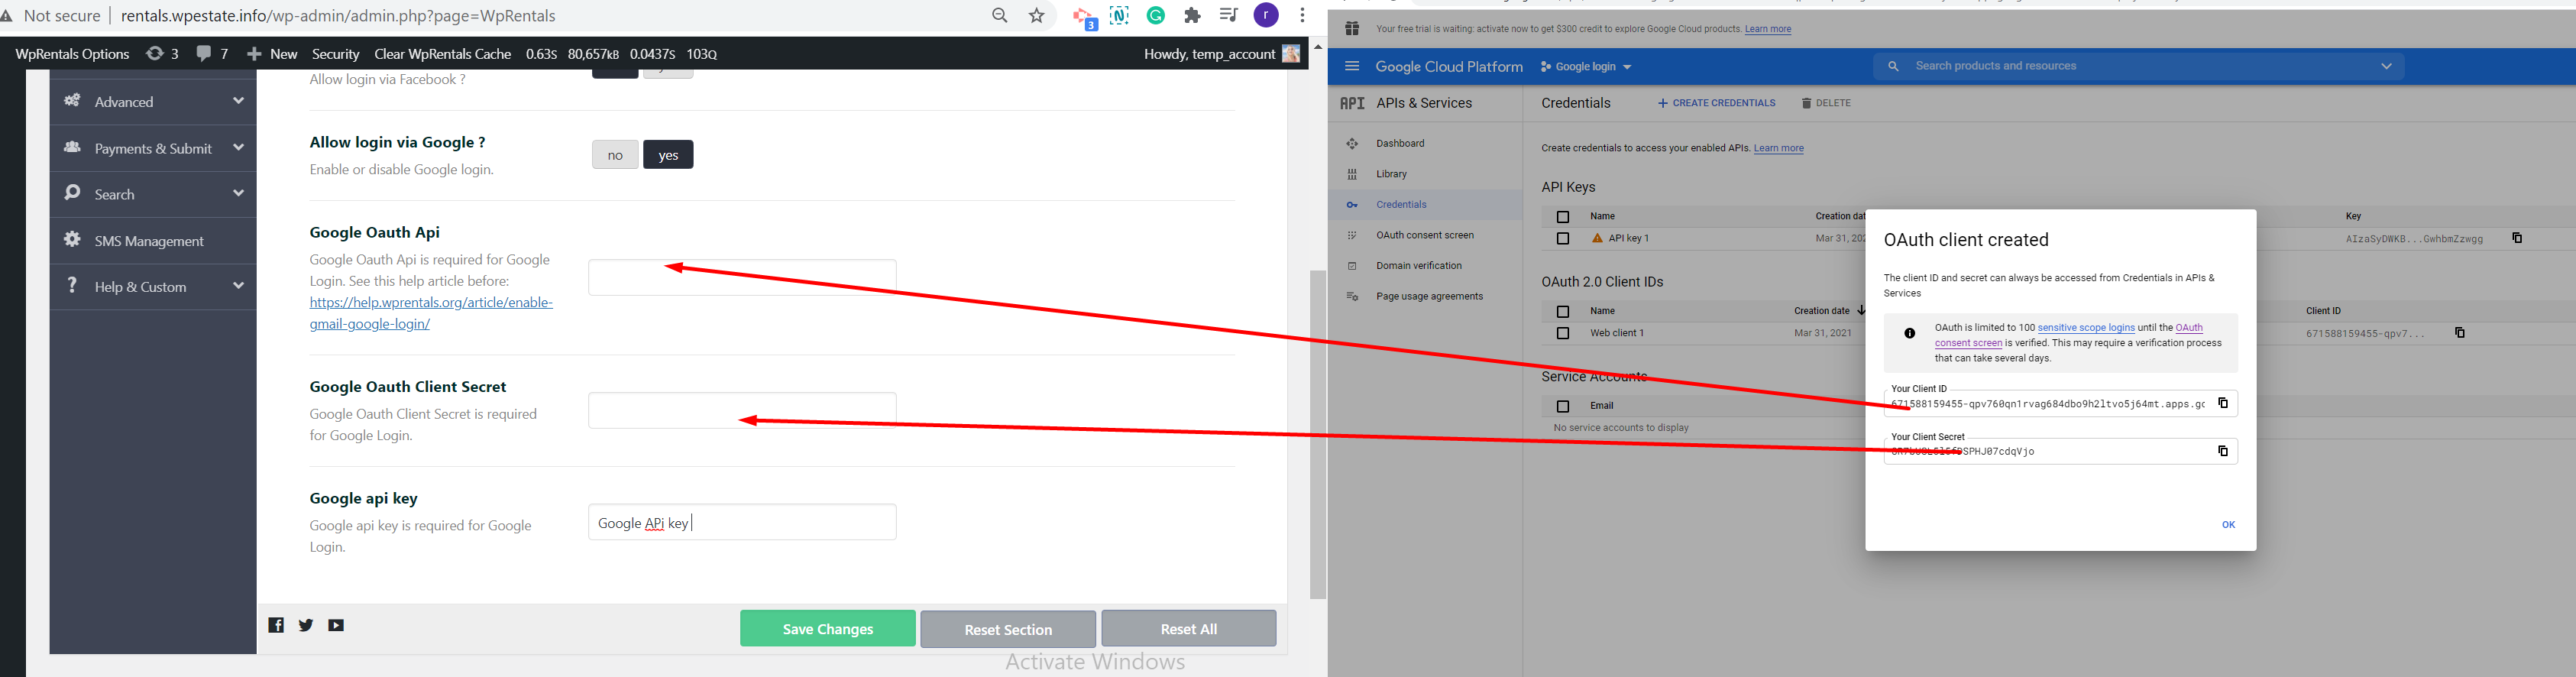
Step 5: Copy the credentials to Theme Options
Go back to your WordPress admin and open:
Theme Options > Social and Contact > Social Login
Add the Google credentials:
- Google API Key
- Google Client ID
- Google Client Secret
Save changes.
Theme Options: Social Login controls
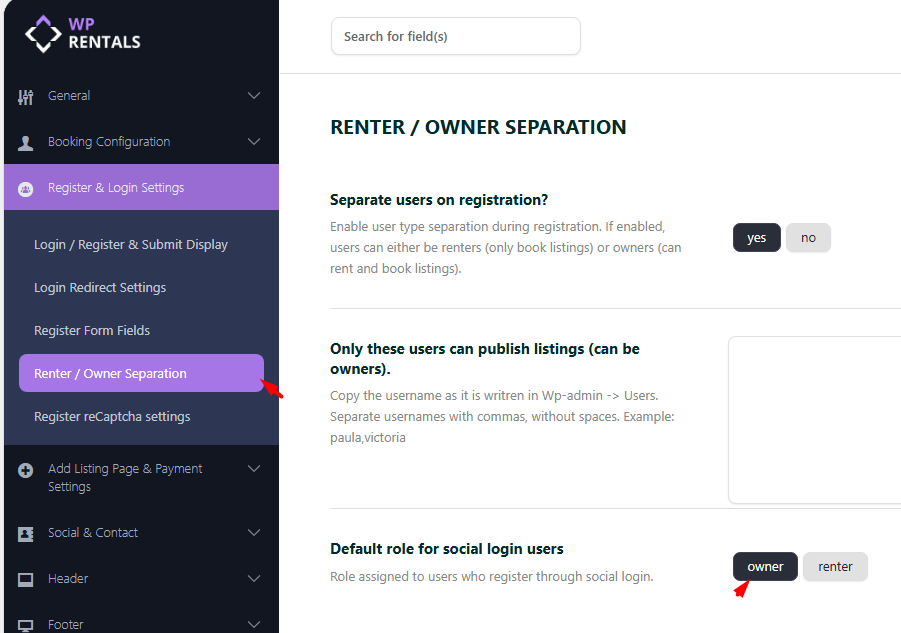
Default role for social login users
This option controls which role is assigned automatically to users who register through Social Login.
You can select:
- Owner – assigns the Owner role to new users who register via social login.
- Renter – assigns the Renter role to new users who register via social login.
Show Google Login on the Register modal
By default, social login buttons can show on the login modal after Google Login is enabled and configured.
If you also want the Google Login button to appear on the Register modal window, enable:
Display social login also on register modal window?
- Yes – social login buttons appear on both the Login and Register modals.
- No – social login buttons appear only on the Login modal.
Important notes
- Google Login requires PHP version 8.1 or greater.
- Google Login is controlled by WpRentals Theme Options, not by the default WordPress login settings.
- The Google Login button appears on WpRentals login/register forms that use the theme login markup.
- If you use a third-party login/register plugin or custom login form, the WpRentals social login button may not appear there automatically.
- The Authorized Redirect URI must be the website My Profile page URL.
- The default role for social login users can be set to Owner or Renter.
- Set Display social login also on register modal window? to Yes if you want Google Login to appear on both login and register modals.
- If the Google button does not show after setup, check the credentials, save Theme Options again, clear cache, and test in a private browser window.