Overview
This help explains how to translate WPRentals using the Loco Translate plugin from WordPress admin, or Poedit as a local application.
WPRentals includes translation files that can be used as a starting point. To keep theme translations safer during updates, install and activate the WPRentals Child Theme.
Some text comes from the theme, some text comes from the WPRentals Core plugin, and some labels are managed directly from Theme Options, taxonomies, widgets, custom fields, or Elementor templates.
Quick Answer: Where Should I Translate This Text?
Before searching only in Loco Translate, first check where the text comes from.
| Text location | Where to translate or edit it |
|---|---|
| Theme layout text | Loco Translate > Themes > WPRentals Child Theme |
| Booking, login, submission, dashboard, or core functionality text | Loco Translate > Plugins > WPRentals – Theme Core Functionality |
| Labels saved in Theme Options | Edit the label directly in Theme Options |
| Property features, amenities, categories, custom fields, or taxonomy terms | Edit the term or field directly from the WordPress admin area where it was created |
| Widget titles | Edit the title directly inside the widget from Appearance > Widgets |
| Elementor or Studio template text | Edit the text directly inside Elementor |
Before You Start
Loco Translate is the recommended tool for translating most WPRentals strings directly from WordPress admin.
To translate WPRentals correctly, you may need to work in two separate locations:
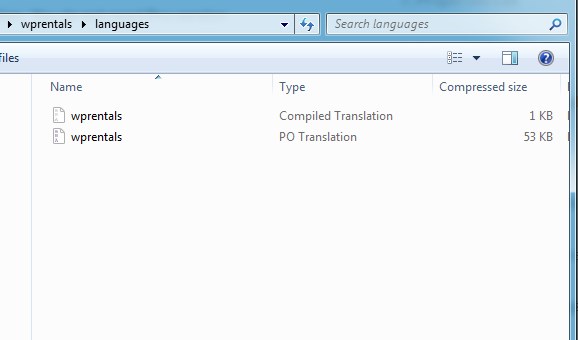
- Theme files: wp-content/themes/wprentals-child/languages/
- Core plugin files: wp-content/plugins/wprentals-core/languages/
The child theme is recommended so your theme translations are safer during theme updates.
The core plugin translations are separate from the theme translations. If you keep custom translations inside the plugin language folder, back them up before updating the plugin.
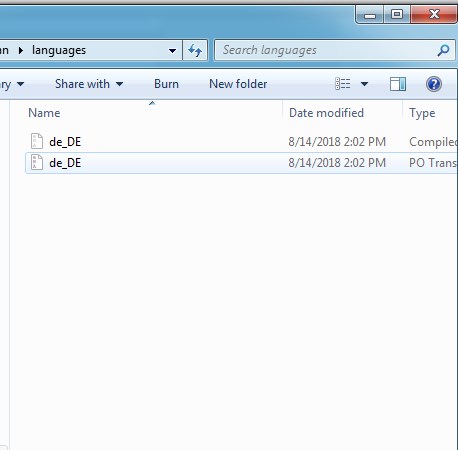
Translation File Types
| File type | What it does |
|---|---|
| .pot | Template file used to create or sync translation files. WordPress does not load this file on the front end. |
| .po | Editable translation file where you add or update translated strings. |
| .mo | Compiled file loaded by WordPress on the front end. |
Correct File Name Examples
For French, theme files can use:
- fr_FR.po
- fr_FR.mo
For the WPRentals Core plugin, the files use the core plugin prefix:
- wprentals-core-fr_FR.po
- wprentals-core-fr_FR.mo
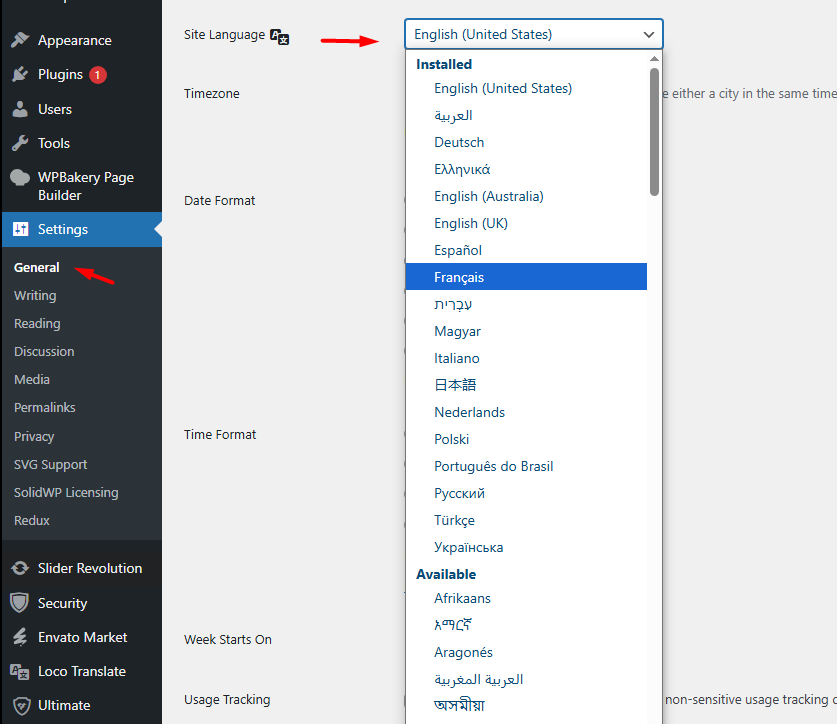
Check the WordPress Site Language
Before using Loco Translate or Poedit, make sure your WordPress site is set to the correct language.
WordPress loads translation files based on the language selected in:
Settings > General > Site Language
- Go to Settings > General.
- Find Site Language.
- Select your preferred language.
- Click Save Changes.
Install and Activate the Child Theme
The WPRentals Child Theme is recommended for theme translations.
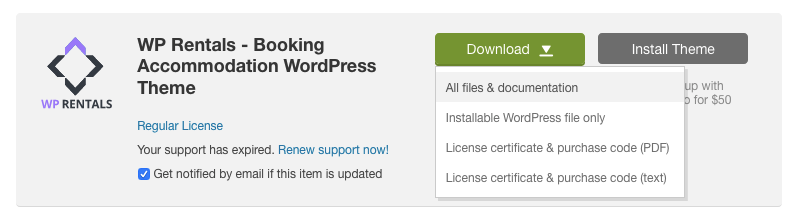
- Download All Files and Documentation from your buyer account > Downloads.
- Unzip the package and locate wprentals-child.zip.

- Install the parent theme first: wprentals.zip.
- Then install wprentals-child.zip the same way.
- Activate the child theme.


Translate With Loco Translate
Loco Translate is the easiest way to translate most WPRentals strings directly from WordPress admin.
You usually need to translate both:
- The WPRentals Child Theme
- The WPRentals Core plugin
This is important because some strings come from the theme and some strings come from the core plugin.
Install and Activate Loco Translate
- Go to Plugins > Add New.
- Search for Loco Translate.
- Install and activate the plugin.

Translate Theme Strings
Use this section to translate strings that come from the WPRentals Child Theme.
Create a New Language for the Child Theme
- Make sure the WPRentals Child Theme is installed and active.
- Go to Loco Translate > Themes.
- Select WPRentals Child Theme.
- Click New language.
- Select your language.
- Choose Author as the file location.
- Do not use Edit template.
Recommended configuration values for the child theme:
- Project name: WPRentals Child Theme
- Text domain: wprentals
- File prefix: wprentals
- Template file: languages/wprentals.pot
- Domain path: languages
- Source file paths: blank
Example file names for French:
- fr_FR.po
- fr_FR.mo


Edit an Existing Language for the Child Theme
- Go to Loco Translate > Themes > WPRentals Child Theme.
- If your language already exists, click it and then click Edit.
- If needed, click Sync before translating new strings.
- Use the search box to find the string you want to translate, for example Book Now.
- Select the string and enter your translation.
- Click Save.


Translate WPRentals Core Plugin Strings
Some strings are not in the theme language files. They are inside the WPRentals Core plugin and must be translated separately.
Create a New Language for the Core Plugin
- Go to Loco Translate > Plugins.
- Select WPRentals – Theme Core Functionality.
- Click New language.
- Select your language.
- Choose Author as the file location.
Example file names for French:
- wprentals-core-fr_FR.po
- wprentals-core-fr_FR.mo


Edit an Existing Language for the Core Plugin
- Go to Loco Translate > Plugins > WPRentals – Theme Core Functionality.
- Open your language file.
- Click Sync to load any new strings.
- Search for the strings you need, for example Service Fee.
- Translate the strings and click Save.


Update Translations After Theme or Plugin Updates
When the theme or core plugin is updated, new strings may be added or existing strings may move between the theme and the WPRentals Core plugin.
After each update:
- Open the child theme language file in Loco Translate and click Sync.
- Open the core plugin language file in Loco Translate and click Sync.
- Translate any new strings.
- Click Save.
Back Up Your Language Files Before Updates
Before updating, back up your custom language files.
This is especially important if your custom language files are stored inside the theme or plugin folders.
- Before updating, download or save the language file to your computer.

After the update, upload the file back if needed.

How to update translations after a theme update
Upload Translation Files With FTP or File Manager
If you prefer to work manually, you can upload translation files with FTP or your hosting File Manager.
You need to upload the translated .po and .mo files to the correct folders.
- Child theme files: wp-content/themes/wprentals-child/languages/
- Parent theme files: wp-content/themes/wprentals/languages/
- Core plugin files: wp-content/plugins/wprentals-core/languages/
For the WPRentals theme in French, use:
- fr_FR.po
- fr_FR.mo
For the WPRentals Core plugin in French, use:
- wprentals-core-fr_FR.po
- wprentals-core-fr_FR.mo
FTP or File Manager is useful if:
- You translated the files offline with Poedit.
- You want to restore a backup after an update.
- You want to manually replace the existing translation files.
Translate Labels Managed From Theme Options and Admin
Not all labels are handled through .po language files. Some labels are managed directly from WordPress admin.
Listing Page Labels
- Go to Theme Options > Listing Page > Listing Page Text Labels.
- Edit the section titles and other listing-related labels, for example Property Description or Property Price.
- Bed type labels can also be edited there.

Property Features and Amenities
Features and amenities are not translated through .po files. They must be edited manually.
- Go to Listings, Bookings & More > Listing Features.
- Rename, add, or remove features, for example Air Conditioning or Swimming Pool.

Custom Property Fields
- Go to Theme Options > General > Listing Custom Fields.
- Edit the field label, type, and values.

Advanced Search Labels
Some search labels are managed from Theme Options > Search.

The Half Map filter labels are managed from:
Theme Options > Search > Half Map Search Form

Translate Widget Titles
Widget titles are managed directly inside each widget.
If a widget title appears in English or in the wrong language, do not search only in Loco Translate. Open the widget and change the title manually.
Go to:
Appearance > Widgets
Then:
- Open the sidebar or widget area where the widget is added.
- Open the widget settings.
- Edit the Title field.
- Write the title in the language you want visitors to see.
- Save the widget.
Examples:
- For an English website, use Featured Listings.
- For a French website, write the title in French.
- For a Spanish website, write the title in Spanish.
If You Use the Block Widget Editor
If your WordPress installation uses the block-based widget editor, you can still edit widget titles from Appearance > Widgets.
If you prefer the classic drag-and-drop widget interface, you can install the Classic Widgets plugin.
If You Use a Multilingual Plugin
If the website uses a multilingual plugin, widget title translation depends on that plugin setup.
Check the multilingual plugin options for widget translation, string translation, or language-specific widget display.
Translate Elementor and Studio Template Text
If you edit labels inside Elementor templates such as Header, Footer, Listing Page, Taxonomies, or Studio templates, those labels are managed inside Elementor.
To change this text, edit the template with Elementor and update the text directly.


Translate With Poedit
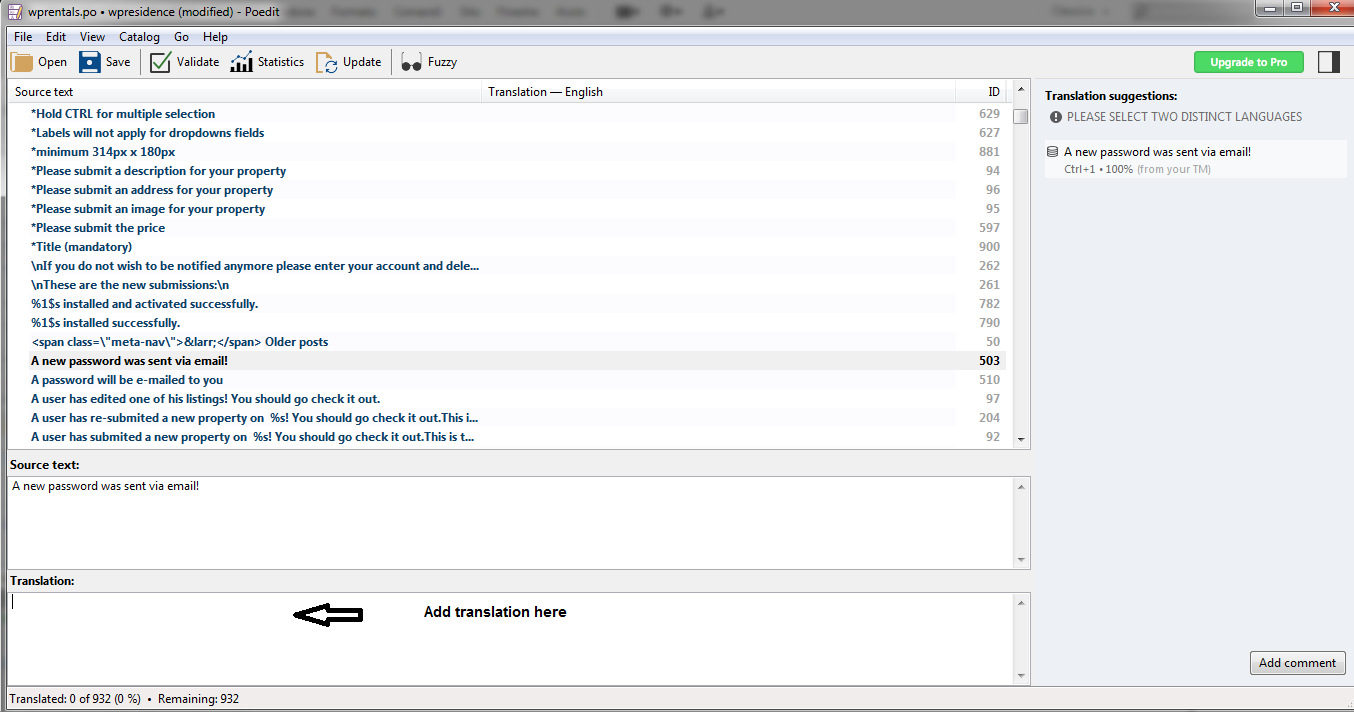
Poedit is a secondary option if you prefer to work offline on your computer.
- Download and install Poedit. You can use the free version.
- Open the .po file you want to translate.
- Set the file language to match your site language from Settings > General > Site Language.
- Translate the strings you need.
- Save the file. Poedit should generate both .po and .mo files.
- Upload the files to the correct theme or plugin language folder if you worked locally.
For the WPRentals theme in French, save:
- fr_FR.po
- fr_FR.mo
For the WPRentals Core plugin in French, save:
- wprentals-core-fr_FR.po
- wprentals-core-fr_FR.mo

FAQ: Translations Are Saved, but the Front End Still Shows English
If you translated strings in Loco Translate but the website still shows the original English text, check the points below.
1. Check the WordPress Site Language
WordPress loads the translation file that matches the language selected in WordPress.
- Go to Settings > General.
- Find Site Language.
- Make sure the language matches the translation file you created.
Example: if your site language is French (France), the language code is fr_FR.
2. Check That the .mo File Exists
WordPress loads the compiled .mo file on the front end.
If the .po file exists but the .mo file does not exist or was not updated, the translation may not show.
3. Translate Both the Theme and the Core Plugin
WPRentals uses strings from both the theme and the core plugin.
If a string does not translate after editing one file, check both locations:
- Loco Translate > Themes > WPRentals / WPRentals Child Theme
- Loco Translate > Plugins > WPRentals – Theme Core Functionality
Open each language file, click Sync, search for the string, add the translation, and click Save.
4. Do Not Translate the Template File Directly
In Loco Translate, do not use Edit template for normal translations.
The template is the .pot file. It is used only to create or sync language files.
To translate the website, create or edit the correct language file for your selected site language.
5. Check Labels Managed From Theme Options, Admin, Widgets, or Elementor
Not every front-end label is controlled by Loco Translate.
Some labels are saved from the WordPress admin area, especially labels added in Theme Options, taxonomy terms, custom fields, features, amenities, widgets, or Elementor templates.
Common admin-controlled labels can be found in:
- Theme Options > Listing Page > Listing Page Text Labels
- Theme Options > Search
- Theme Options > General > Listing Custom Fields
- Listings, Bookings & More > Listing Features
- Appearance > Widgets, for widget titles
- Elementor or Studio templates, if the text was added directly inside a template
6. Sync Translations Again After Updates
Theme and plugin updates can add new strings or move strings between the theme and the WPRentals Core plugin.
After an update:
- Open the child theme language file in Loco Translate and click Sync.
- Open the core plugin language file in Loco Translate and click Sync.
- Translate any new strings and click Save.
7. Back Up Translation Files Before Updates
If your translation files are stored inside the theme or plugin folders, make a backup before updating.
Theme or plugin updates can overwrite files stored inside these folders.
Recommended folders to check:
- wp-content/themes/wprentals-child/languages/
- wp-content/themes/wprentals/languages/
- wp-content/plugins/wprentals-core/languages/
- wp-content/languages/loco/plugins/, if Loco stores plugin translations there
- wp-content/languages/loco/themes/, if Loco stores theme translations there
Update translations after theme or plugin updates
Quick Checklist
- Check that WordPress Site Language is correct.
- Translate the WPRentals Child Theme if the text comes from the theme.
- Translate the WPRentals Core plugin if the text comes from booking, login, dashboard, submission, or core functionality.
- Make sure the .mo file exists after saving.
- Click Sync after updates.
- Check Theme Options for labels that are not controlled by Loco Translate.
- Check Appearance > Widgets for widget titles.
- Check Elementor or Studio templates for text added directly in page builder templates.
- Clear cache after saving translations.