The Google Login API requires your Server PHP version is 8.1 or greater.
Help Last updated: October 2025
Google Login Step by Step Directions
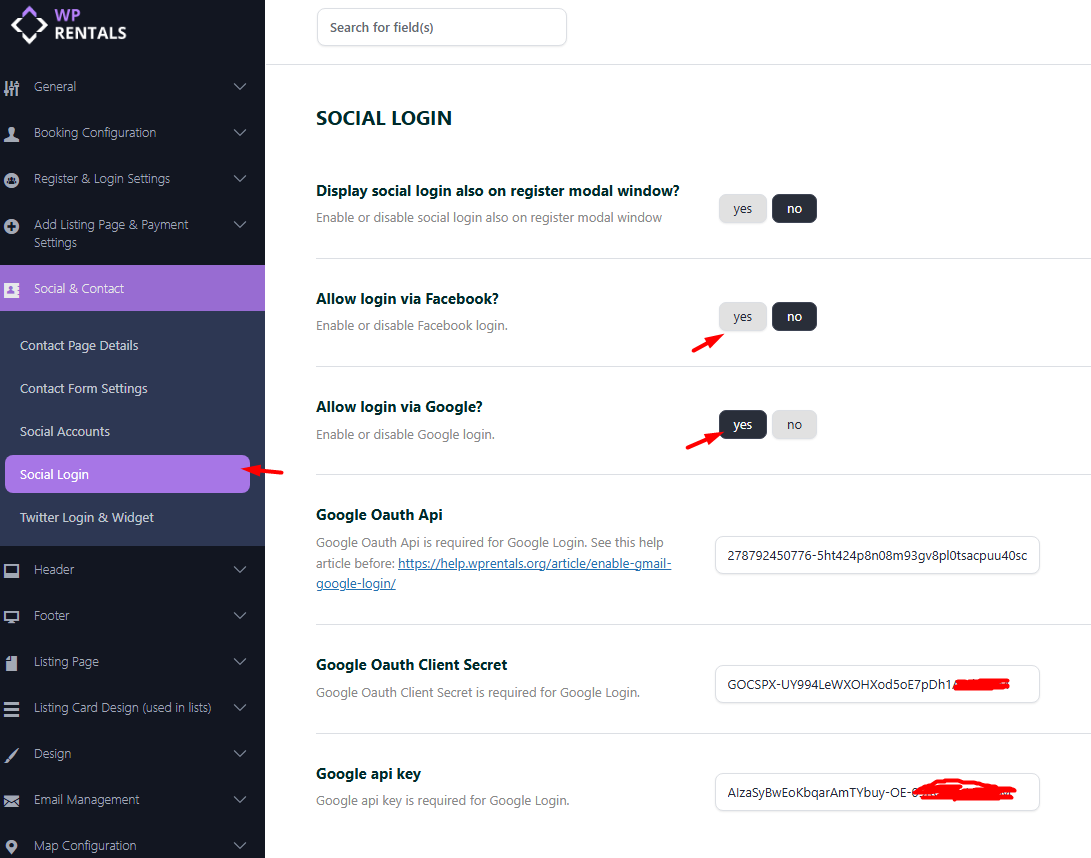
Enable Social Login
- Go to Theme Options > Social and Contact > Social Login.
- Choose YES to enable Allow login via Google
Set Up Google Login
Create a Project in Google Developers Console
-
Log in to: https://console.developers.google.com
-
Click “Create Project” and give it a name (e.g., “WpRentals Login”).
-
After creation, make sure the project is selected at the top.
Select the new project created
Generate API Key
-
Go to APIs & Services > Credentials.
-
Click “Create Credentials” > API Key.
-
Copy the generated API key.
-
Paste it into Theme Options > Social & Contact > Social Login > Google API Key.
Configure OAuth Consent Screen
-
In the left menu, go to OAuth consent screen.
-
Choose External and click Create.
-
Fill in the required App Name, Support Email, and other basic info.
-
You can skip optional scopes and user info fields.
-
At the final step, click Back to Dashboard.
-
Click “Publish App” to make it live.
Select external
Next, add your details:
Save the remaining steps without adding any details, on the last step press back to dashboard.
Publish the App:
Create OAuth Client ID
-
Return to Credentials and click Create Credentials > OAuth Client ID.
-
Choose Web Application as the type.
-
In the Authorized Redirect URIs field, add your My Profile page link (e.g.,
https://yourdomain.com/my-profile/). -
Click Create.
A pop-up will show your Client ID and Client Secret.
Select Web Application and add your My Profile page link
After you press create a pop-up with credentials that will show. Those credentials need to be copied in Theme Options.
Theme Options: Social Login Controls
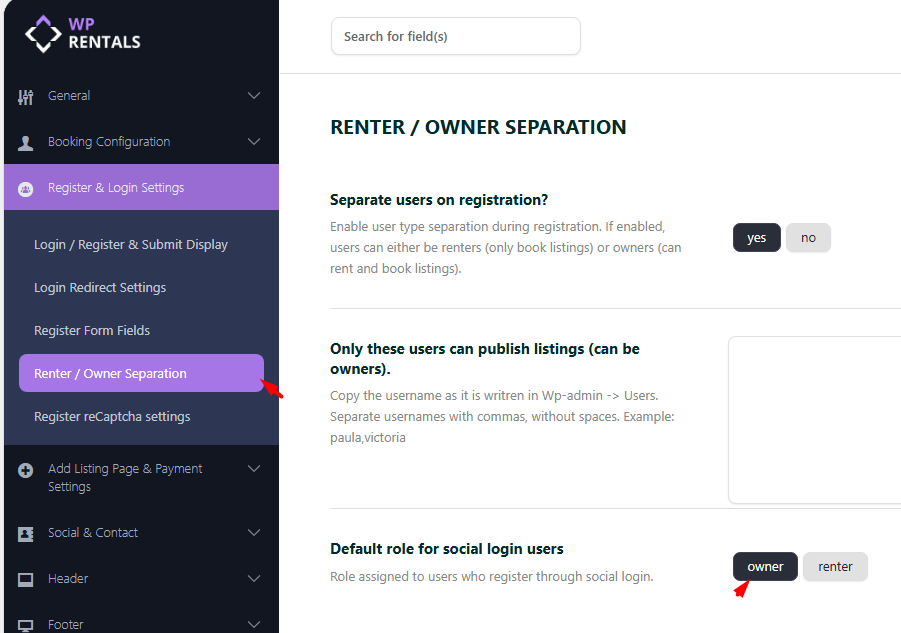
Default role for social login users
This setting allows you to choose which user role is automatically assigned to users who register through Social Login (Google or Facebook).
You can select one of the following options:
- Owner – Assigns the Owner role to new users who register via social login.
- Renter – Assigns the Renter role to new users who register via social login.
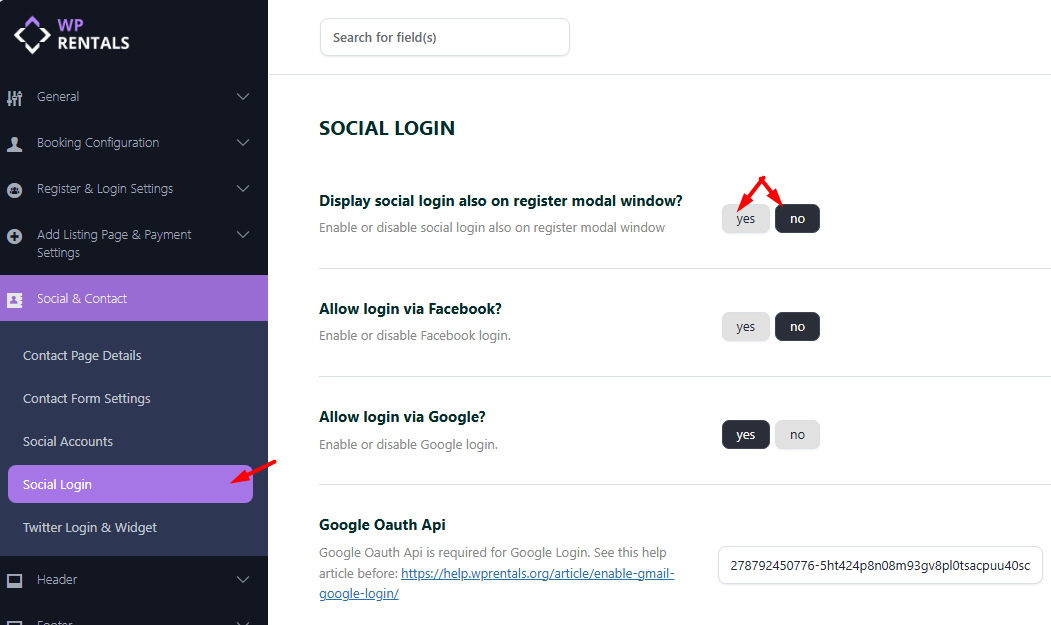
Display social login also on register modal window?
Use this option to enable or disable the display of Social Login buttons (Google or Facebook) on the Register modal window.
- Yes – Social login buttons will appear on both the Login and Register modals.
- No – Social login buttons will appear only on the Login modal.


