Overview
This help explains how to add login and register options in a custom WPRentals header created with Elementor or WPRentals Studio.
There are two ways to do this:
- Use the Website Login & User Menu widget in a WPRentals Studio header template.
- Add custom Elementor buttons or links and use the WPRentals login/register modal IDs.
Recommended Method: Use the Website Login & User Menu Widget
If you are creating a custom header with WPRentals Studio and Elementor, the easiest method is to use the dedicated header widget:
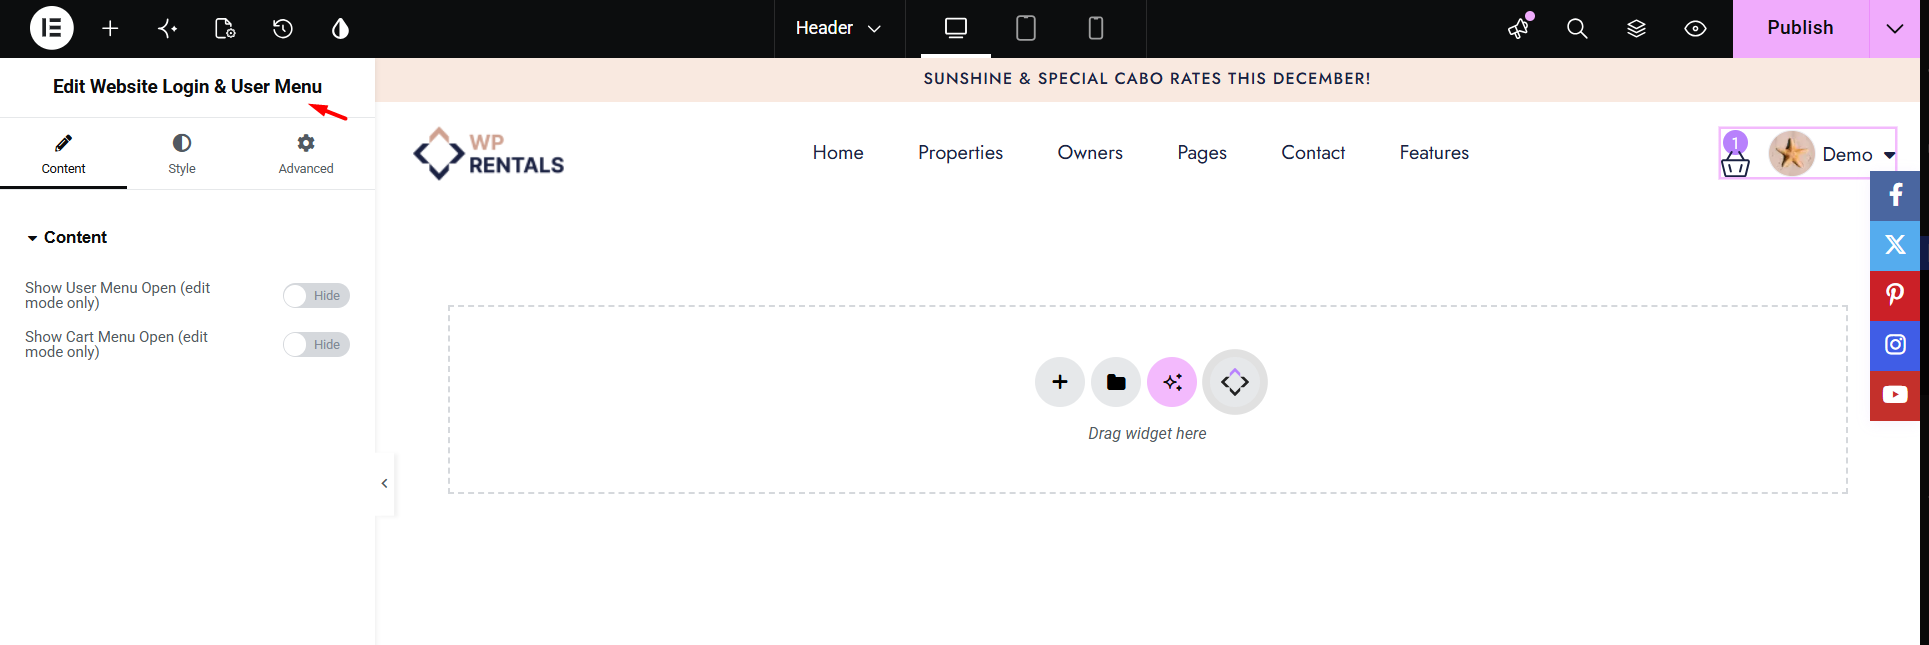
Website Login & User Menu
This widget is designed for custom WPRentals header templates and can show the login/register option and user menu in the header area.
To use it:
- Go to WPRentals Studio > Templates.
- Create or edit a Header template.
- Click Edit with Elementor.
- Search for the Website Login & User Menu widget in the Elementor widgets panel.
- Drag the widget into the header layout.
- Style the widget from Elementor as needed.
- Update the template and test the header on the front end.
Alternative Method: Add Custom Elementor Buttons
You can also create custom Elementor buttons, links, icons, or menu items that open the WPRentals login or register modal.
Use this method when you want a custom button label or design, for example:
- Login
- Register
- Owner Login
- Join Now
- Add Your Property
Create a Login Modal Button
To create a button that opens the login modal:
- Edit the page or header template with Elementor.
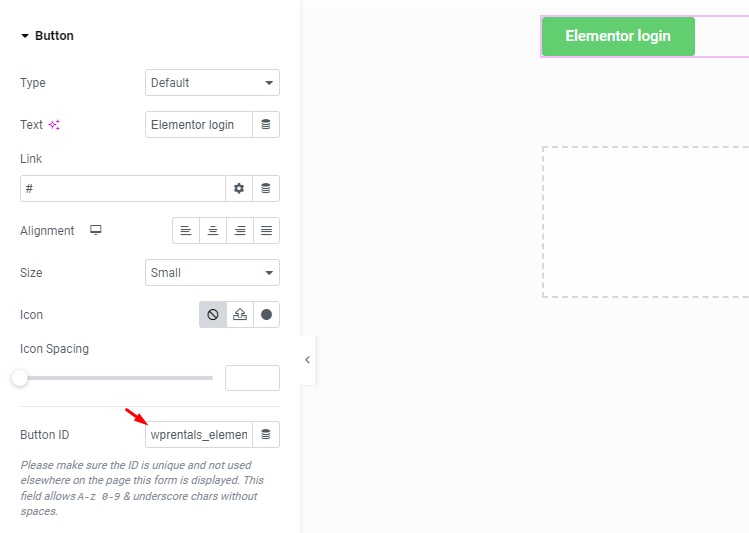
- Add a Button widget or edit an existing button.
- Set the button text, for example Login.
- Open the button Advanced tab.
- In the CSS ID field, add:
wprentals_elementor_login
Update the page or template and test the button on the front end. When clicked, it will open the WPRentals login modal.
Create a Register Modal Button
To create a button that opens the register modal:
- Edit the page or header template with Elementor.
- Add a Button widget or edit an existing button.
- Set the button text, for example Register.
- Open the button Advanced tab.
- In the CSS ID field, add:
wprentals_elementor_register
Update the page or template and test the button on the front end. When clicked, it will open the WPRentals register modal.
Use the Modal IDs on Other Elementor Elements
The same IDs can also be added to other Elementor elements, not only buttons.
For example, you can add the IDs to:
- Text links
- Icons
- Images
- Menu elements
- Call-to-action elements
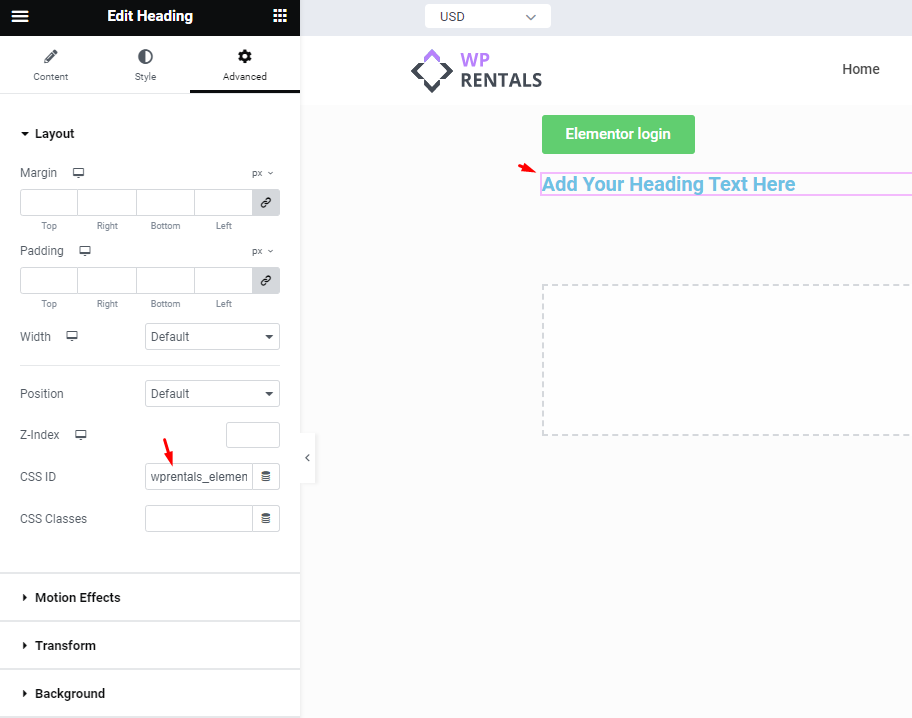
To do this, edit the Elementor element and add one of these IDs in the Advanced > CSS ID field:
- wprentals_elementor_login – opens the login modal.
- wprentals_elementor_register – opens the register modal.
Save and Test
After adding the widget or custom CSS ID:
- Click Update in Elementor.
- Open the page or header on the front end.
- Click the Login or Register button/link.
- Check that the correct WPRentals modal opens.
- Test both logged-out and logged-in behavior.
Important Notes
- For custom WPRentals Studio headers, the recommended method is to use the Website Login & User Menu widget.
- For custom Elementor buttons or links, use the CSS ID wprentals_elementor_login to open the login modal.
- For custom Elementor buttons or links, use the CSS ID wprentals_elementor_register to open the register modal.
- Add the ID in Advanced > CSS ID without the # symbol.
- The custom button/link method opens the WPRentals modal. It does not place the full login or register form inside the page.
- The login/register modal uses the main WPRentals login and register settings.
- If the modal does not open, clear cache and test again in a private/incognito browser window.
- If you use cache, optimization, or JavaScript delay plugins, disable those options while testing the modal.