Overview
The WPRentals Contact Form Builder is an Elementor widget that lets you create a custom contact form for your website pages.
You can build the contact page in two ways:
- Import a prebuilt contact page template from the WPRentals Templates library inside Elementor.
- Create the contact form manually by adding the Contact Form Builder widget to an Elementor page.
Import a Prebuilt Contact Page Template
The fastest way to create a contact page is to import a prebuilt WPRentals contact page template from Elementor.
To import a prebuilt template:
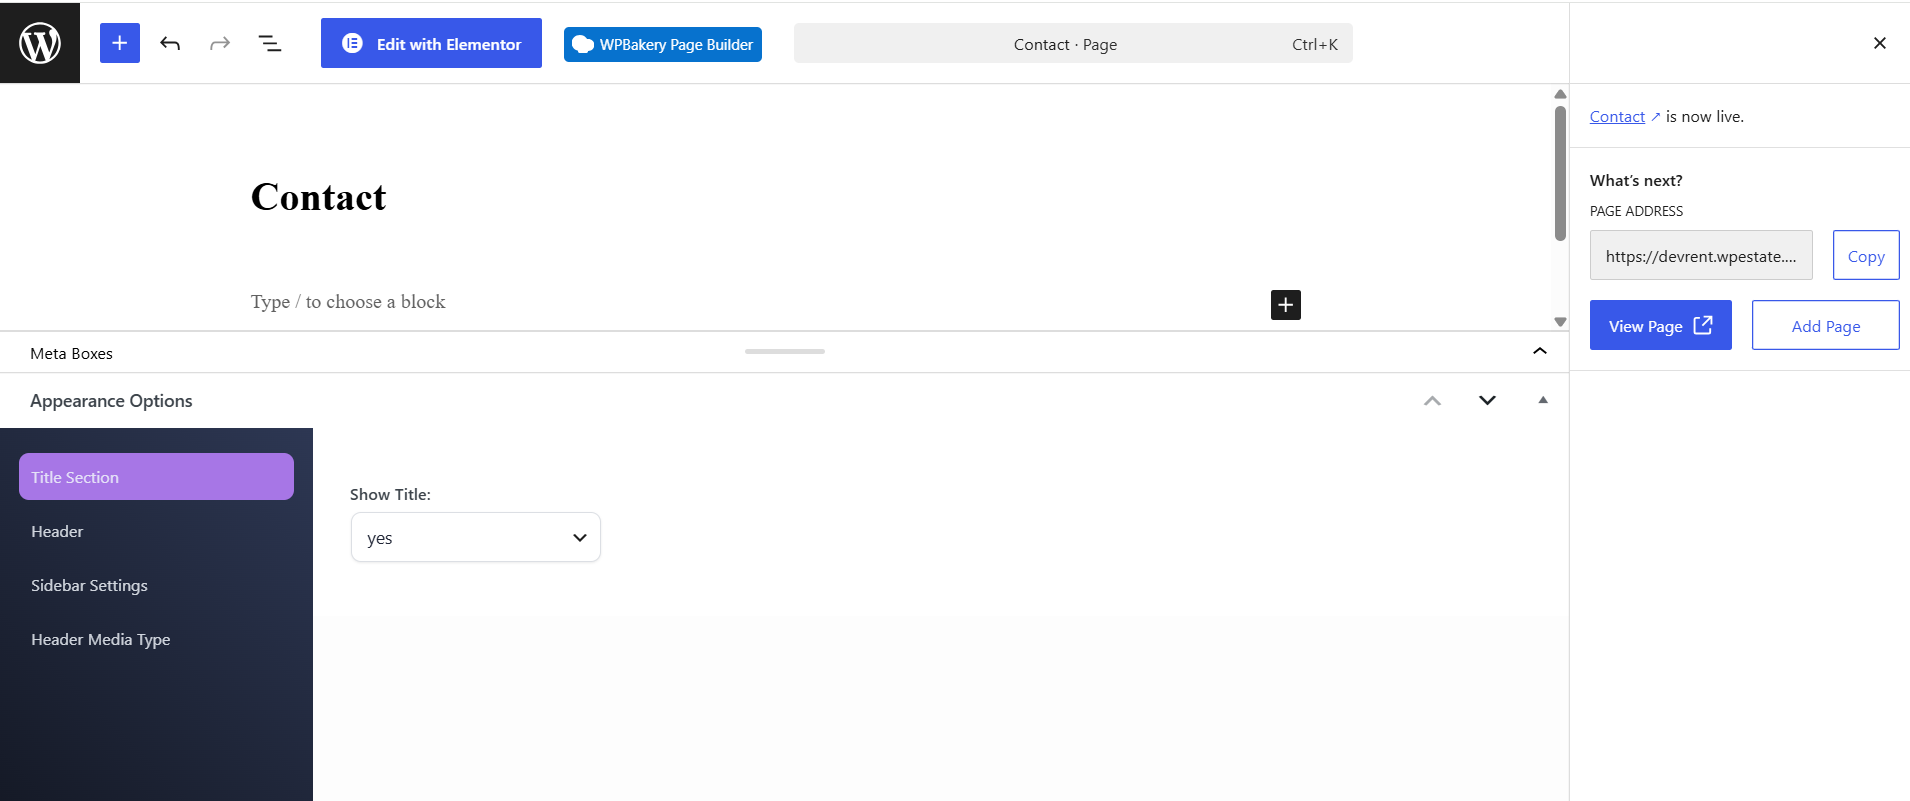
- Go to Pages > Add New.
- Add a page title, for example Contact.
- Click Edit with Elementor.
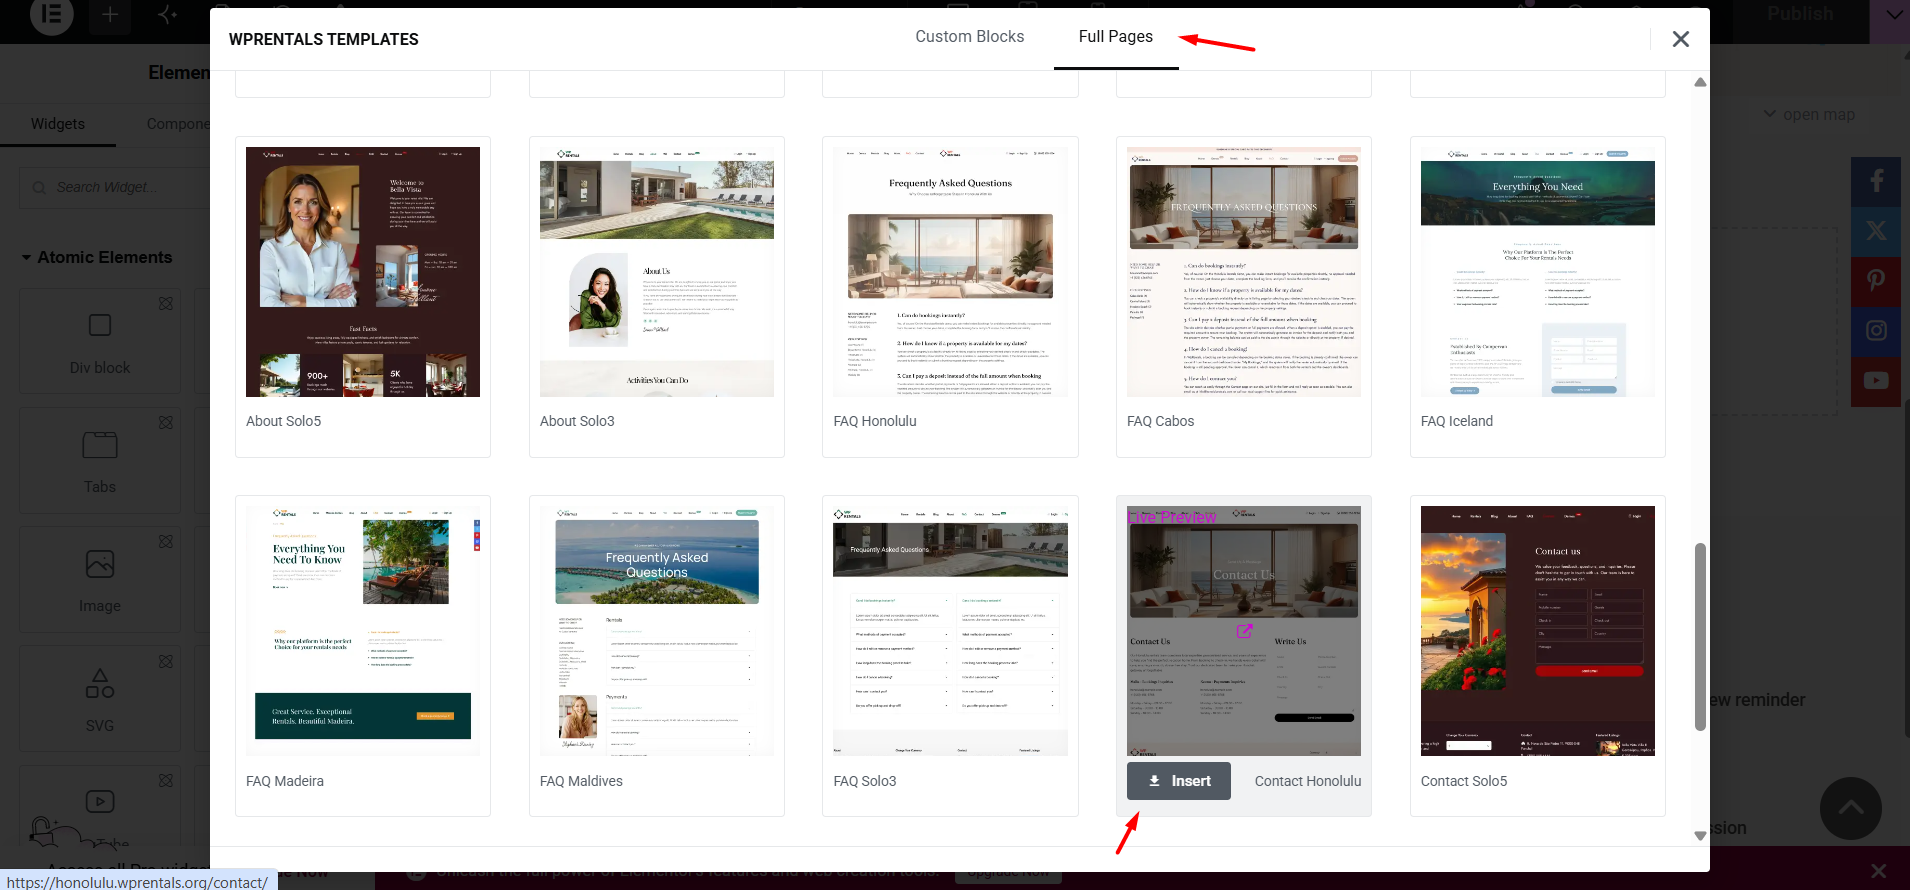
- In the Elementor editor area, click the WPRentals Templates tab/icon.
- In the template library popup, choose the contact page design you want to use.
- Click Insert.
- After the template is inserted, edit the text, images, contact details, form fields, and design as needed.
- Click Publish or Update.

After importing the template, continue with the sections below if you need to edit the contact form fields, email subject, recipient email, or form design.
Where to Find the Widget
Open the page where you want to add or edit the contact form and click Edit with Elementor.
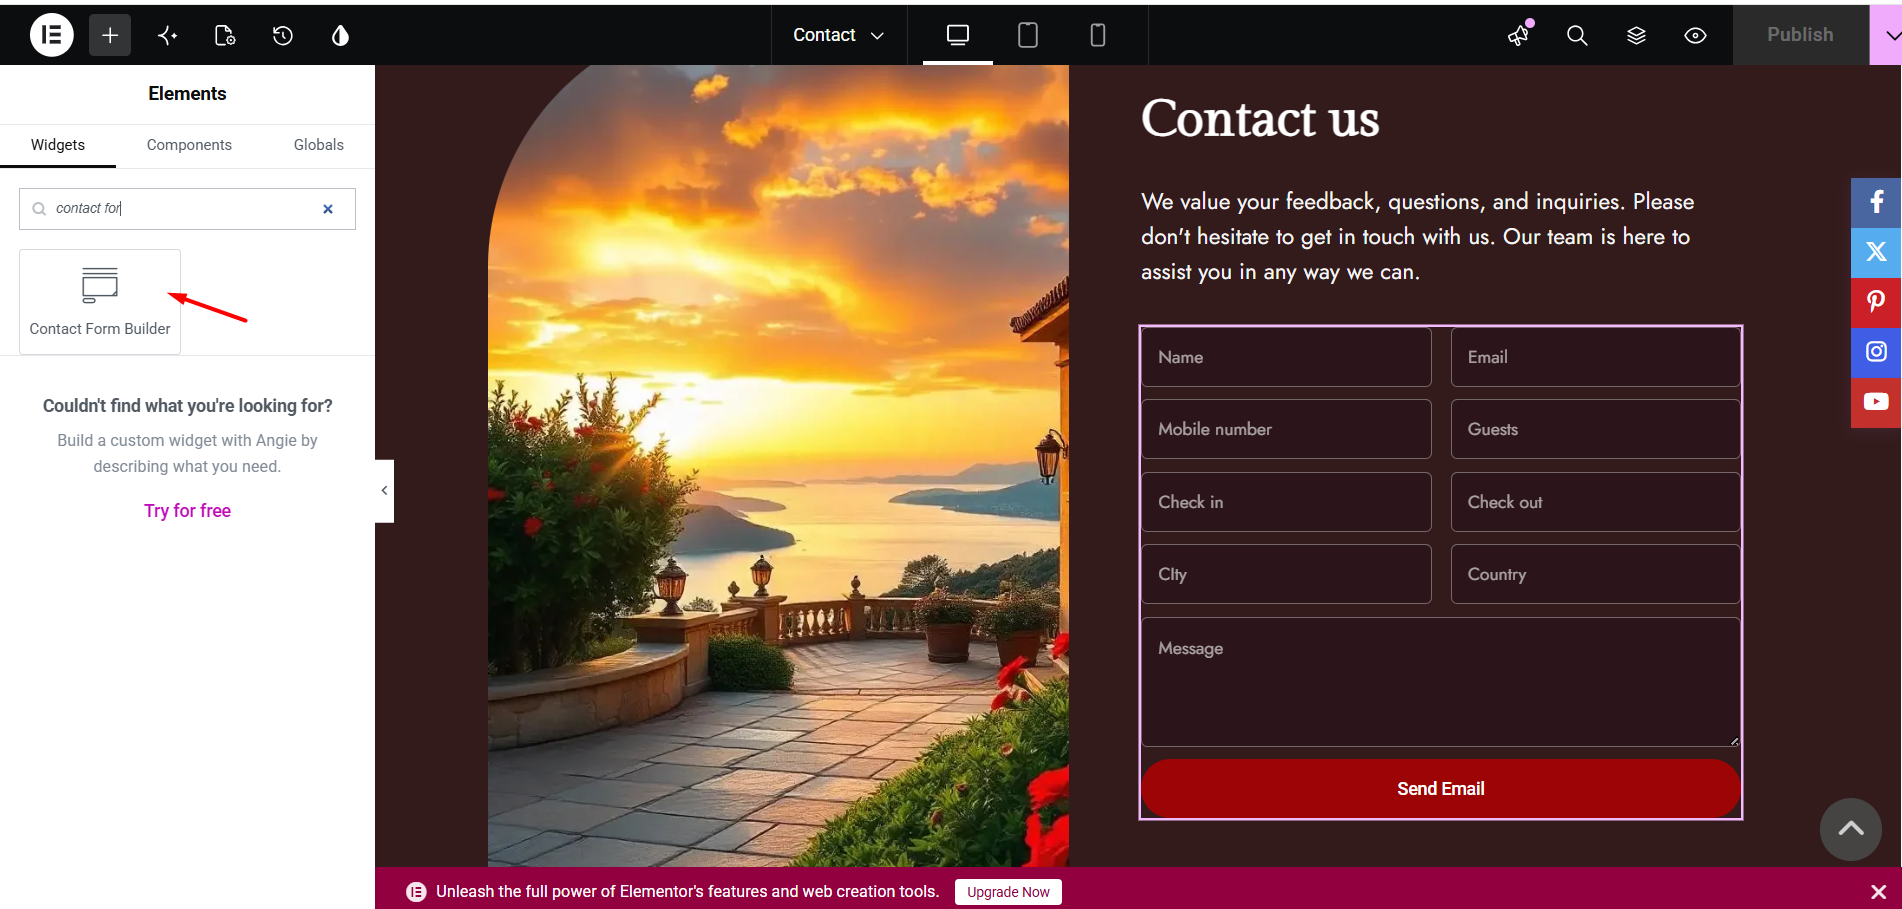
In the Elementor widgets panel, search for:
Contact Form Builder
Add the Contact Form Builder Widget Manually
If you do not use a prebuilt contact page template, you can add the contact form manually.
Drag the Contact Form Builder widget into the section where you want the form to appear.
After the widget is added, the form will display on the page, and you can start editing the fields from the Elementor left panel.
Manage the Form Fields
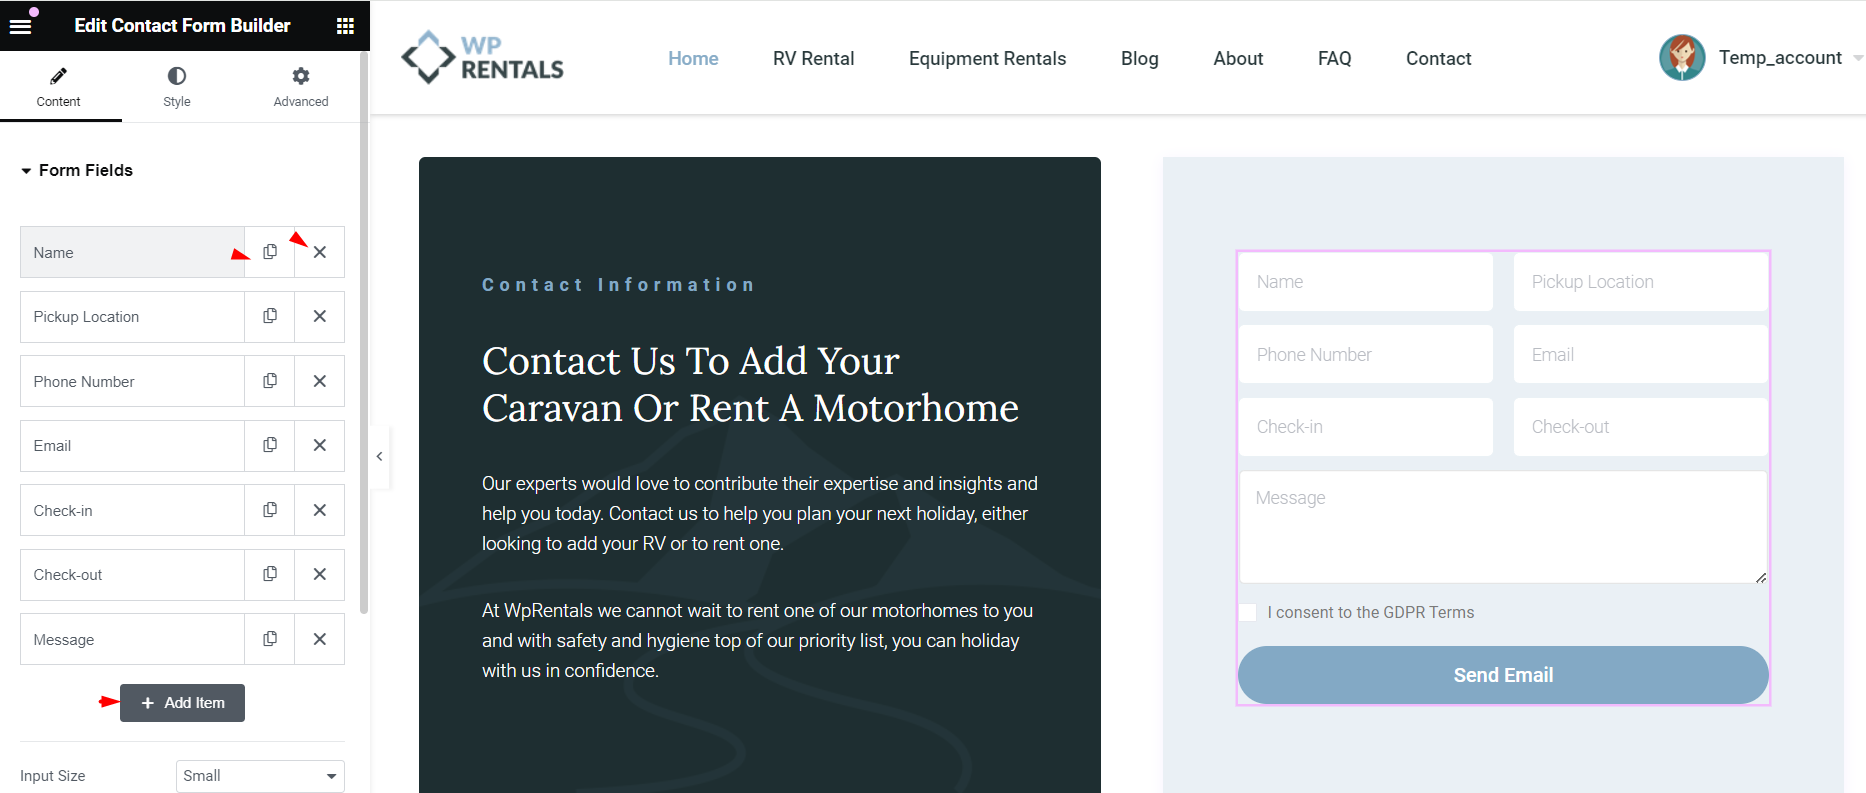
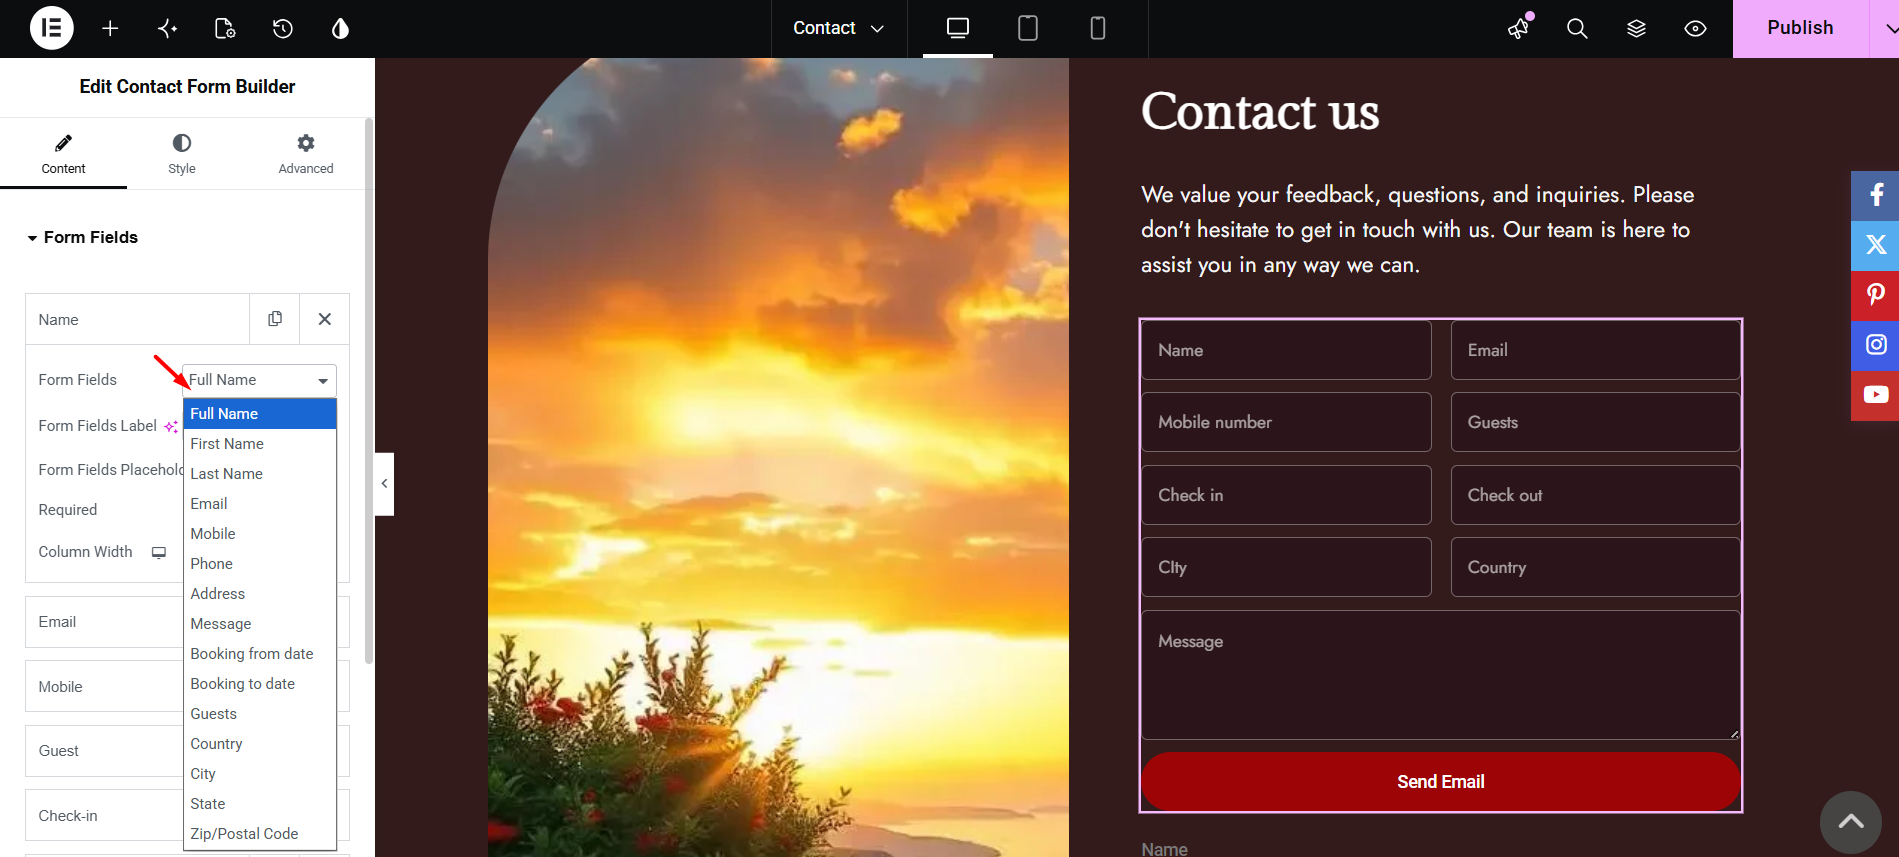
In the widget settings, open the Form Fields section.
From this section, you can manage the fields that appear in the contact form.
- Add a new field – click Add Item to add another field to the form.
- Duplicate a field – use the duplicate icon to copy an existing field.
- Delete a field – use the delete icon to remove a field you do not need.
- Reorder fields – drag fields up or down to change their order in the form.
Field Options Explained
Each form field has its own settings. Click a field to open and edit its options.
Form Fields
This option controls the type of field added to the form.
Available field types can include:
- Full Name
- First Name
- Last Name
- Mobile
- Phone
- Address
- Message
- Booking from date
- Booking to date
- Guests
- Country
- City
- State
- Zip/Postal Code
Form Fields Label
This option controls the label shown above or near the field on the front end.
Form Fields Placeholder
This option controls the placeholder text shown inside the field before the visitor types anything.
Required
This option controls whether the visitor must complete the field before sending the form.
- Set it to Yes if the field is mandatory.
- Set it to No if the field is optional.
Column Width
This option controls the width of the field in the form layout.
Use it when you want fields to appear side by side or full width.
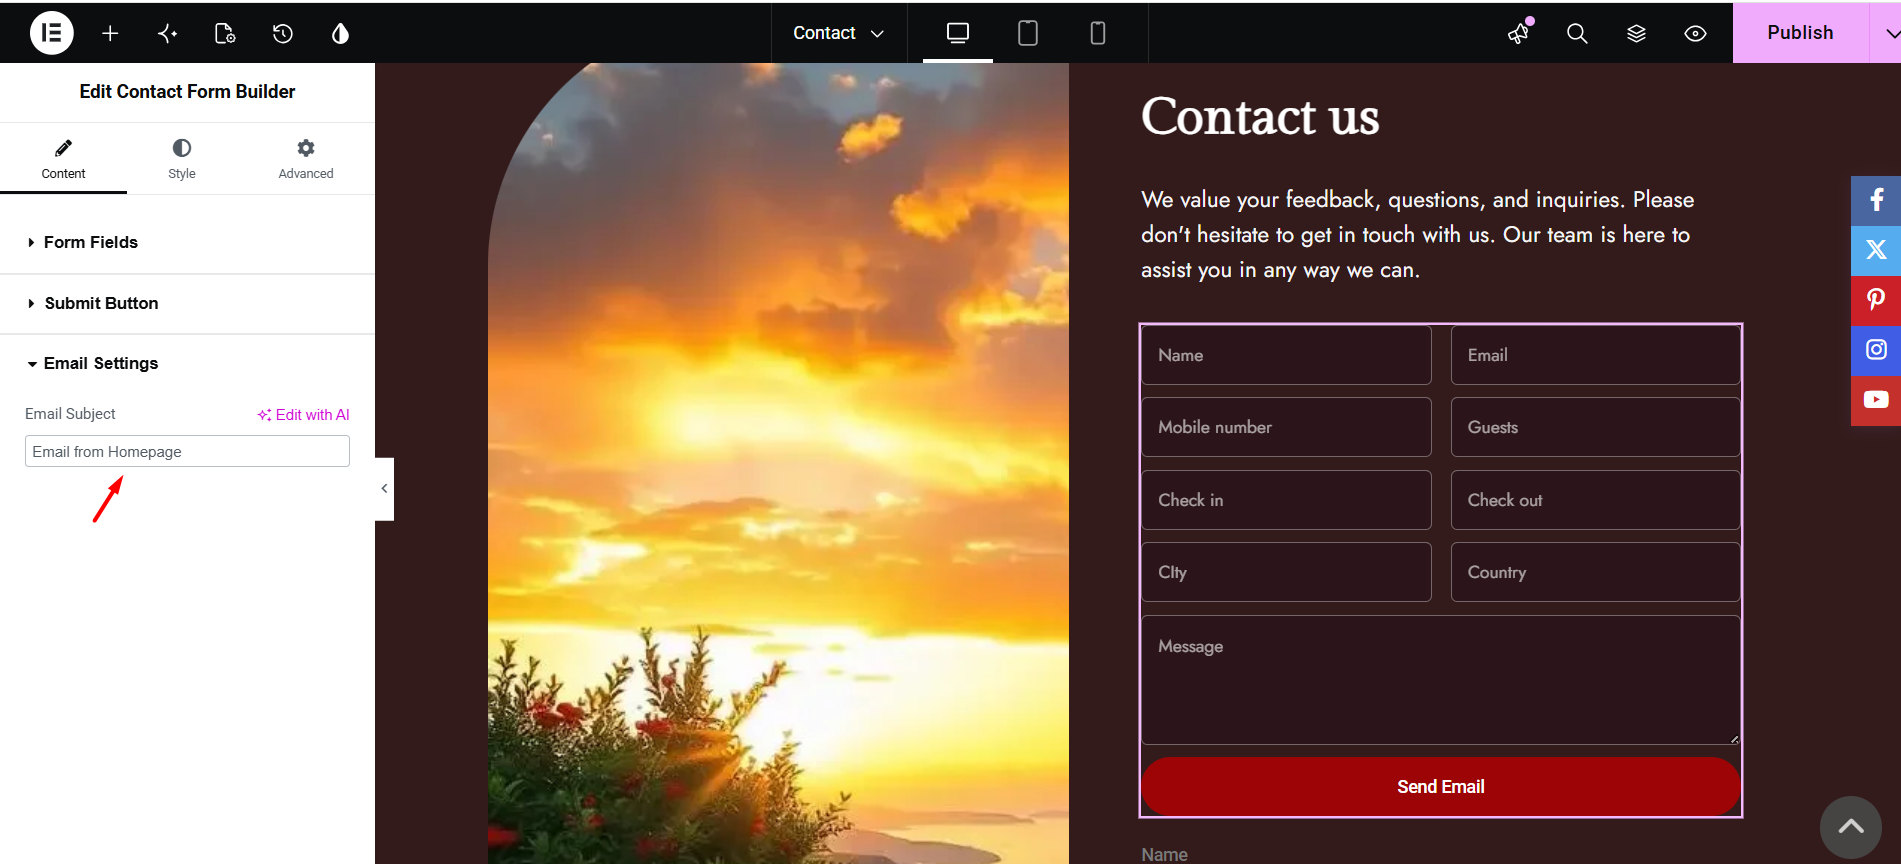
Set the Email Subject
Open the Email Settings section in the Contact Form Builder widget.
Use the Email Subject field to set the subject of the email you will receive when a visitor submits the form.
For example, you can use a subject such as:
- New message from my website
- New rental inquiry
- New contact form request
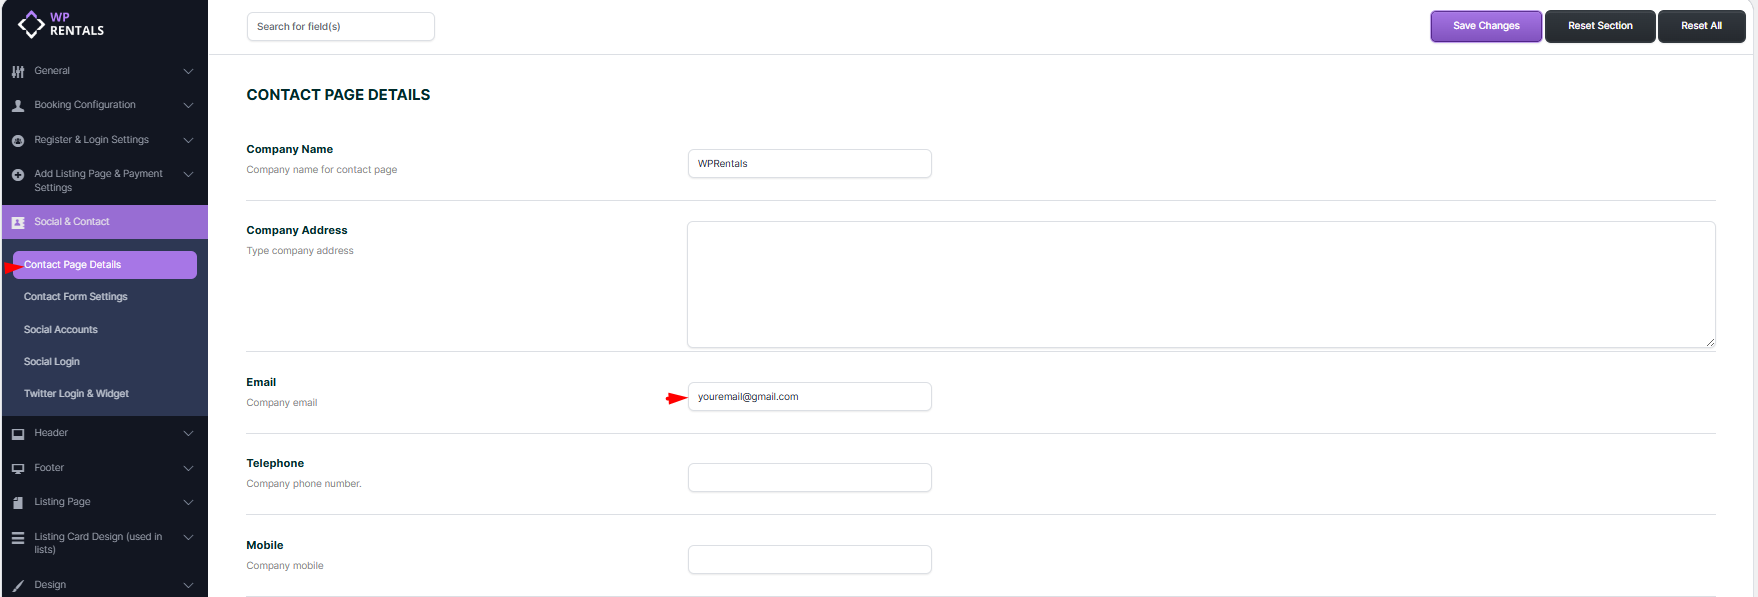
Set the Email Address That Receives Messages
The contact form messages are sent to the email address added in WPRentals Theme Options.
Go to:
WPRentals Options > Social & Contact > Contact Page Details
Find the Email field and add the email address where you want to receive contact form messages.
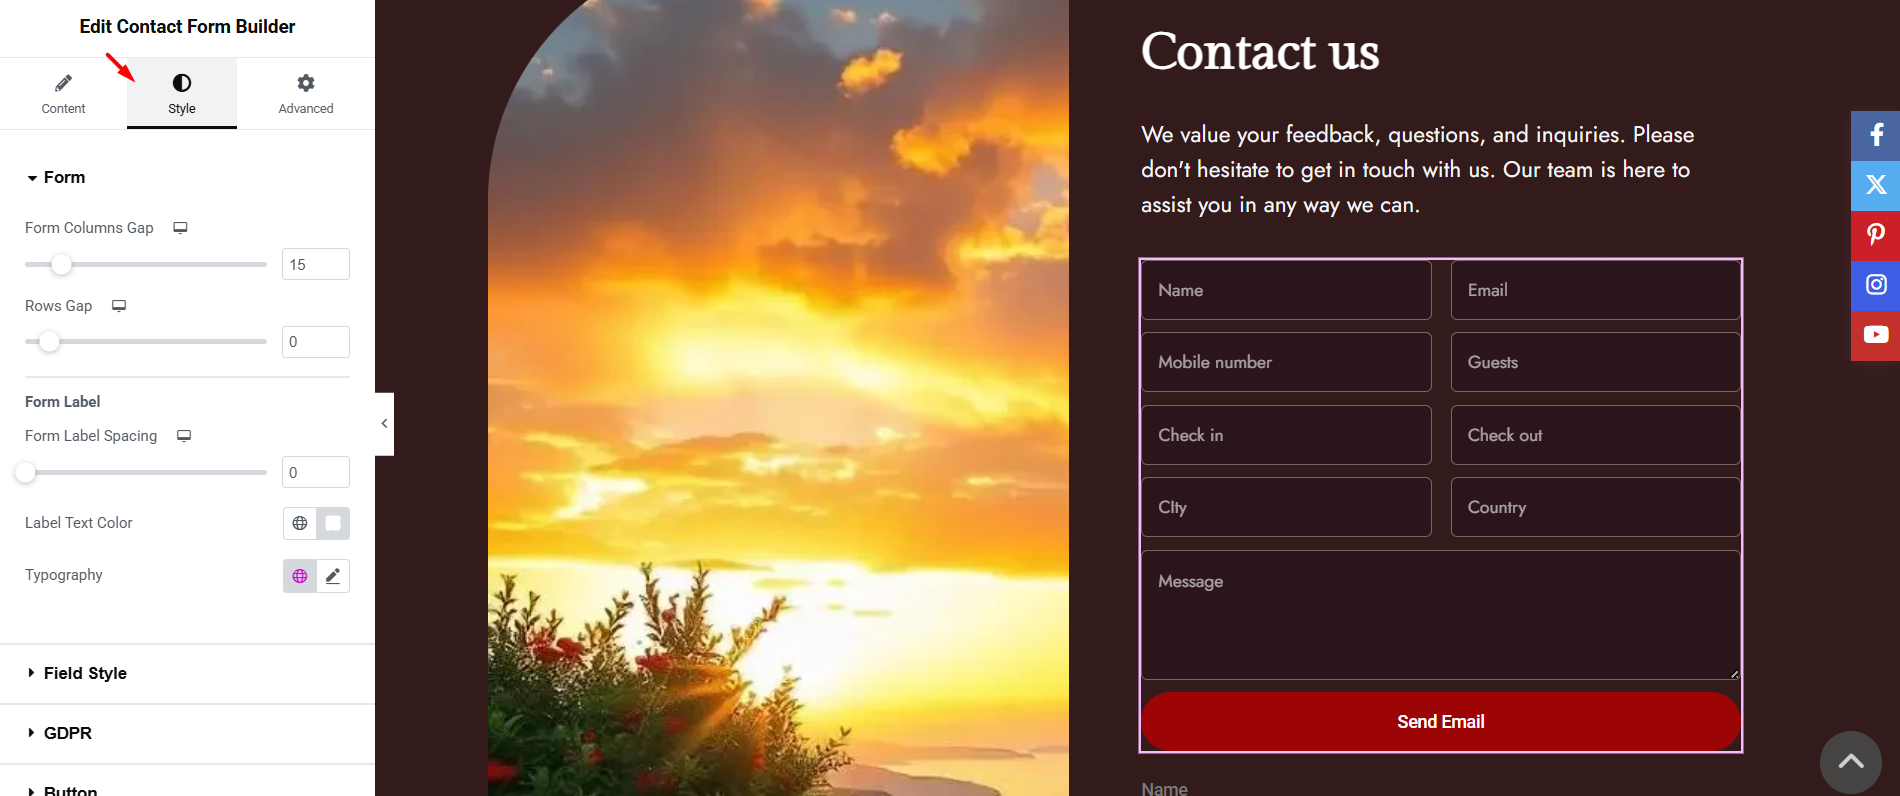
Style the Contact Form
The Contact Form Builder widget can be styled from the Elementor widget settings.
Open the widget and use the available Style options to customize the form design.
Depending on the widget settings, you can manage options such as:
- Field spacing
- Input size
- Text color
- Background color
- Button style
- Button color
- Typography
- Padding and margins
Test the Form
After you finish editing the form, click Update in Elementor and test the form on the front end.
To test correctly:
- Open the page as a visitor, not only inside the Elementor editor.
- Complete all required fields.
- Send a test message.
- Check the inbox of the email address added in WPRentals Options > Social & Contact > Contact Page Details.
- Check the spam or junk folder if the message does not arrive in the inbox.
Important Notes
- The Contact Form Builder is an Elementor widget.
- You can create a contact page by importing a prebuilt contact page template or by adding the Contact Form Builder widget manually.
- Prebuilt WPRentals templates are imported from the WPRentals Templates option inside Elementor.
- After importing a prebuilt template, check and update the form fields, email subject, recipient email, and page content.
- The form fields are managed directly from the Elementor widget settings.
- The email subject is managed from the widget Email Settings.
- The recipient email address is managed from WPRentals Options > Social & Contact > Contact Page Details.
- If form emails do not arrive, check that the recipient email address is correct.
- If emails still do not arrive, check the spam folder and verify that WordPress email sending works correctly on the server.
- After changing the form, clear cache and test the page again from the front end.