WooCommerce is optional in WPRentals. You can use it if you want to process payments through WooCommerce payment gateways instead of the default theme payment methods.
WooCommerce can be used for booking payments, paid submission payments, and Instant Booking payments.
What WooCommerce supports in WPRentals
WooCommerce is supported in WPRentals for the following payment options:
- Paid Submission – users can pay to publish a listing and can pay separately to mark a listing as featured.
- Booking payments – the booking deposit and the remaining balance can be paid through WooCommerce payment methods.
- Instant Booking payments – guests can pay through WooCommerce when Instant Booking is enabled.
- Booking without login first – with Instant Booking and WooCommerce enabled, guests can start the booking without logging in first.
- Membership-based subscription payments – supported for membership payments, except recurring payments.
WooCommerce is used only as the payment processing system. The booking, listing, and reservation logic remains managed by WPRentals.
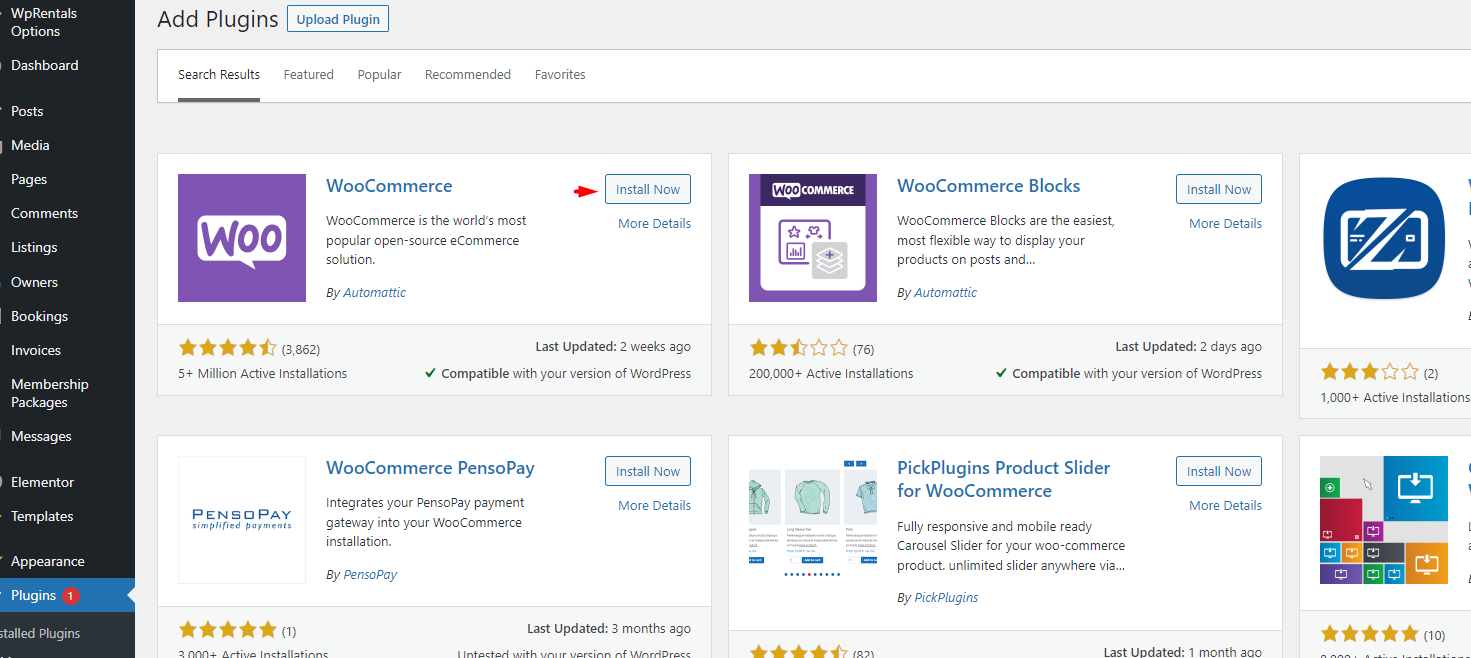
How to install WooCommerce
To install WooCommerce, go to Plugins > Add New, search for WooCommerce, click Install Now, and then click Activate.
How to set up WooCommerce
After activation, WooCommerce will prompt you to go through a setup wizard. Complete the setup based on the payment methods you want to use.
- You do not need extra plugins for basic WooCommerce functionality.
- Disable shipping if you are only using WooCommerce for booking payments or digital payment flows.
- Configure your payment gateways from WooCommerce settings.

WooCommerce pages created automatically
When WooCommerce is activated, it automatically creates essential pages under Admin > Pages:
- Cart
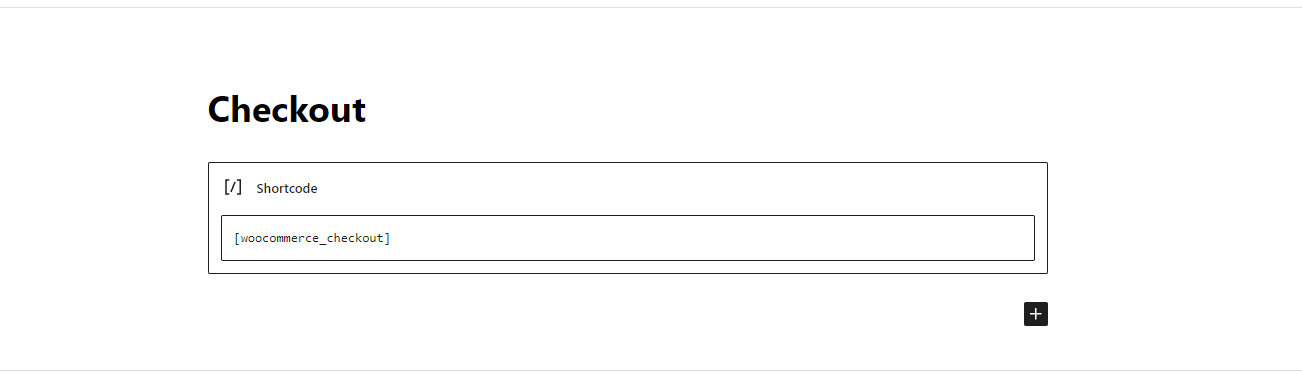
- Checkout
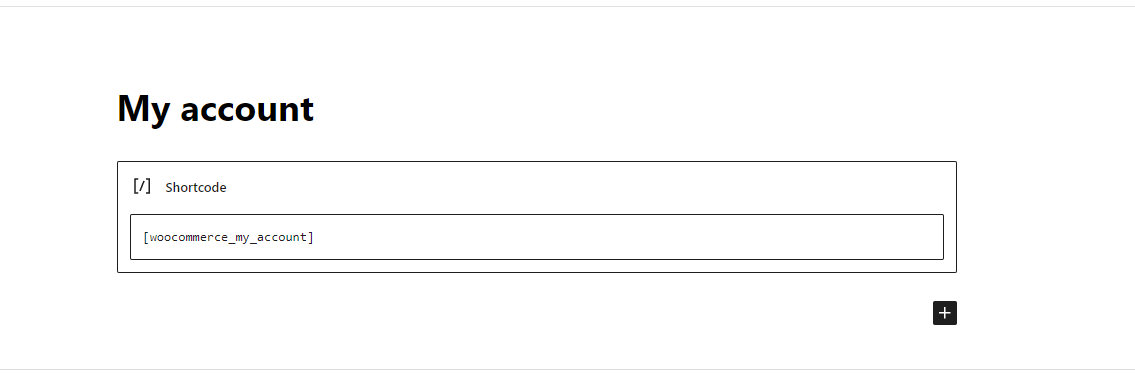
- My Account

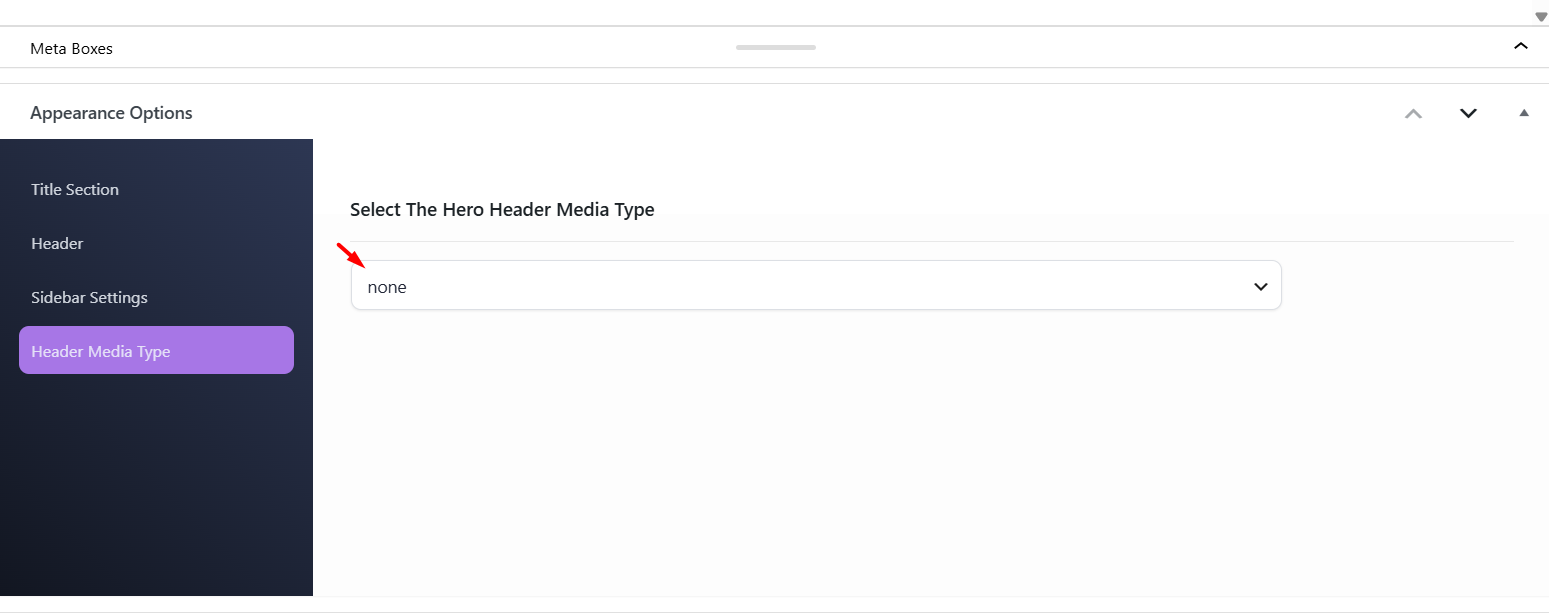
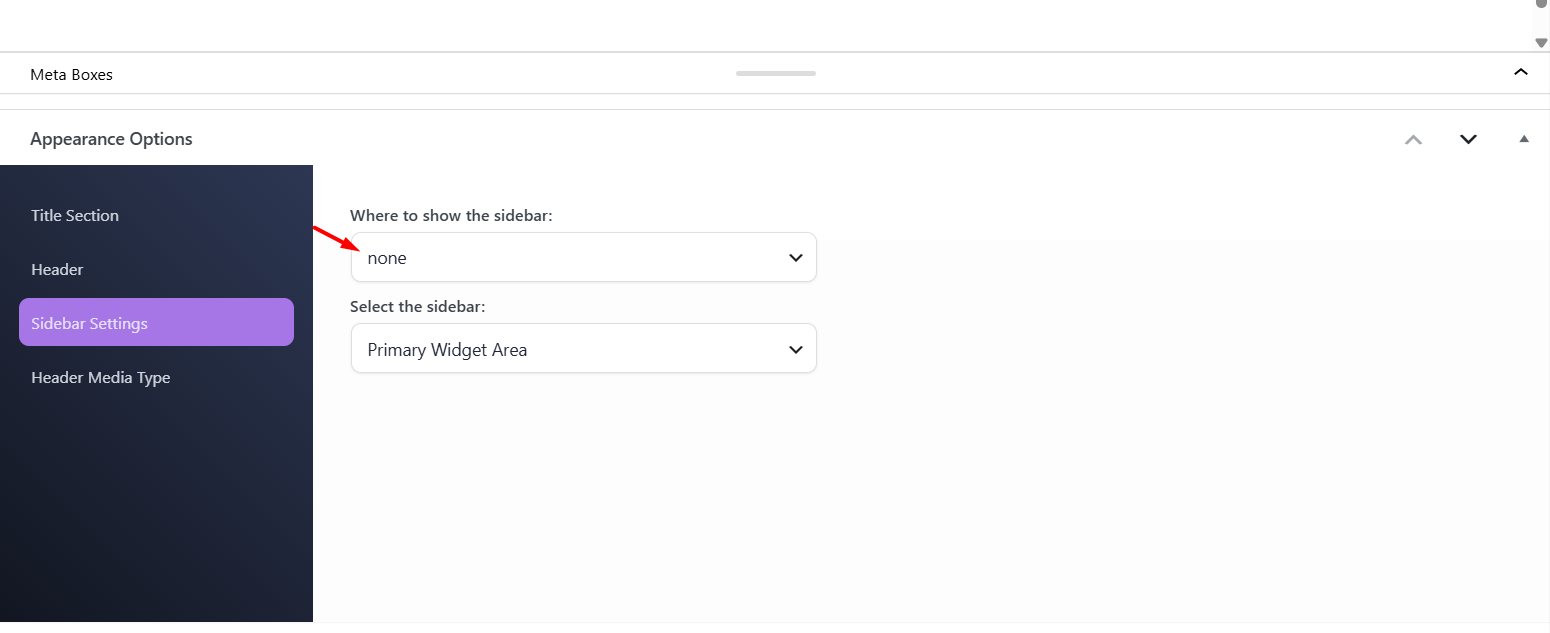
You can edit these pages and customize their headers.
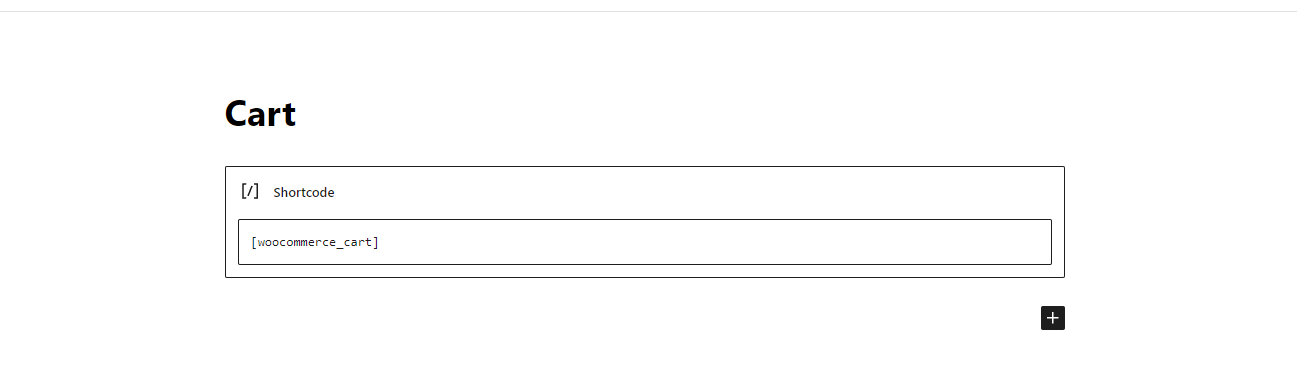
If you do not see the WooCommerce shortcodes on these pages, you can regenerate the default WooCommerce pages from WooCommerce settings.
Example Checkout Page
Example My Account Page
You can edit these pages and set a custom header.
How to regenerate WooCommerce pages
If the WooCommerce pages do not contain the required shortcodes, you can regenerate them from WooCommerce settings.
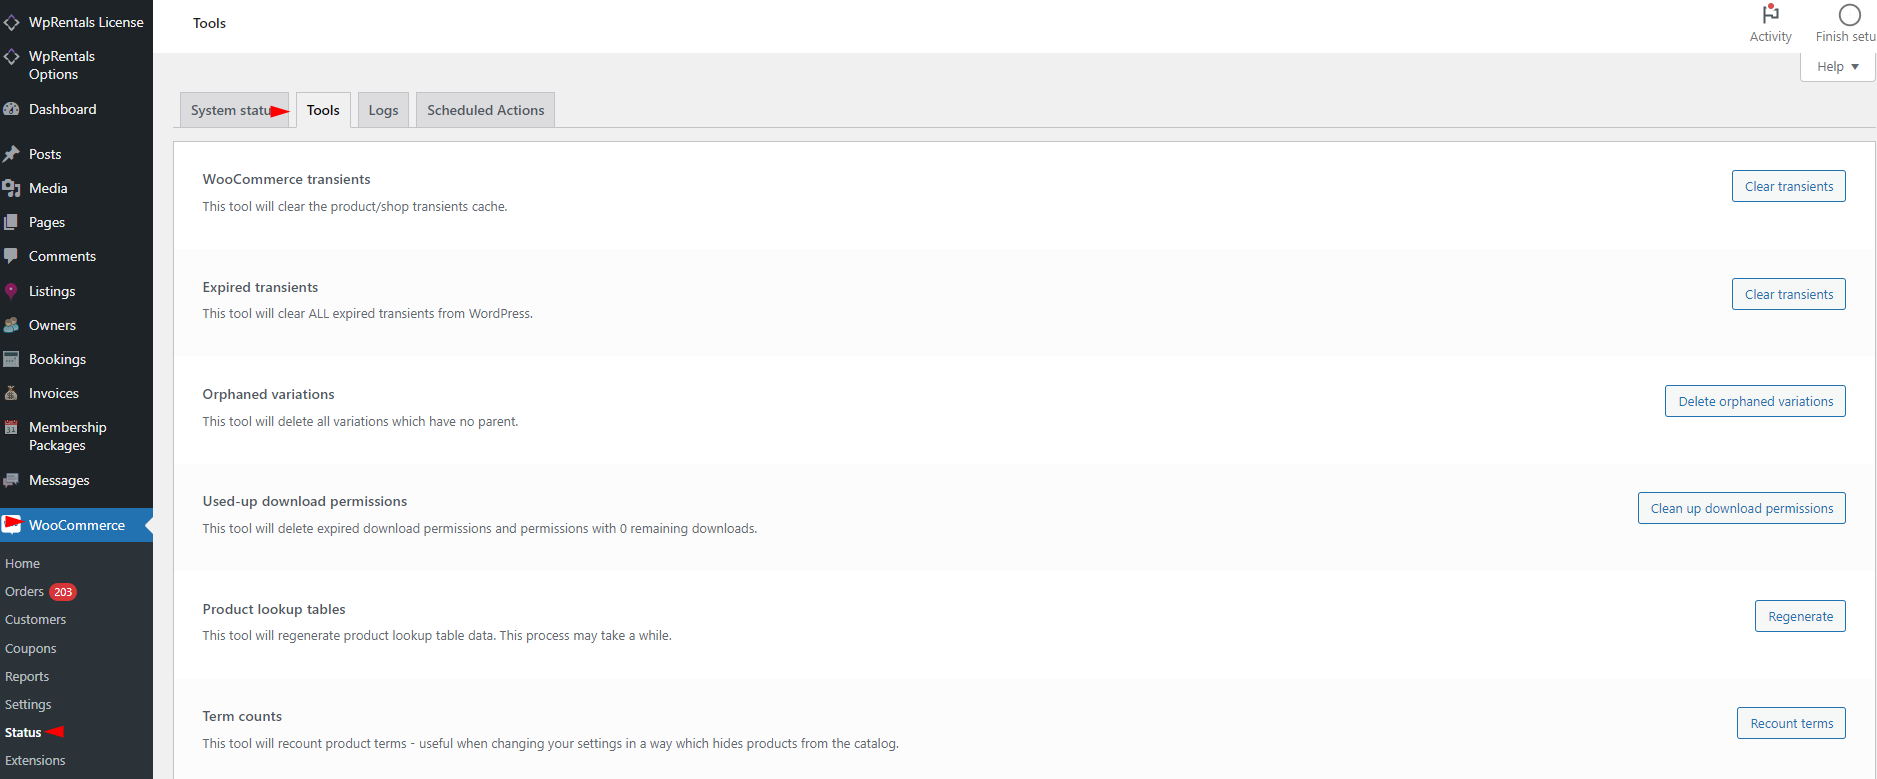
- Go to WooCommerce > Status > Tools.
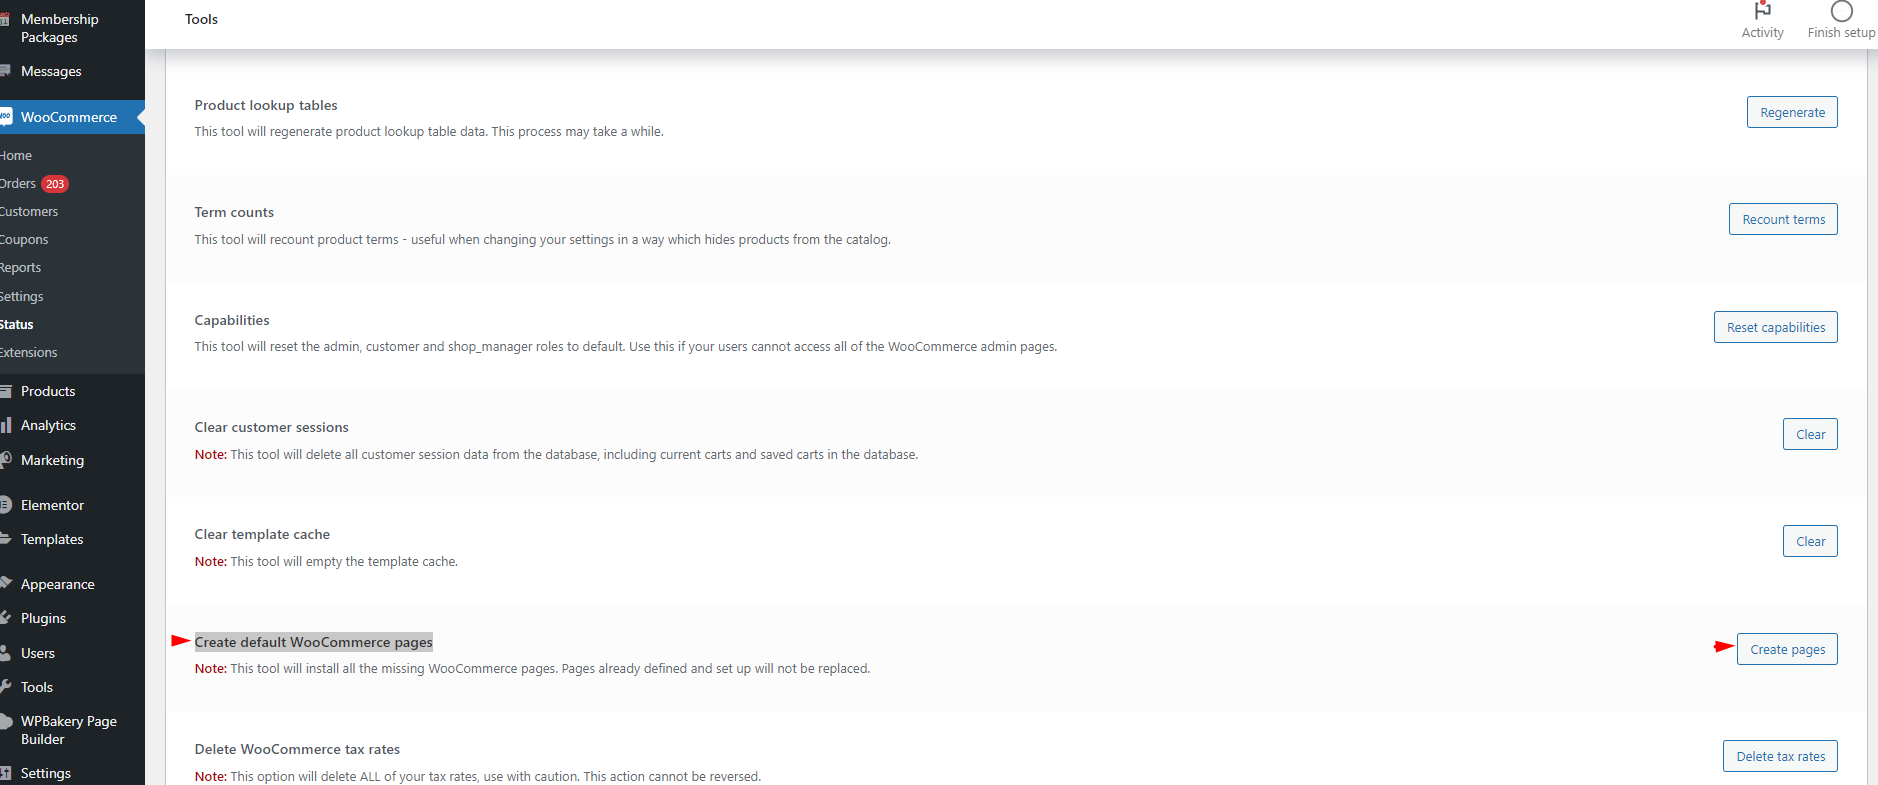
- Scroll to Create Default WooCommerce Pages.
- Click Create Pages.
How to set payment gateways in WooCommerce
WooCommerce supports many payment gateways. Some gateways are free, while others require a paid extension.
After selecting a gateway, configure it according to the gateway documentation.
Direct Bank Transfer (BACS)
WooCommerce includes a built-in payment method called Direct Bank Transfer, also known as BACS.
To enable it, go to:
WooCommerce > Settings > Payments
Then enable and configure Direct Bank Transfer.

When a guest selects Direct Bank Transfer at WooCommerce checkout, WooCommerce displays the bank account details you configured.
The guest must make the bank transfer manually from their bank account.
Direct Bank Transfer is not an automatic online payment. WooCommerce cannot confirm the payment instantly because the payment happens outside the website.
New orders paid by Direct Bank Transfer are created with the status On hold.
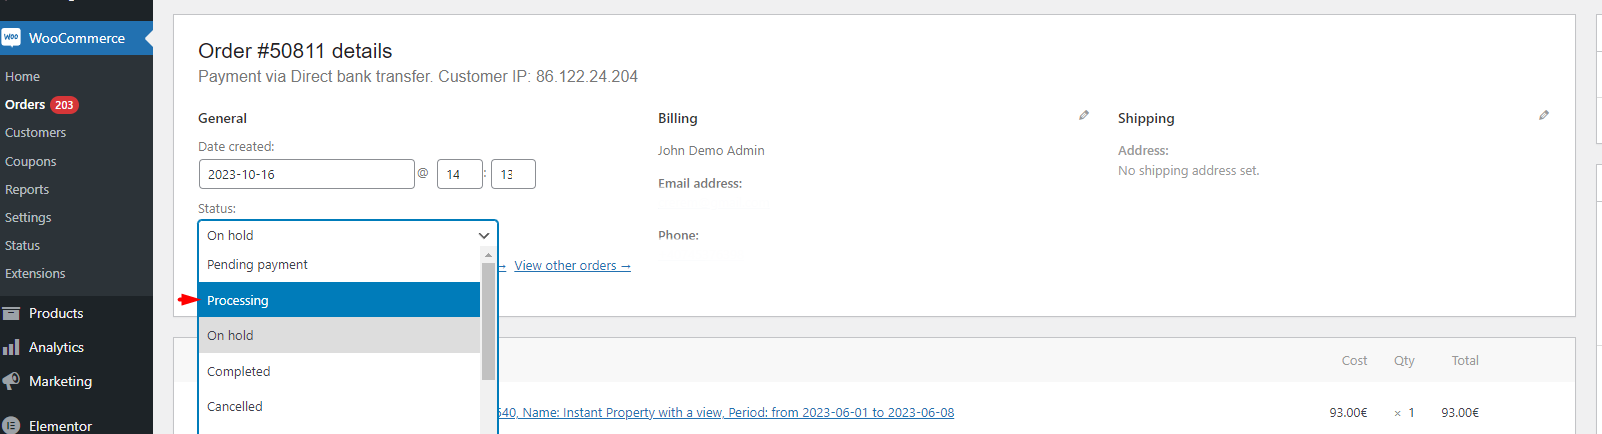
After the money arrives in your bank account, the admin must open the WooCommerce order and manually change the order status to Processing or Completed, depending on the workflow used on the website.
Direct Bank Transfer with Instant Booking
If you want to use Instant Booking and also offer Direct Bank Transfer, enable WooCommerce payments in WPRentals and enable Direct Bank Transfer in WooCommerce.
With this setup:
- The guest selects the dates and clicks Book Now.
- The guest is sent to WooCommerce checkout.
- The guest selects Direct Bank Transfer.
- WooCommerce creates the order with the status On hold.
- The guest receives the bank transfer instructions.
- The admin verifies the bank payment manually.
- The admin updates the WooCommerce order status after confirming the payment.
This is still a manual payment confirmation flow. Direct Bank Transfer can be shown in the WooCommerce checkout used by Instant Booking, but the payment is not confirmed automatically at the moment of checkout.
WooCommerce documentation for Direct Bank Transfer:
https://woocommerce.com/document/bacs/
Theme Wire Transfer vs WooCommerce Direct Bank Transfer
WPRentals has its own default payment methods, including the theme Wire Transfer option.
WooCommerce also has a separate payment method named Direct Bank Transfer, also known as BACS.
These are not the same payment method.
Theme Wire Transfer
The theme Wire Transfer option is managed by WPRentals payment settings. It is part of the default WPRentals payment system.
Use the theme Wire Transfer option if you want to manage manual bank transfer payments through the default WPRentals booking/payment workflow, without sending the guest through WooCommerce checkout.
WooCommerce Direct Bank Transfer
WooCommerce Direct Bank Transfer is managed from WooCommerce payment settings.
Use WooCommerce Direct Bank Transfer if you enabled WooCommerce payments in WPRentals and you want the guest to continue through the WooCommerce checkout page.
This option is useful when you want to use:
- Instant Booking in WPRentals
- WooCommerce checkout for the booking payment
- Direct Bank Transfer as the payment method shown at checkout
WooCommerce Direct Bank Transfer is a manual/offline payment method. The guest does not pay automatically online. WooCommerce shows your bank details, and the guest must make the bank transfer outside the website.The WooCommerce order is created with the status On hold until the admin verifies the bank payment and manually changes the order status to Processing or Completed.
Which option should you use?
- Use Theme Wire Transfer if you want to use the default WPRentals payment system without WooCommerce checkout.
- Use WooCommerce Direct Bank Transfer if you want Instant Booking to continue through WooCommerce checkout and show bank transfer as the payment method.
WooCommerce Direct Bank Transfer documentation:
https://woocommerce.com/document/bacs/
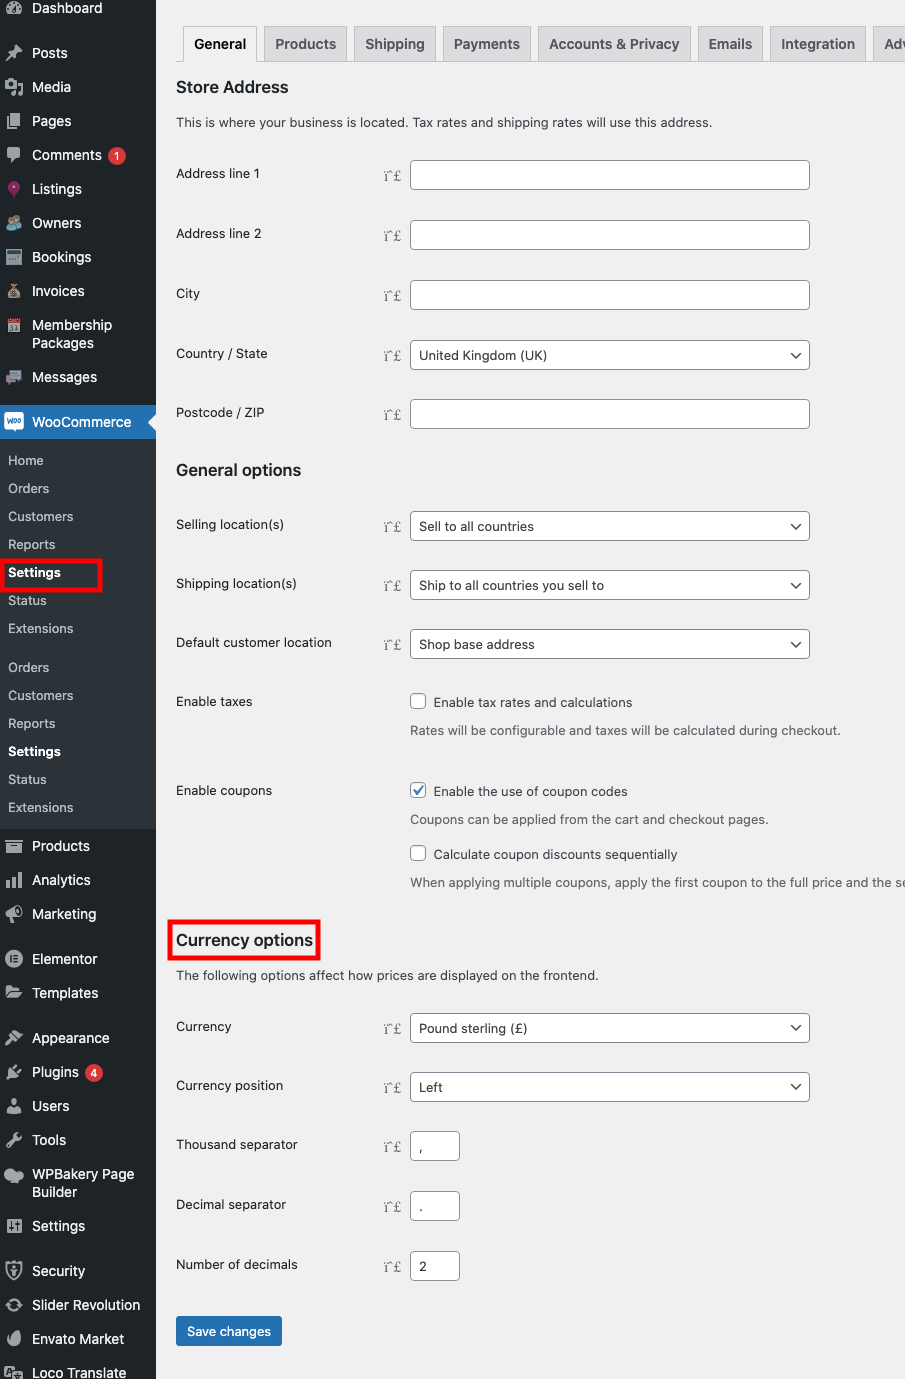
Currency and timezone settings
- Set the currency from WooCommerce > Settings > General.
- Set the timezone to Universal Timezone in WooCommerce settings so bookings match correctly with the availability calendar.

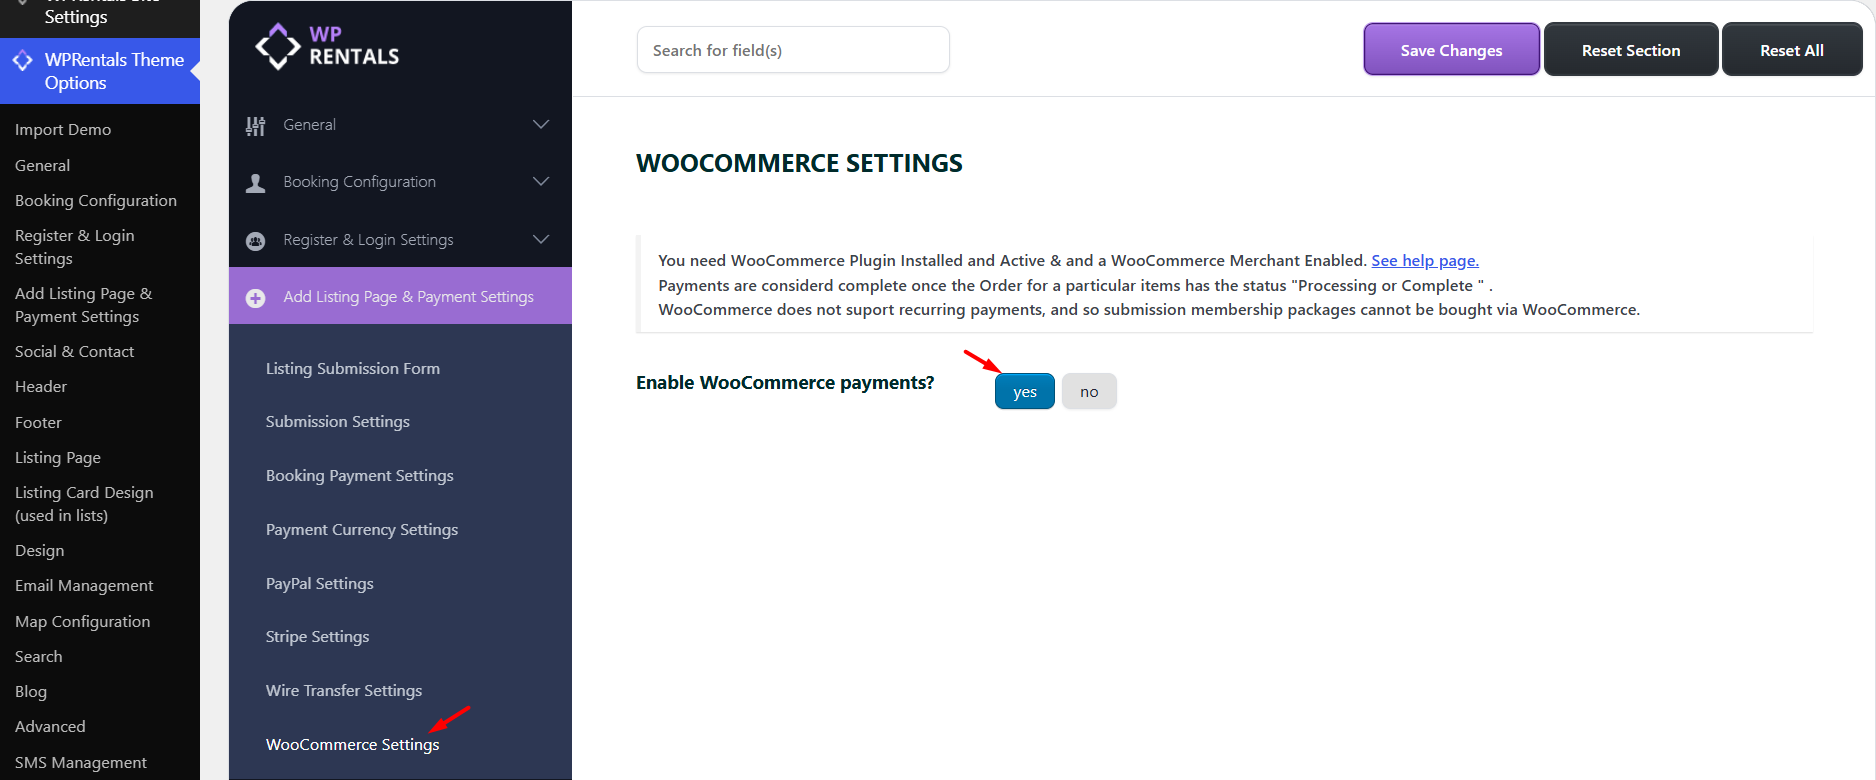
How to enable WooCommerce payments in WPRentals
Go to Theme Options > Add Listing Page & Payment Settings > WooCommerce Settings and enable the option to use WooCommerce payments.
How WooCommerce payments work in WPRentals
The Pay Now button appears when paying for:
- Instant Booking deposit, if the deposit is greater than 0.
- Regular booking deposit.
- Remaining balance payment.
- Paid submission fee for listing creation, including fees for marking listings as featured.
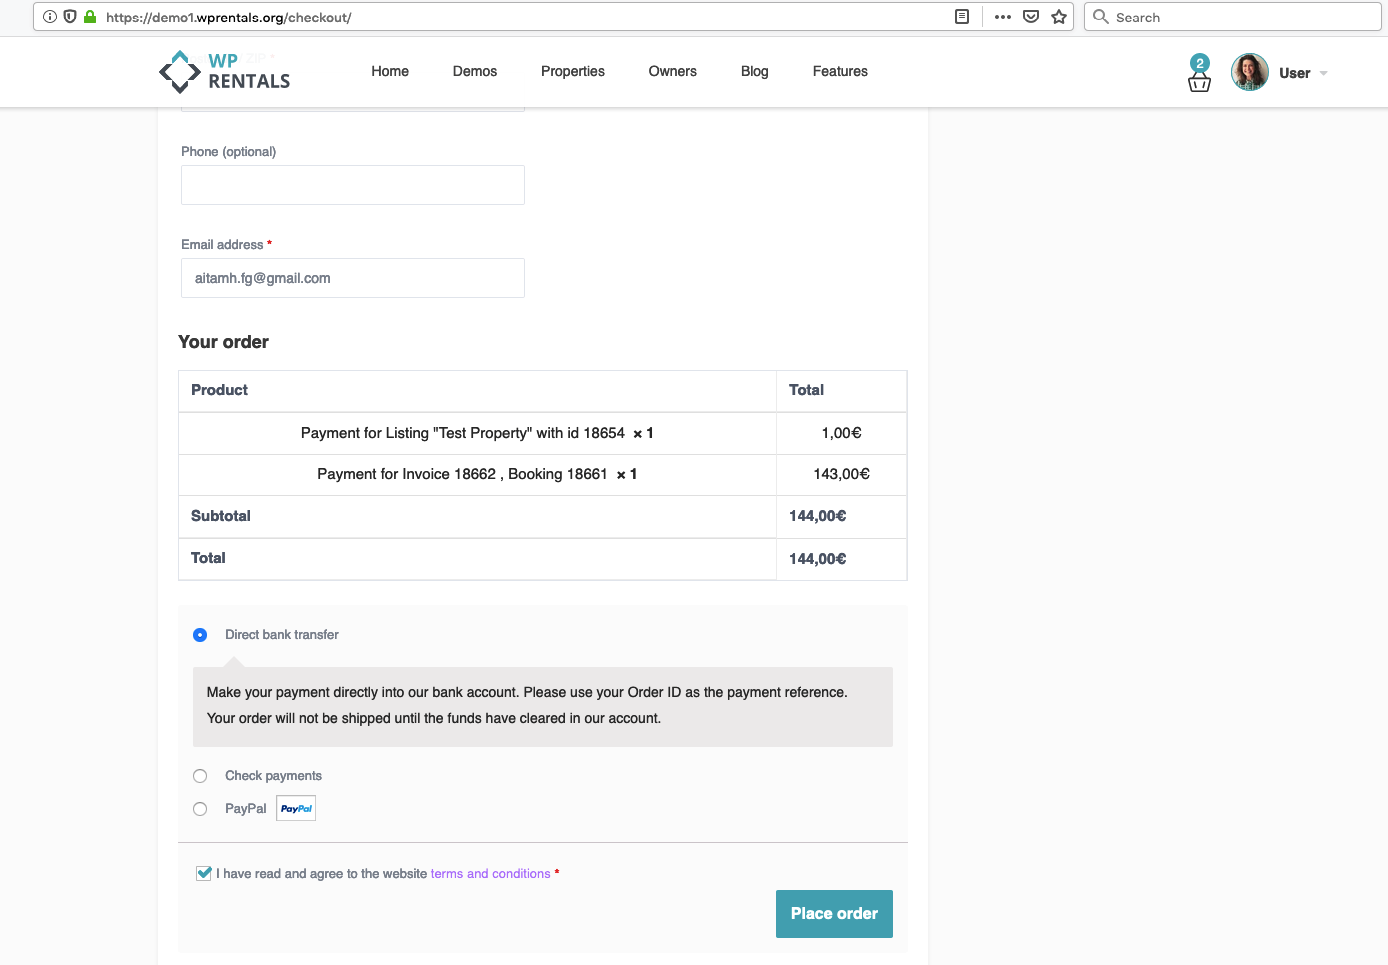
Example with Instant Booking enabled
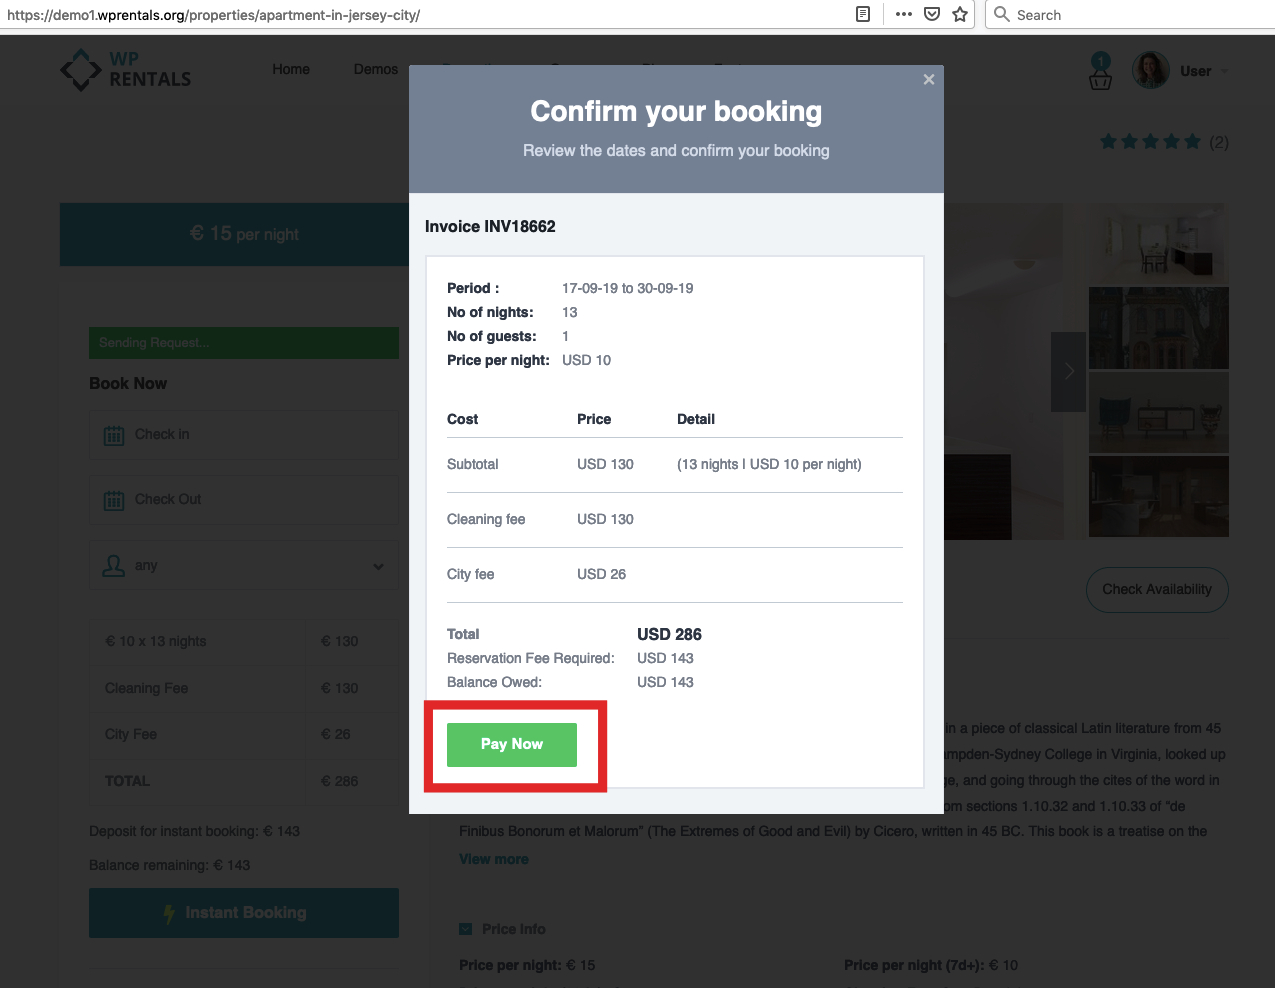
Clicking Pay Now redirects the user to the WooCommerce checkout page.
The payment is processed through the payment gateways configured in WooCommerce.
The checkout page can also show the Terms and Conditions checkbox and other profile information saved in WooCommerce reports.

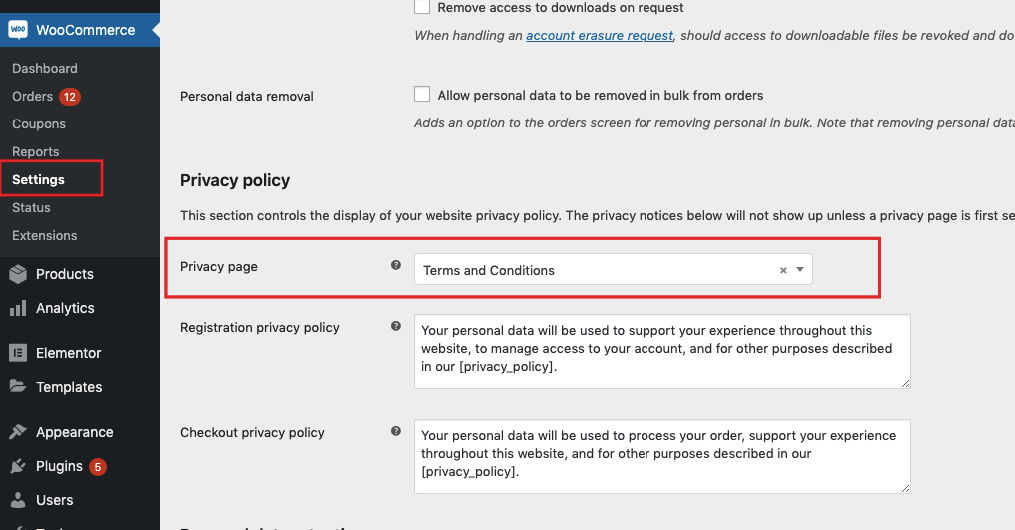
How to enable Terms and Conditions on checkout
Go to WooCommerce > Settings > Account & Privacy and select the page you want to use for the Privacy Policy and Terms setup.
How to use booking without login
This option works with properties that have Instant Booking enabled and use WooCommerce for payment processing.
With this setup, the user does not need to log in before starting the booking.
The guest selects the dates, clicks Book Now, and continues through WooCommerce checkout. WooCommerce can create the account during checkout and send the password setup email automatically.
Required setup
- The property must have Instant Booking enabled.
- WooCommerce payments must be enabled in WPRentals.
- WooCommerce must allow account creation during checkout.
- The password setup email for new users must be enabled in WooCommerce.
Live demo:
https://demo1.wprentals.org/properties/condo-in-liberty-state-park/
Recommended user setup
If you want new users created through checkout to have only booking-related dashboard access, the Separate users on registration option should be set to No.
Then add the owner usernames in Theme Options.
This setup allows only selected users to submit properties from the front end, while users created through WooCommerce checkout are used mainly for booking and reservation access.
Read how to allow only certain users to submit properties in front end

Booking flow without login first
- The guest opens an Instant Booking property.
- The guest selects check-in and check-out dates.
- The guest selects the number of guests.
- The guest clicks Book Now.
- The guest continues to WooCommerce checkout.
- WooCommerce creates or handles the customer account during checkout, based on your WooCommerce settings.
- The guest completes payment through the WooCommerce payment gateway.
- After payment is completed, the booking is confirmed.
This booking without login first flow applies only to Instant Booking with WooCommerce payments. If you use the theme payment merchants instead of WooCommerce, the user is asked to log in or register before sending the booking request.
How to manage checkout fields
WPRentals hides some default WooCommerce checkout fields that are not required for payment processing.
If you encounter duplicate checkout pages when purchasing WooCommerce products, you may need to adjust the checkout fields manually.
You can remove unnecessary fields from this file path:
plugins/wprentals-core/classes/wpestate_global_payments.php
Duplicate checkout pages can happen if the checkout process cannot be completed because required fields are missing.
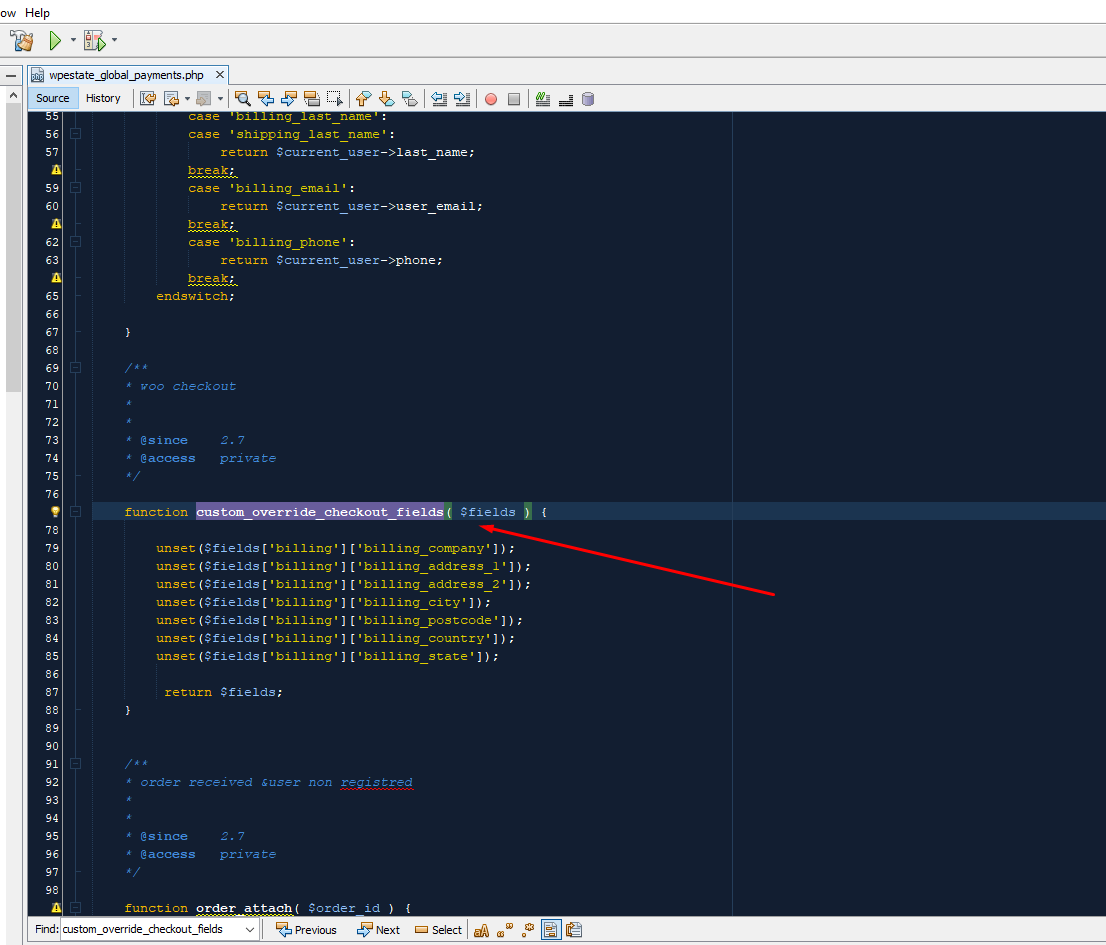
You can delete the lines for the fields you want to show, without using an additional plugin.
For more advanced customization of checkout fields, you can use a WooCommerce-compatible plugin such as Flexible Checkout Fields.
Handling shipping in WooCommerce
For products marked as non-virtual, you can enable shipping details by following this guide:
Enable Shipping for Non-Virtual Products
How to use WooCommerce to collect extra taxes at checkout
To collect taxes at checkout through WooCommerce, you need to configure the tax settings inside WooCommerce.
Follow this guide from WooCommerce for detailed instructions:
Setting up Taxes in WooCommerce
WooCommerce also offers tax-related extensions that can help if you need special tax collection or invoice generation based on country-specific regulations.
Explore WooCommerce Tax Extensions
In the WooCommerce tax settings, you can define multiple tax rates and apply them based on the customer billing address.
For accurate tax calculation, make sure the tax calculation is based on the customer billing address.

You can add customer billing address fields to the checkout page using Flexible Checkout Fields.
Taxes will be displayed in checkout only after the user fills in the address details required by the WooCommerce tax settings.
