Overview
The WPRentals Map with Listings widget displays a map with listing pins on a custom page.
You can use this widget to show published listings on a map inside pages created with Elementor or WPBakery.
Before You Start
Before adding the map to a page, check these details:
- The listings you want to show must be published.
- The listings must have correct latitude and longitude coordinates.
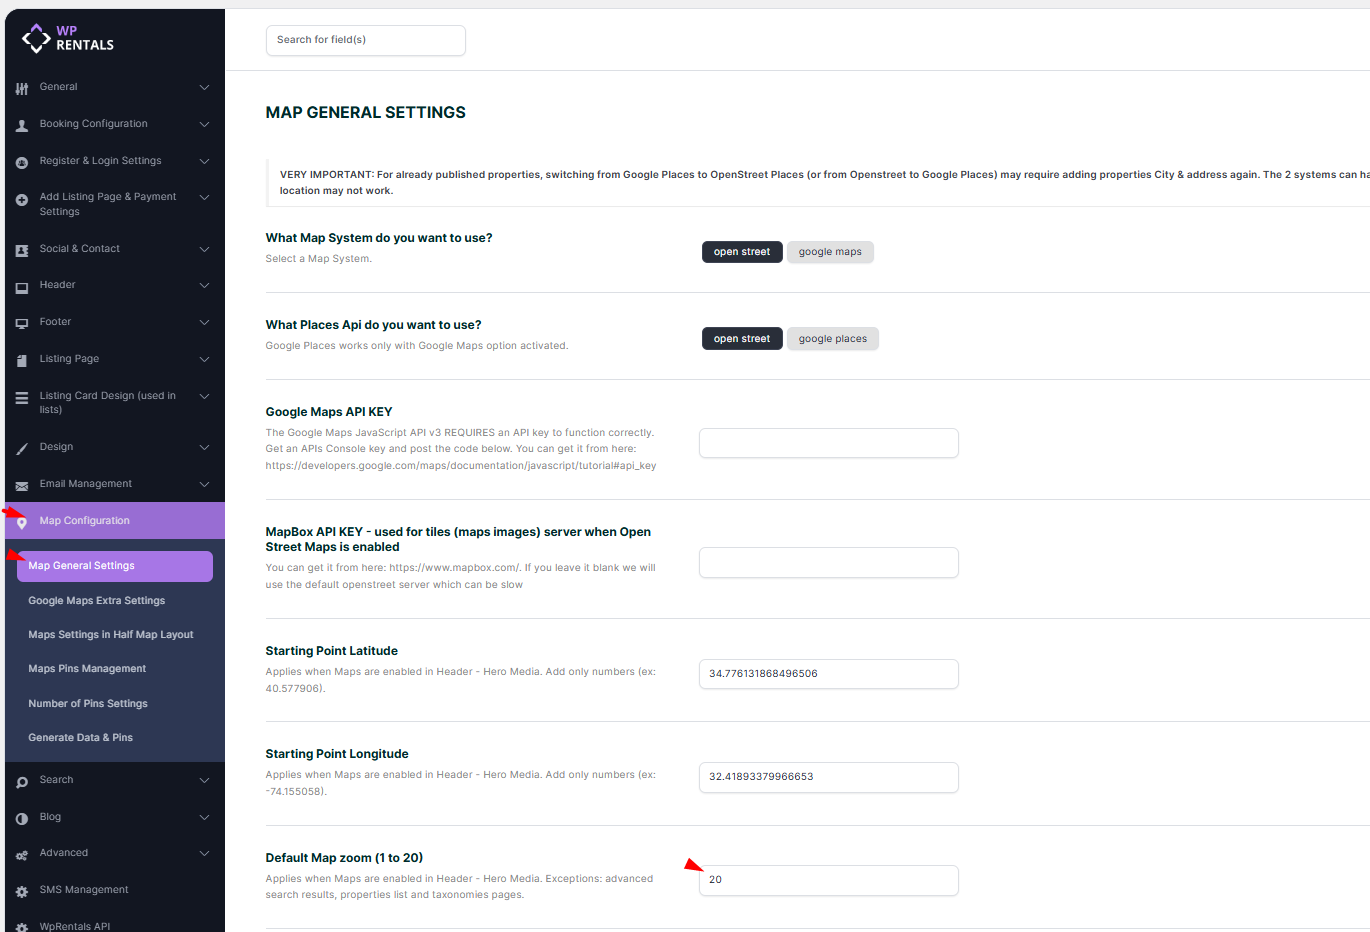
- The map system must be configured from WPRentals Options > Map Configuration.
- If you use Google Maps, the Google Maps API key must be configured correctly.
- If you use OpenStreetMaps, check the OpenStreetMap settings from Map Configuration.
Add the Map with Listings Widget with Elementor
Step 1: Edit the Page with Elementor
Go to the page where you want to add the map and click Edit with Elementor.
Choose the section where the map should appear, or create a new section for the map.
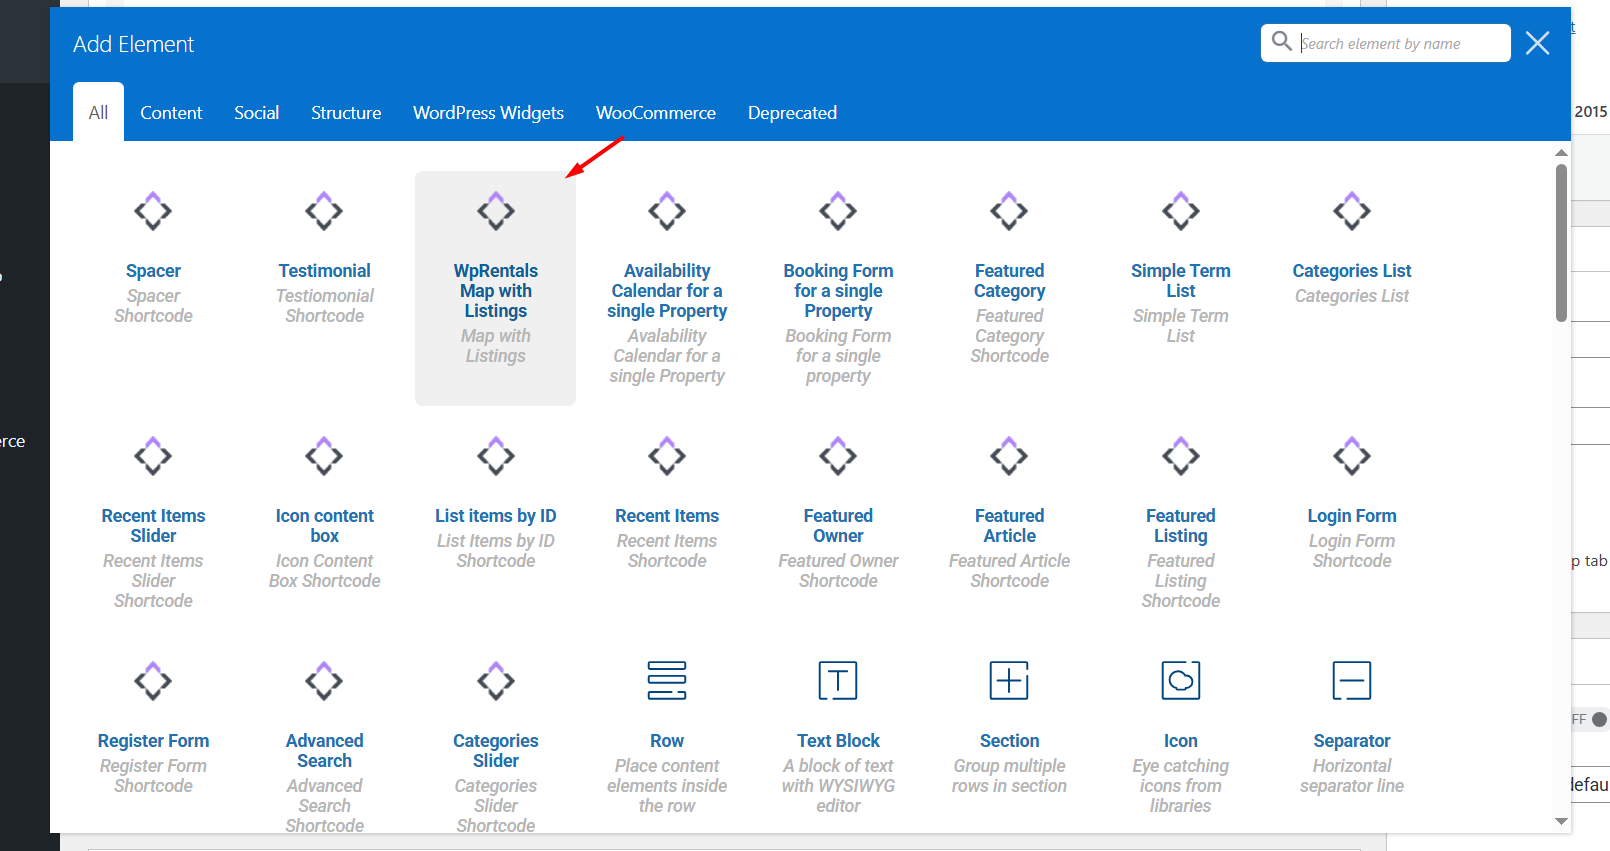
Step 2: Add the Widget
In the Elementor panel, search for:
WPRentals Map with Listings
Drag the widget into the page section where you want the map to show.

Elementor Widget Settings Explained
After you add the widget, open the widget settings from the Elementor left panel.
Map Height
This option controls the height of the map.
Add the height value you want to use for the map section.
List of Categories
This option lets you show listing pins only from selected listing categories.
Use this option if you want the map to display listings from specific categories only.
List of Action Categories
This option lets you show listing pins only from selected action categories.
Use this option if you want to filter the map pins by listing action category.
List of City
This option lets you show listing pins only from selected cities.
List of Areas
This option lets you show listing pins only from selected areas.
Map Style from Snazzy Maps
If your site uses Google Maps, you can add a custom map style from Snazzy Maps.
Copy the JSON style code from Snazzy Maps and paste it into the map style field.
Map Zoom
The map zoom for this widget follows the default map zoom configured in:
WPRentals Options > Map Configuration > Map General Settings

Make the Elementor Map Full Width
The map width is controlled by the Elementor section or container where the widget is added.
To make the map full width:
- Select the Elementor container or section that includes the map widget.
- Open the Layout settings.
- Set the container or section width to full width, depending on your Elementor layout.
- Open the Advanced tab if you need to adjust margins, padding, or spacing.
- Click Update to save the page.

Add the Map with Listings Widget with WPBakery
Step 1: Edit the Page with WPBakery
Open the page created with WPBakery and click Edit Page or Edit with WPBakery Page Builder.
Step 2: Add the Map Element
Add a new row and click the + button to add a new element.
Search for:
WPRentals Map with Listings
Select the element to insert it into the page.
Step 3: Configure the WPBakery Map Settings
The WPBakery element includes similar options to the Elementor widget.
You can manage:
- Map height
- Listing categories shown on the map
- Action categories shown on the map
- City filters
- Area filters
- Snazzy Maps style code, if Google Maps is used
Step 4: Save the Page
Save or update the page, then check the result on the front end.
Map Settings That Affect This Widget
The Map with Listings widget uses the main WPRentals map configuration.
Map settings are managed from:
WPRentals Options > Map Configuration
From this area, you can manage:
- The map system: Google Maps or OpenStreetMaps
- Google Maps API key, if Google Maps is used
- OpenStreetMap settings, if OpenStreetMaps is used
- Default map zoom
- Map pin style
- Pin clustering
- Price pins
- Generated map pins data
Important Notes
- The WPRentals Map with Listings widget is available for Elementor and WPBakery.
- The widget displays published listings as pins on a map.
- Listings must have correct latitude and longitude coordinates to show correctly on the map.
- The map system and global map behavior are managed from WPRentals Options > Map Configuration.
- The map zoom follows the default map zoom from the map configuration settings.
- Snazzy Maps styling applies only when Google Maps is used.
- The widget can be filtered by category, action category, city, or area.
- The map width depends on the Elementor container, Elementor section, WPBakery row, page template, and custom spacing settings.
- Do not mix Elementor and WPBakery on the same page.
- If the map does not update after changes, clear theme cache, plugin cache, server cache, CDN cache, and browser cache.