
WPRentals uses a single calendar to collect both travel dates. The guest opens it from the Check-In field, picks the arrival day, then picks the departure day, and both fields fill in together.
From version 3.19.0 the Check-Out field is shown as locked by default, so the guest is guided to that one calendar. This article explains what changed, why, and how to switch it off if you prefer the older behaviour.
How guests choose their dates
The guest clicks the Check-In field. One calendar opens, covering two months.
The first day they click is their arrival. The calendar stays open and highlights the arrival day. The second day they click is their departure. As soon as both are chosen, the calendar closes and both the Check-In and the Check-Out fields show the dates.
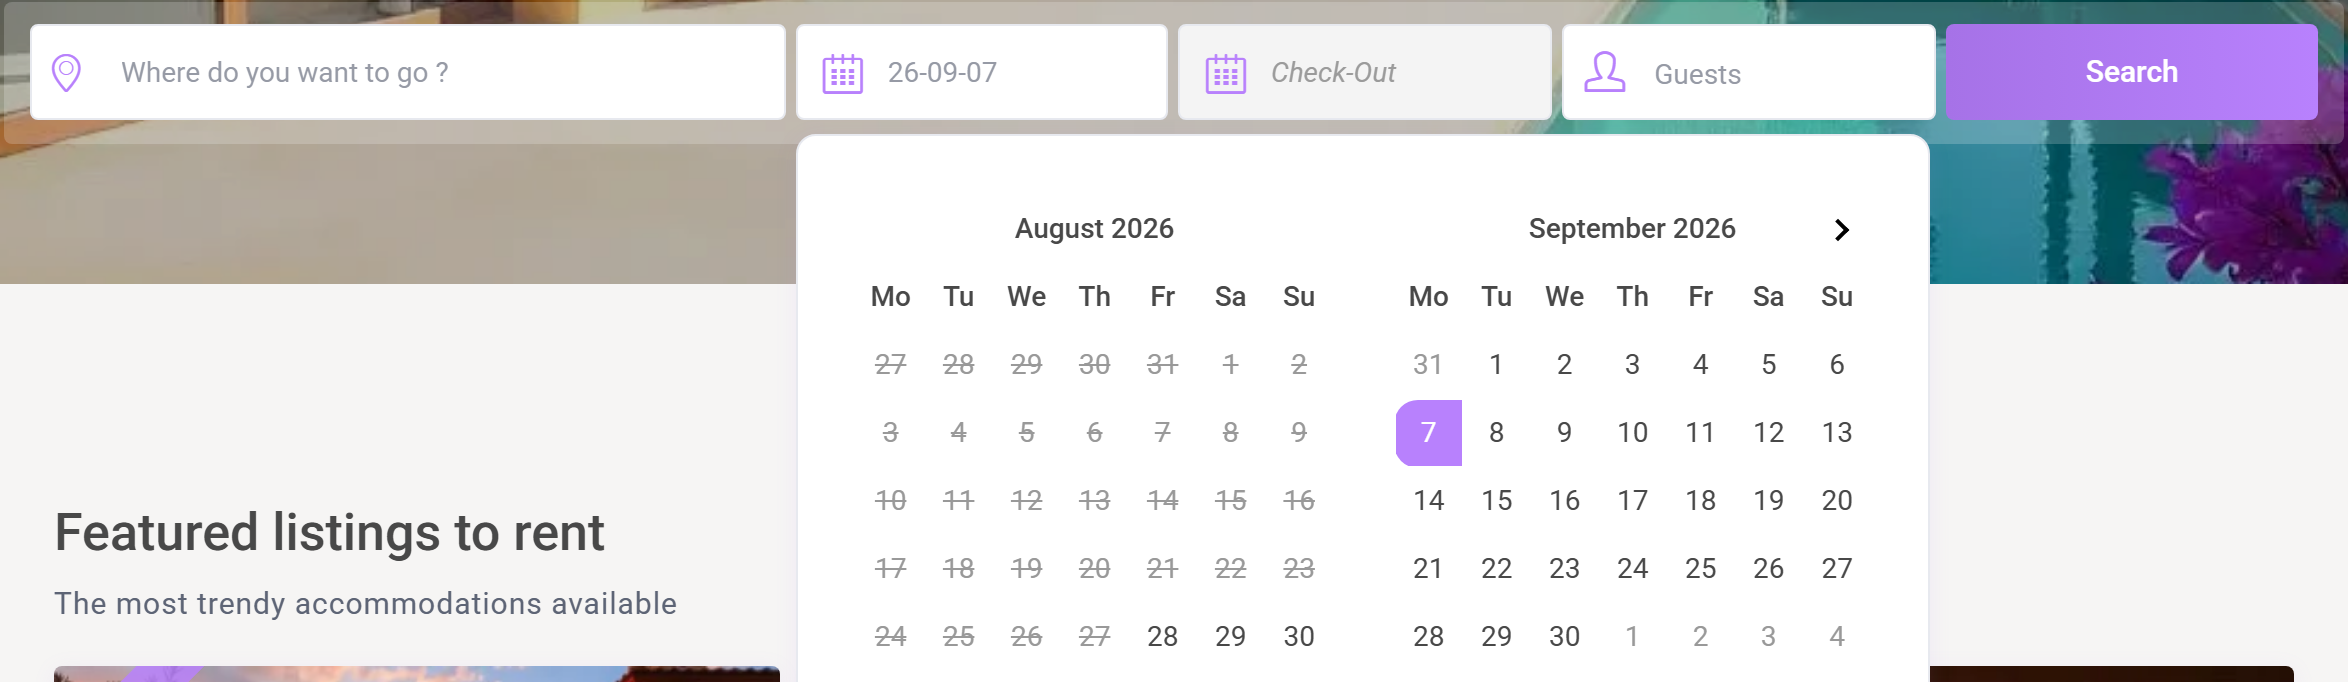
There is only ever one calendar. The Check-Out field never had a calendar of its own.
What the locked Check-Out field looks like
With the setting enabled, the Check-Out field is shown in grey. It still carries its own Check-Out label, so guests can see which field is which, and the departure date appears in it as soon as they pick it.

The field cannot be typed into and cannot be clicked. When the guest hovers over it, a short message appears: Pick both dates in the Check-In calendar.

Once the guest has chosen both days, the Check-Out field fills in exactly as before. Nothing about the booking itself changes.
Why the field is locked
Because there is only one calendar, clicking the Check-Out field used to re-open it. If the guest had already picked an arrival day and had not yet picked a departure day, re-opening the calendar started the selection again from the beginning.
The result was confusing. The guest picked a day, clicked the Check-Out field, picked a second day, and instead of completing the stay the second day replaced the arrival date. The Check-Out field stayed empty. Guests could repeat this without ever filling both fields, and nothing on screen explained why.
Locking the field removes the trap. There is one obvious way to choose dates and it always works.
How to turn it off
Go to WPRentals Theme Options, then Booking Configuration, then the Calendar Settings tab. The setting is called Lock the Check-Out field?
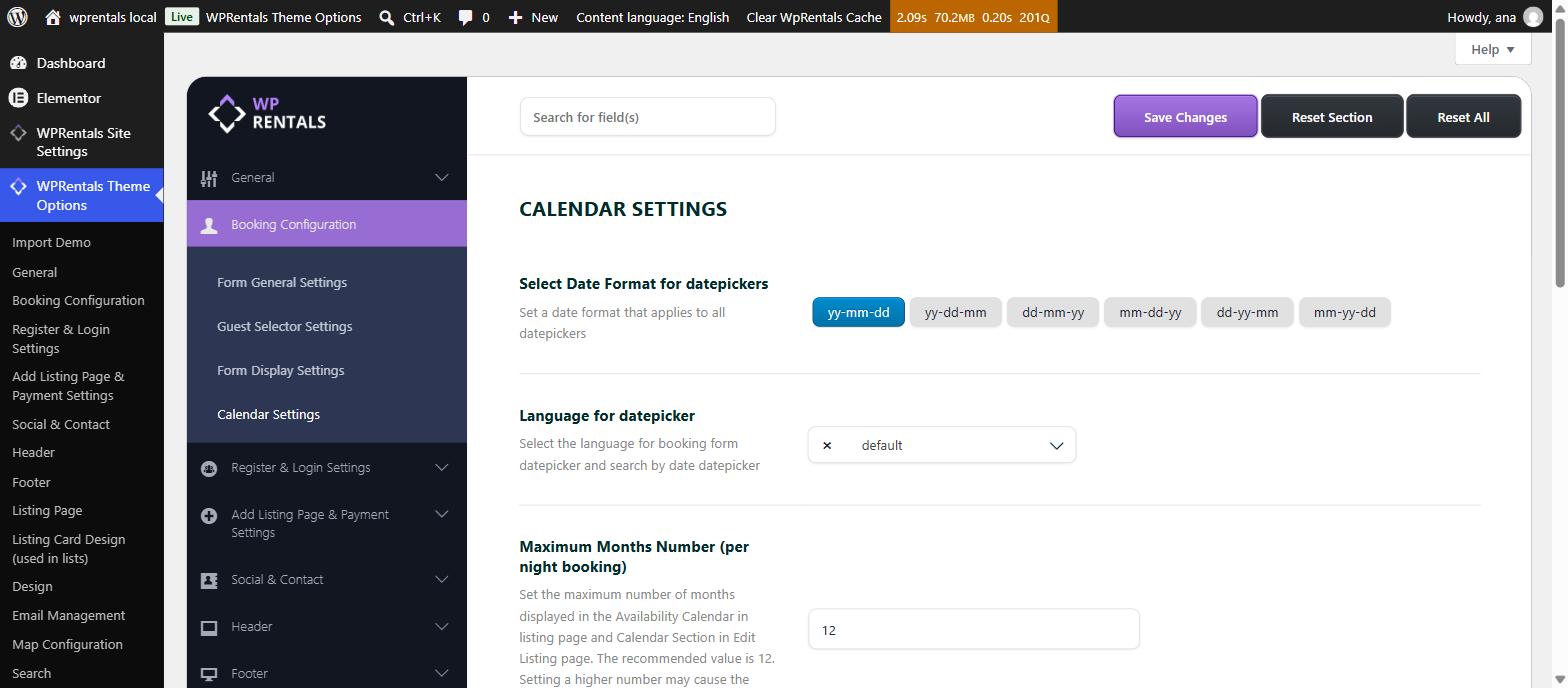
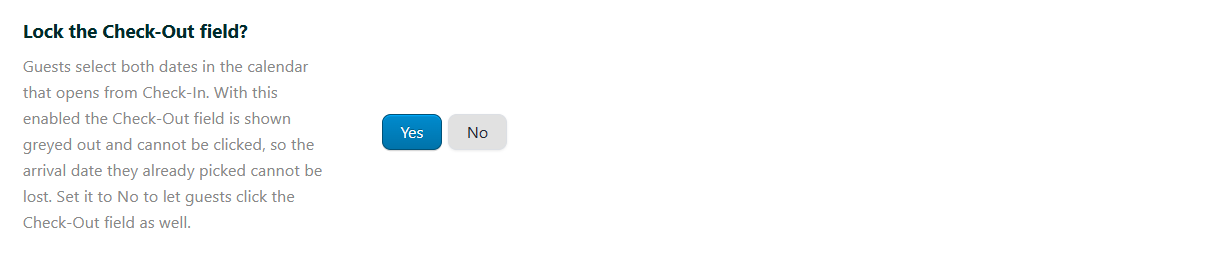
Set it to No and the Check-Out field goes back to being clickable, exactly as in earlier versions. Set it to Yes, which is the default, and the field is locked.
The setting applies to the whole site. There is no per listing version of it.
What happens when you turn it off
The Check-Out field becomes a normal field again. Clicking it re-opens the same Check-In calendar.
Importantly, the underlying problem is fixed either way. Even with the setting off, picking an arrival day and then clicking the Check-Out field no longer throws that date away. The second day the guest clicks completes the stay as they would expect.
So the setting controls how the field looks and whether it can be clicked. It does not control whether dates are lost. That is fixed for everyone.
Where it applies
The setting covers every place in the theme that asks for a pair of dates: the main search form, the half map search, the search widget, the search shortcode, the mobile search form, the booking form on a listing page, and the Contact Owner form.
Per hour booking is not affected. That mode asks for a single day plus start and end times, so it has no Check-Out date field to lock.
Do you need to do anything after updating?
No. The setting defaults to Yes, so the locked field is active as soon as you update to 3.19.0. If you would rather keep the old behaviour, change the setting to No.
If the field still looks or behaves the way it did before, clear your site cache and your browser cache, then reload the page.