Stripe Dashboard (Classic) vs Stripe Workbench
When following Stripe setup guides, you may see references to Stripe Classic or Stripe Workbench.
These are not different Stripe accounts and they do not change how payments work in WPRentals.
They are simply different interfaces inside the same Stripe Dashboard.
Stripe Dashboard (Classic)
This is the standard Stripe interface that most users are familiar with. It shows payments, customers, products, subscriptions, API keys, and webhooks in a simple, traditional dashboard layout. If the Stripe interface looks different from the screenshots in this help article, check the Standard Stripe setup help.
Stripe Workbench
Stripe Workbench is a newer, reorganized interface introduced by Stripe.
It groups tools by workflow (payments, subscriptions, webhooks, APIs, testing) instead of by feature.
- Same Stripe account and same data
- Different navigation and layout
- May place API keys, webhooks, and products in slightly different menu locations
Important clarification
- WPRentals works the same way with both interfaces
- No setting is required in the theme for “Classic” or “Workbench”
- All Stripe keys, webhooks, and products behave identically
This guide explains how to set up Stripe payments as Stripe Workbench in WPRentals and also clarifies how Stripe connects to your Payment Currency Settings.
Can you use Stripe?
- Supported currencies: check Stripe supported currencies
- Available countries: check Stripe availability by country
Step 1: Create the Stripe Processor page
WPRentals uses a special WordPress page (with a dedicated template) to handle Stripe processing callbacks and confirmations.
- Go to Pages → Add New
- Set the page template to Stripe Merchant Processor (this page is usually created automatically if you imported demo content)
- Important: Only one page should use the Stripe Merchant Processor template. If you have duplicates, delete them (also remove them from Trash).
- Copy the URL of this page. You will use it as the Stripe webhook endpoint.


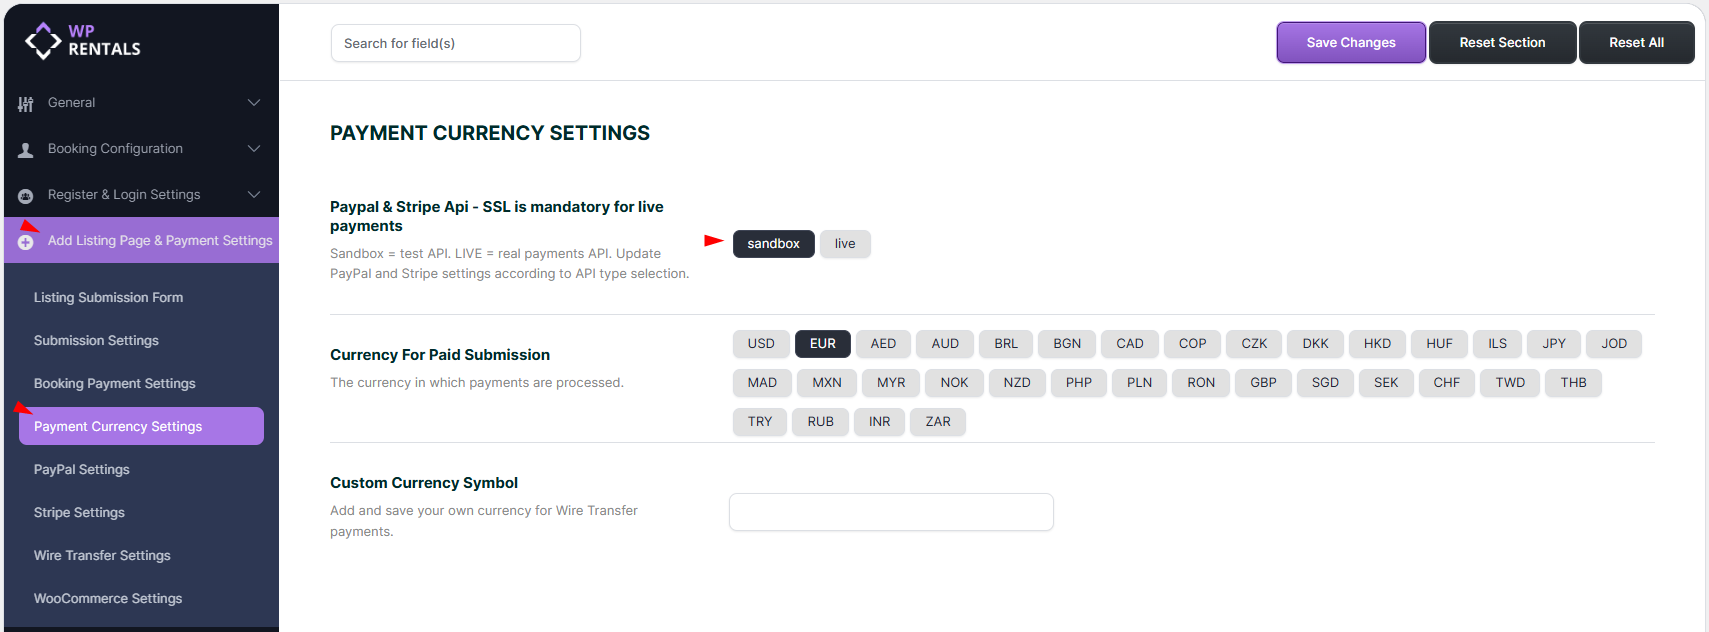
Step 2: Choose Sandbox or Live
In WPRentals you can run Stripe in:
- Sandbox for testing
- Live for real payments
Your Stripe keys are different depending on the mode, so make sure you paste the correct keys in the correct mode.
Step 3: Create Stripe API keys
Step 3.1: Create and activate your Stripe account
- Create a Stripe account here: https://stripe.com/
- For Live payments, complete Stripe onboarding in your Stripe dashboard so your account can accept real payments.
- For Sandbox testing, test keys are available automatically.
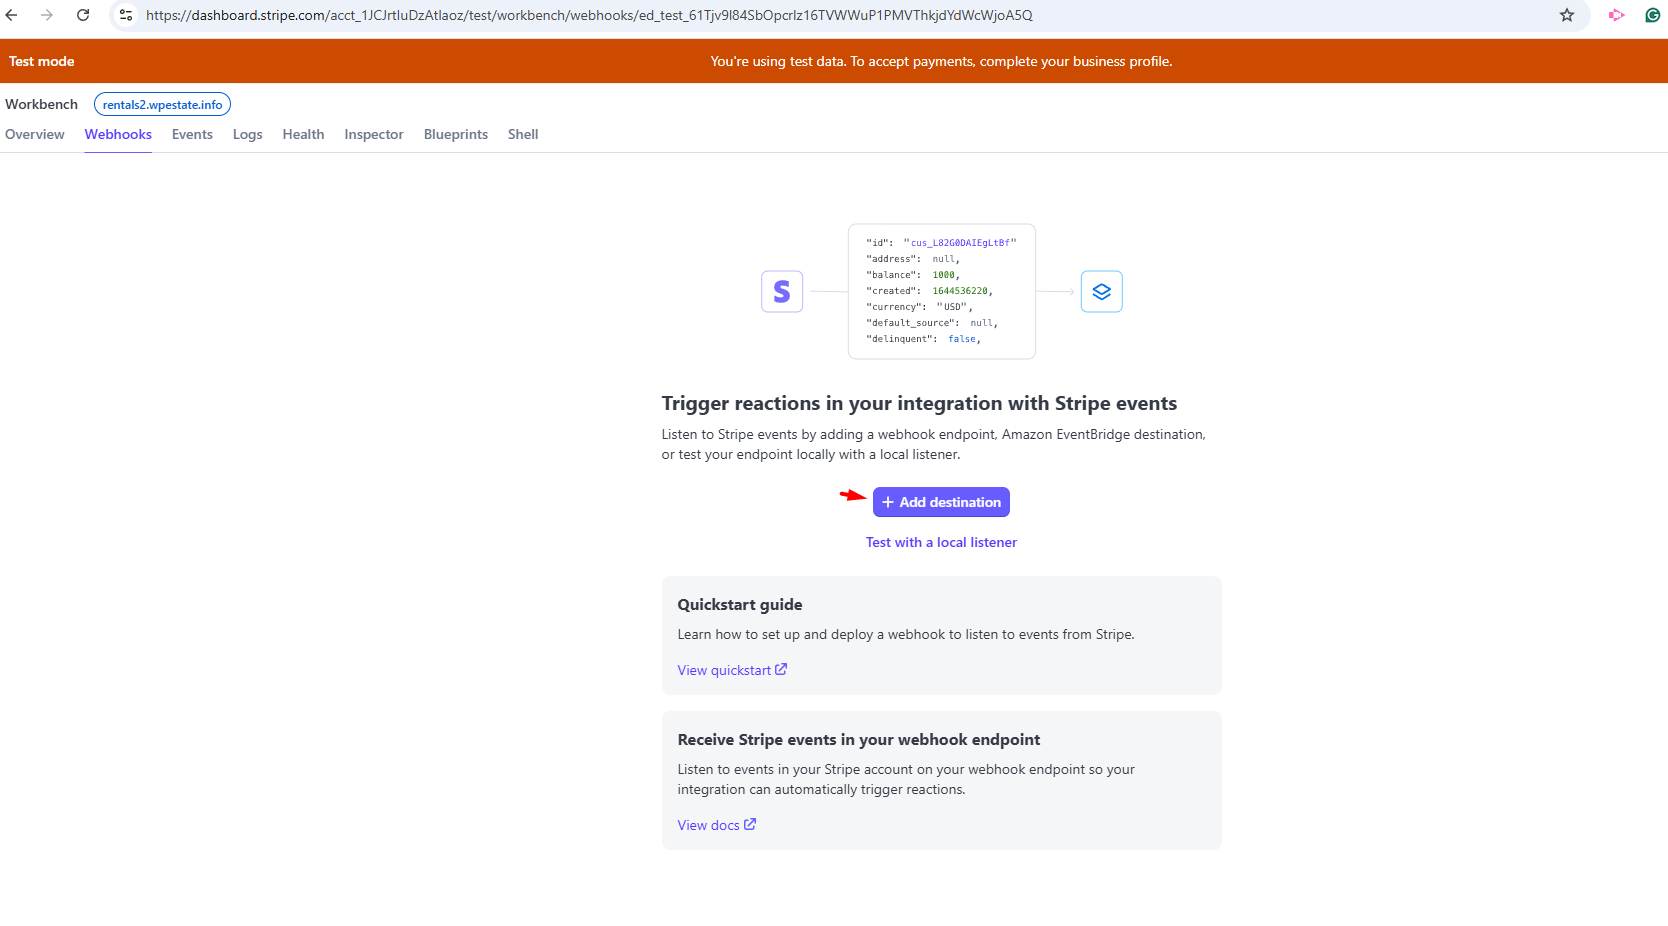
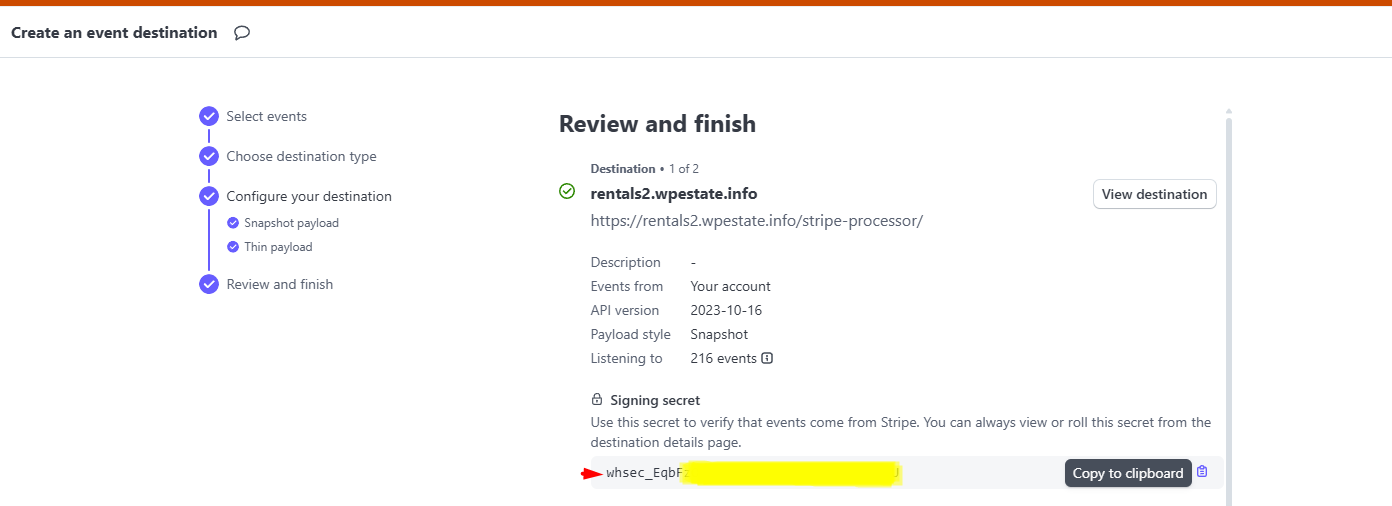
Step 4: Create the Stripe webhook
The webhook is how Stripe notifies your website about payment events. WPRentals uses it to confirm transactions reliably.
- In Stripe Dashboard go to Developers → Webhooks
- Click + Add destination (or Add endpoint)
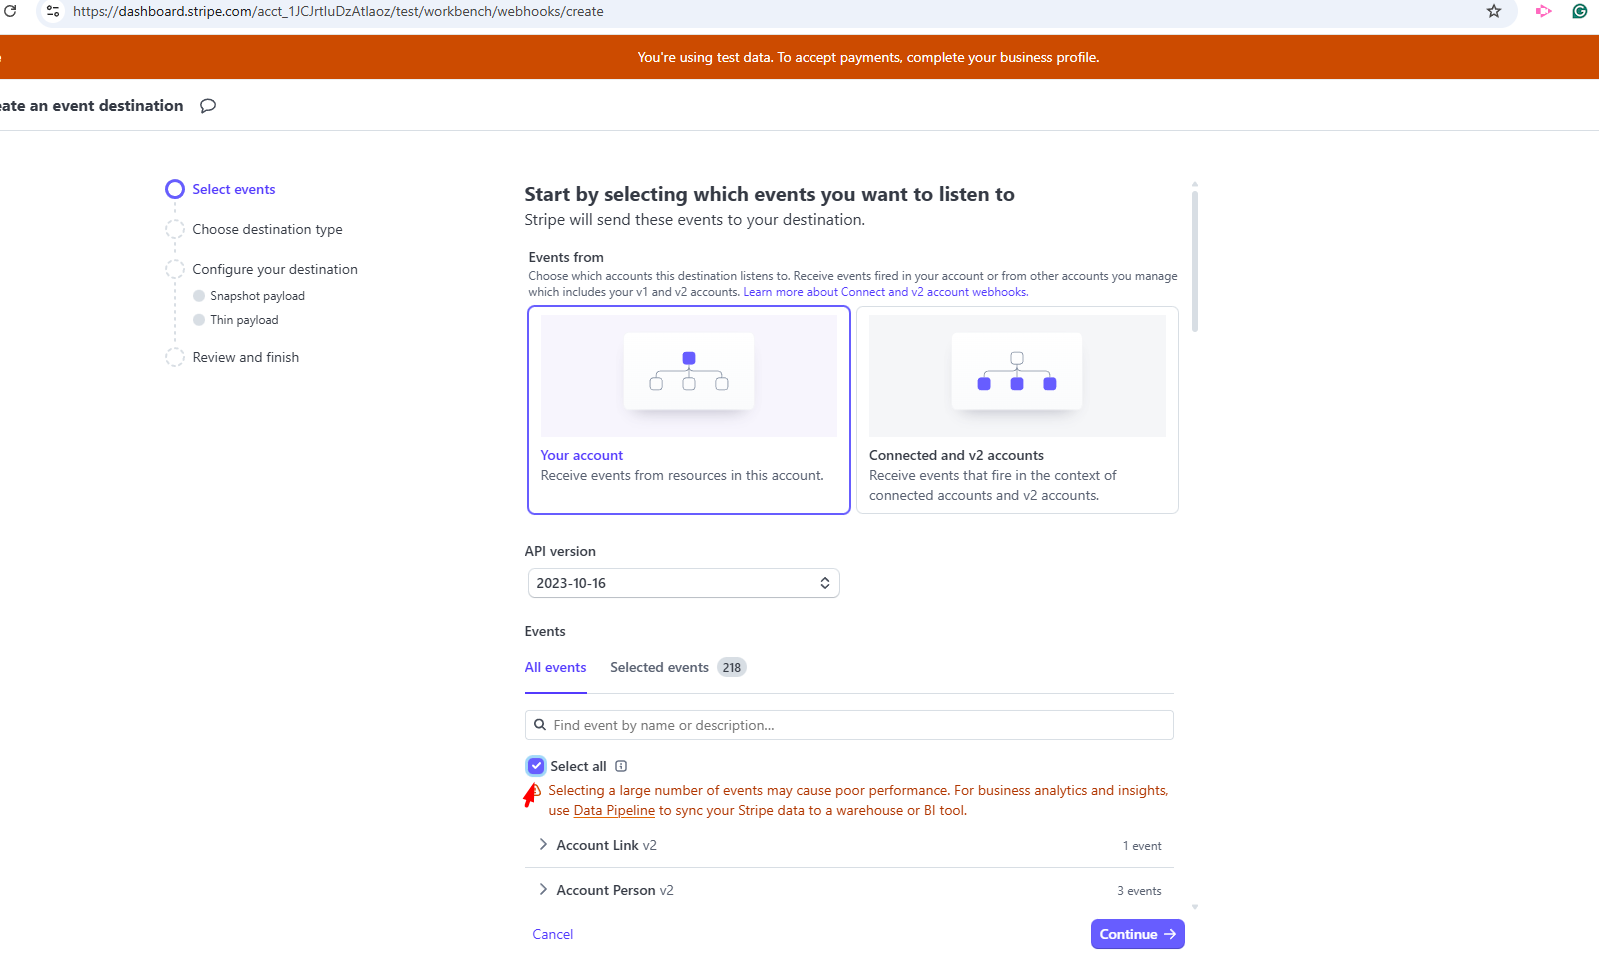
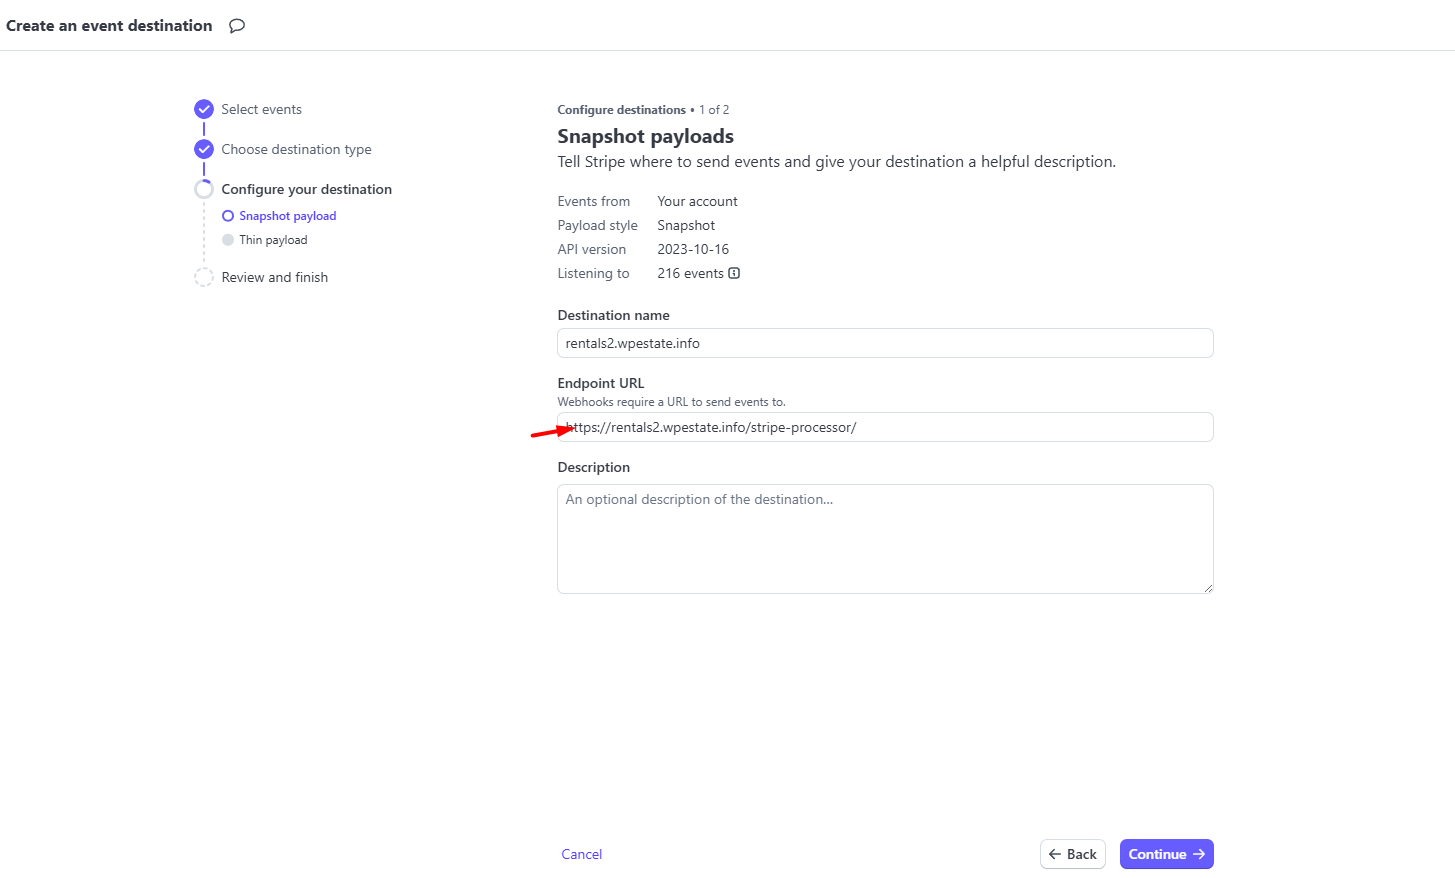
- For the Endpoint URL, paste the URL of your WordPress page that uses the Stripe Merchant Processor template
- Select Receive all events
- Save the webhook
- Copy the Signing secret (Webhook Secret)
Step 5: Add Stripe keys in Theme Options
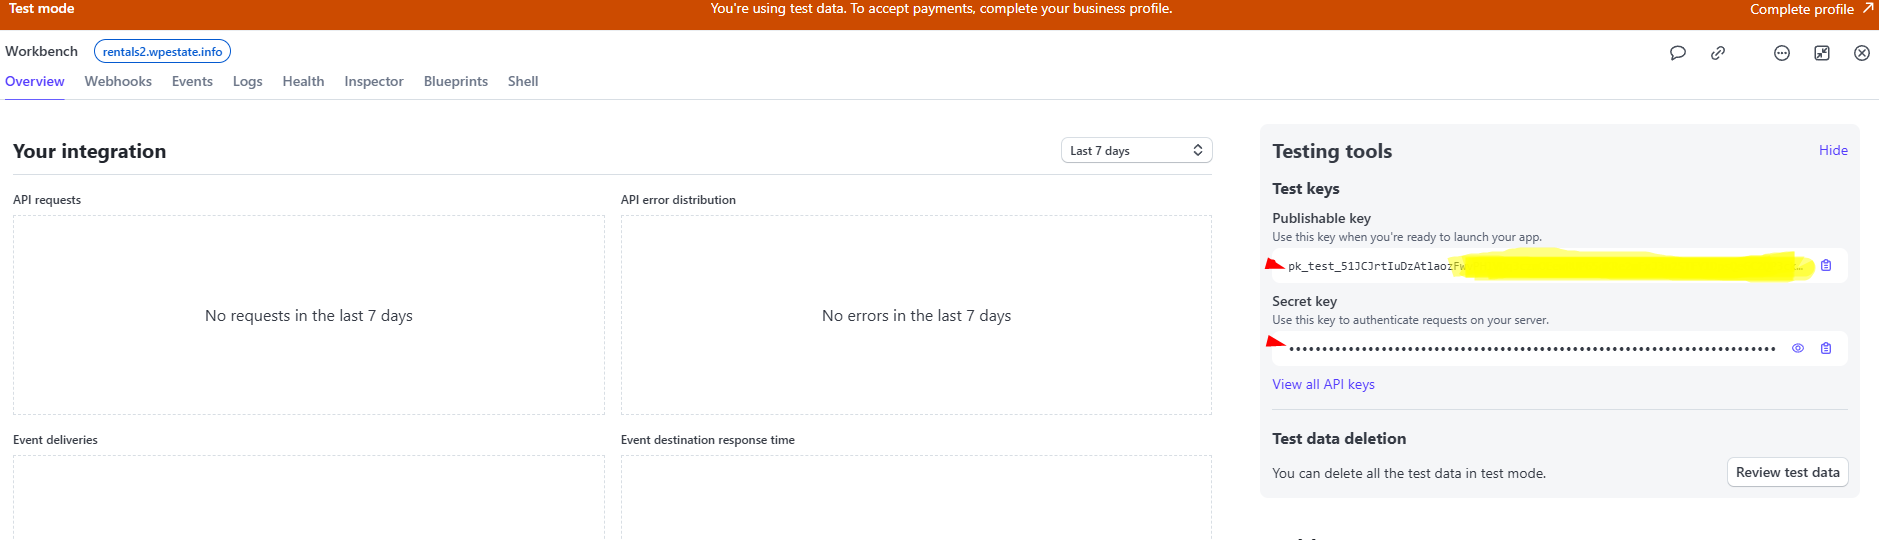
Step 5.1: Copy your API keys from Stripe
- In Stripe Dashboard go to Developers → API keys
- Copy:
- Publishable key
- Secret key
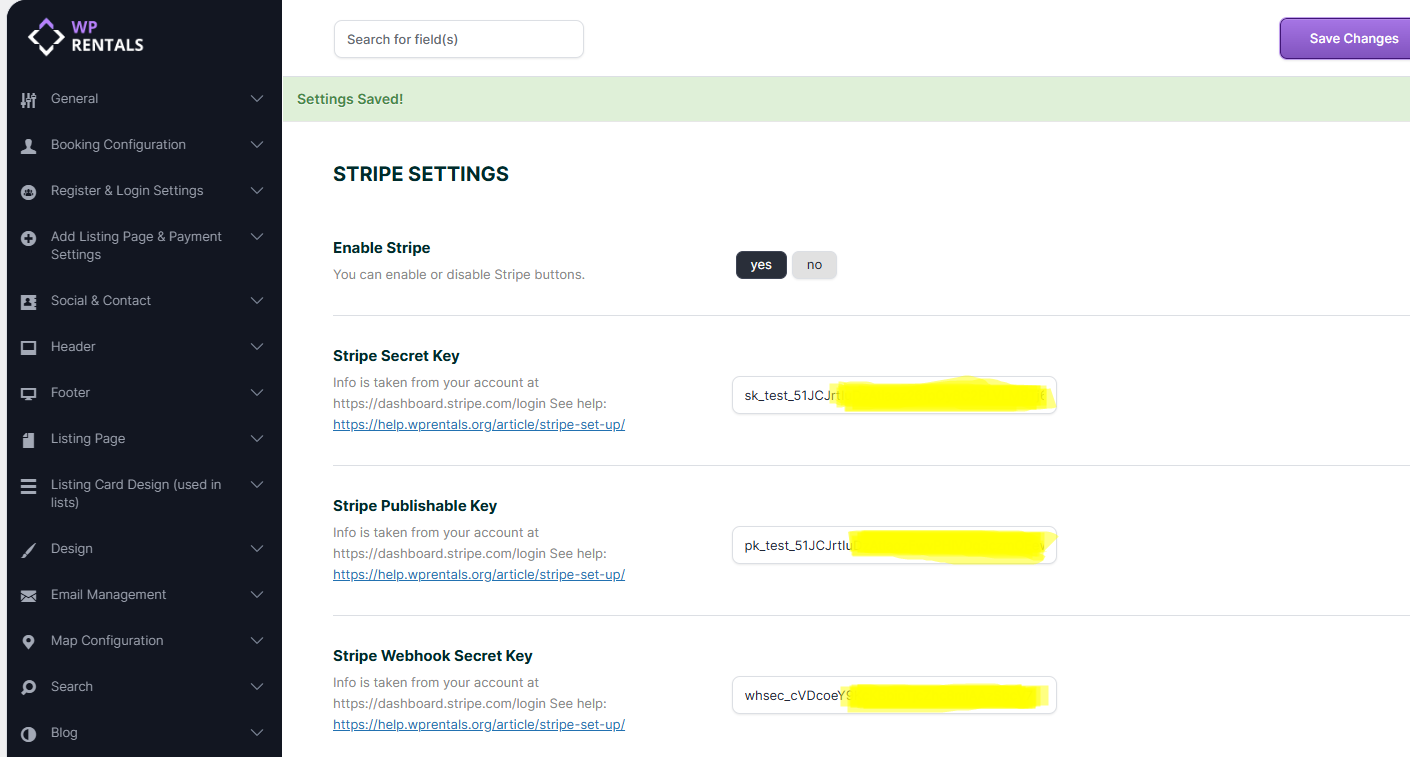
Step 5.2: Paste keys in WPRentals Theme Options
- Go to Theme Options → Add Listing Page & Payment Settings → Stripe Settings
- Paste the Publishable key and Secret key in the matching fields
- Paste the Webhook Secret (Signing secret) into the Stripe Webhook Secret Key field
How currency settings connect to Stripe
In Theme Options → Add Listing Page & Payment Settings → Payment Currency Settings, you select the currency used for payments on your website.
This currency must be supported by your payment processor:
- If you use Stripe, your selected currency must be supported by Stripe.
- If you use PayPal, your selected currency must be supported by PayPal.
That is why the currency dropdown in Theme Options includes only currencies that are accepted by Stripe and PayPal. If your currency is supported but missing from the list, open a ticket in our support system and we can review it for a future update.
Stripe and Membership Packages
If your site uses membership-based submission and you want users to pay memberships via Stripe, you must also create matching products in Stripe.
- In Stripe Dashboard go to Product Catalog
- Click + Add Product
- Create a product that matches your WPRentals membership package:
- Product name = membership name
- Price
- Billing interval (monthly, yearly, etc.)
- Currency (must match your site currency)
- After creating it, copy the Stripe Product ID
- In WordPress go to your membership package (edit), then paste the Stripe Product ID into the package settings
Troubleshooting
Stripe fatal error: missing server module
If you see an error similar to: Stripe needs the Multibyte String PHP extension, your server is missing the mbstring PHP extension.
- Solution: Ask your hosting provider to enable the Multibyte String (mbstring) PHP extension.
Webhook problems
- Make sure your webhook endpoint URL is the page that uses the Stripe Merchant Processor template.
- Make sure there is only one Stripe Processor page and no duplicates in Trash.
- Confirm you pasted the correct Webhook Secret for the mode you are using (Sandbox vs Live).
Sandbox works but Live does not
- Confirm your Stripe account is activated for Live payments.
- Confirm you switched WPRentals to Live mode and pasted Live keys (not test keys).
Need help?
If you need help with Stripe setup, open a ticket and include:
- WordPress version
- WPRentals theme version
- Whether you are using Sandbox or Live
- A screenshot of your Stripe Settings in Theme Options (hide keys if you want)
- The URL of your Stripe Processor page
Support portal: https://support.wpestate.org/