Overview
The WPRentals Tabs widget is an Elementor widget that lets you display content inside tabs.
You can use this widget to show simple text content or to display more complex Elementor templates inside each tab.
Before You Start
Before using the WPRentals Tabs widget, check the following:
- Elementor is installed and activated.
- The WPRentals Elementor Widgets plugin is installed and activated.
- The page you want to edit is created with Elementor.
- If you want to use templates inside the tabs, create or import those templates before assigning them to the widget.
Add the WPRentals Tabs Widget
Step 1: Edit the Page with Elementor
- Go to the page where you want to add the tabs.
- Click Edit with Elementor.
- Select the section where the tabs should appear, or create a new section.
Step 2: Add the Widget
- In the Elementor panel, search for WPRentals Tabs.
- Drag the WPRentals Tabs widget into the page section.

Customize the Tabs
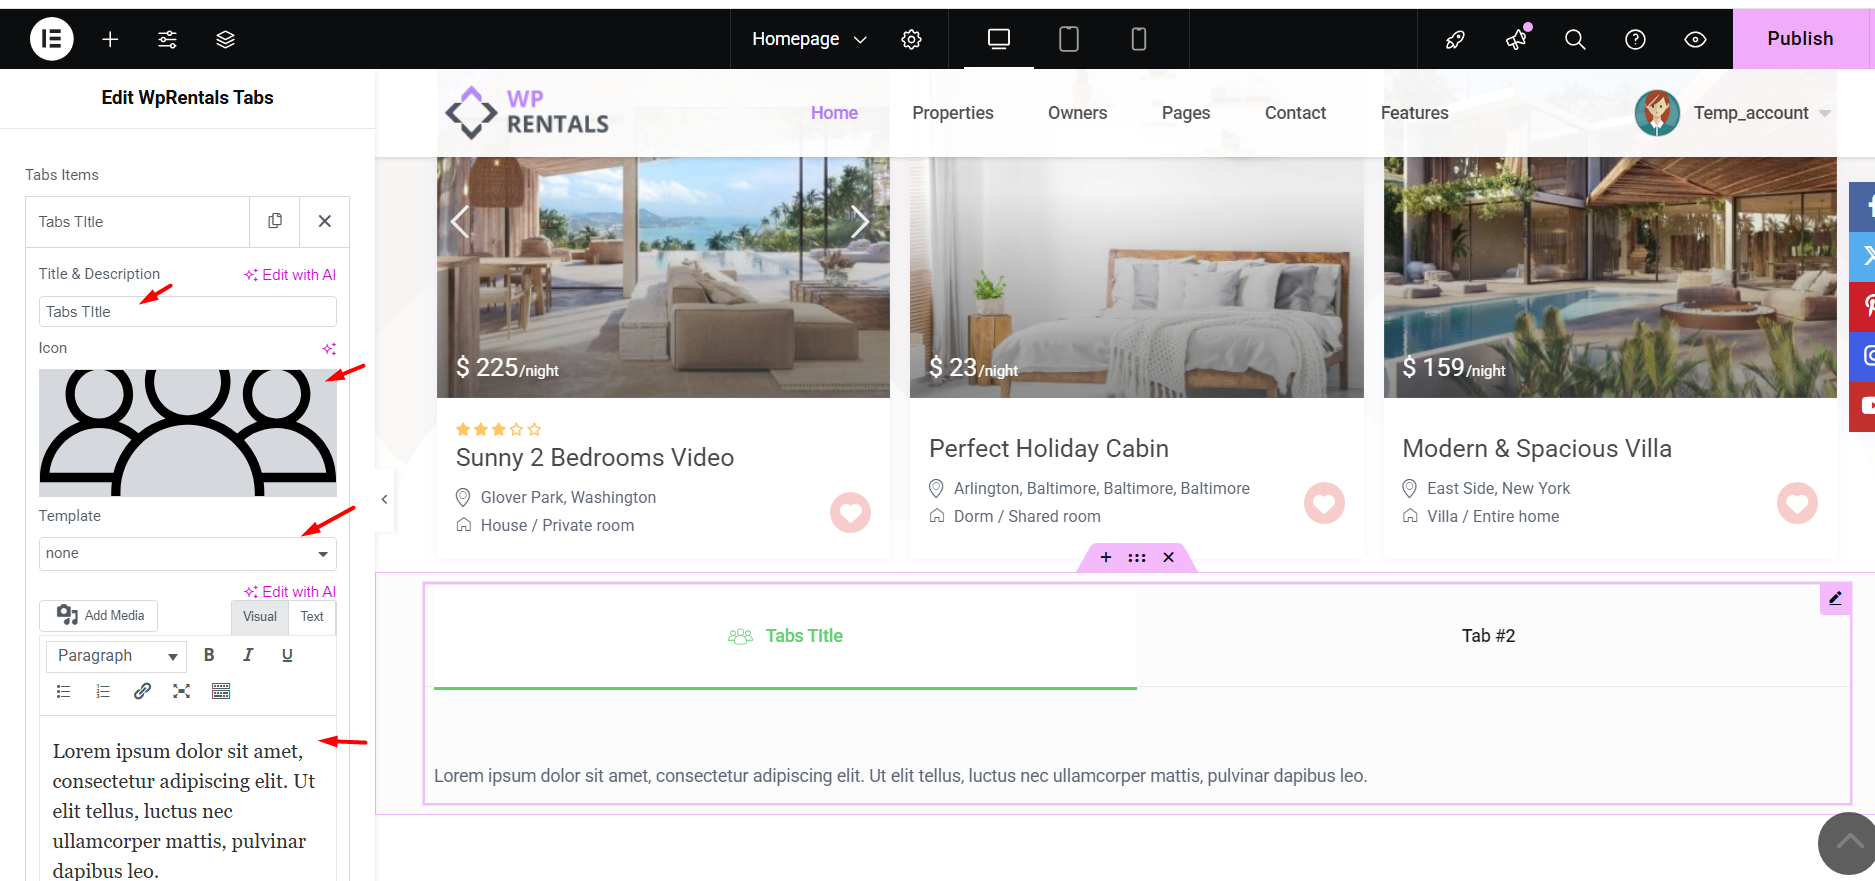
After adding the widget, open the widget settings from the Elementor left panel.
In the Tabs Items section, you can edit each tab.
For each tab, you can manage:
- Tab Title – the title shown in the tab navigation.
- Icon – an icon or image shown next to the tab title.
- Template – an Elementor template used as the tab content.
- Text Content – simple text content added directly inside the widget.
Choose Between Text Content and Template Content
The WPRentals Tabs widget can display two types of content.
Option 1: Text Content
Use text content when the tab needs only a short paragraph or simple explanation.
For example, you can use text content for:
- Short descriptions
- Basic instructions
- Simple information sections
Option 2: Elementor Template Content
Use a template when the tab needs a more advanced design.
For example, use an Elementor template if the tab content needs:
- Columns
- Images
- Buttons
- Icons
- Listing widgets
- Custom sections
- More complex spacing or responsive layout
Create an Elementor Template for a Tab
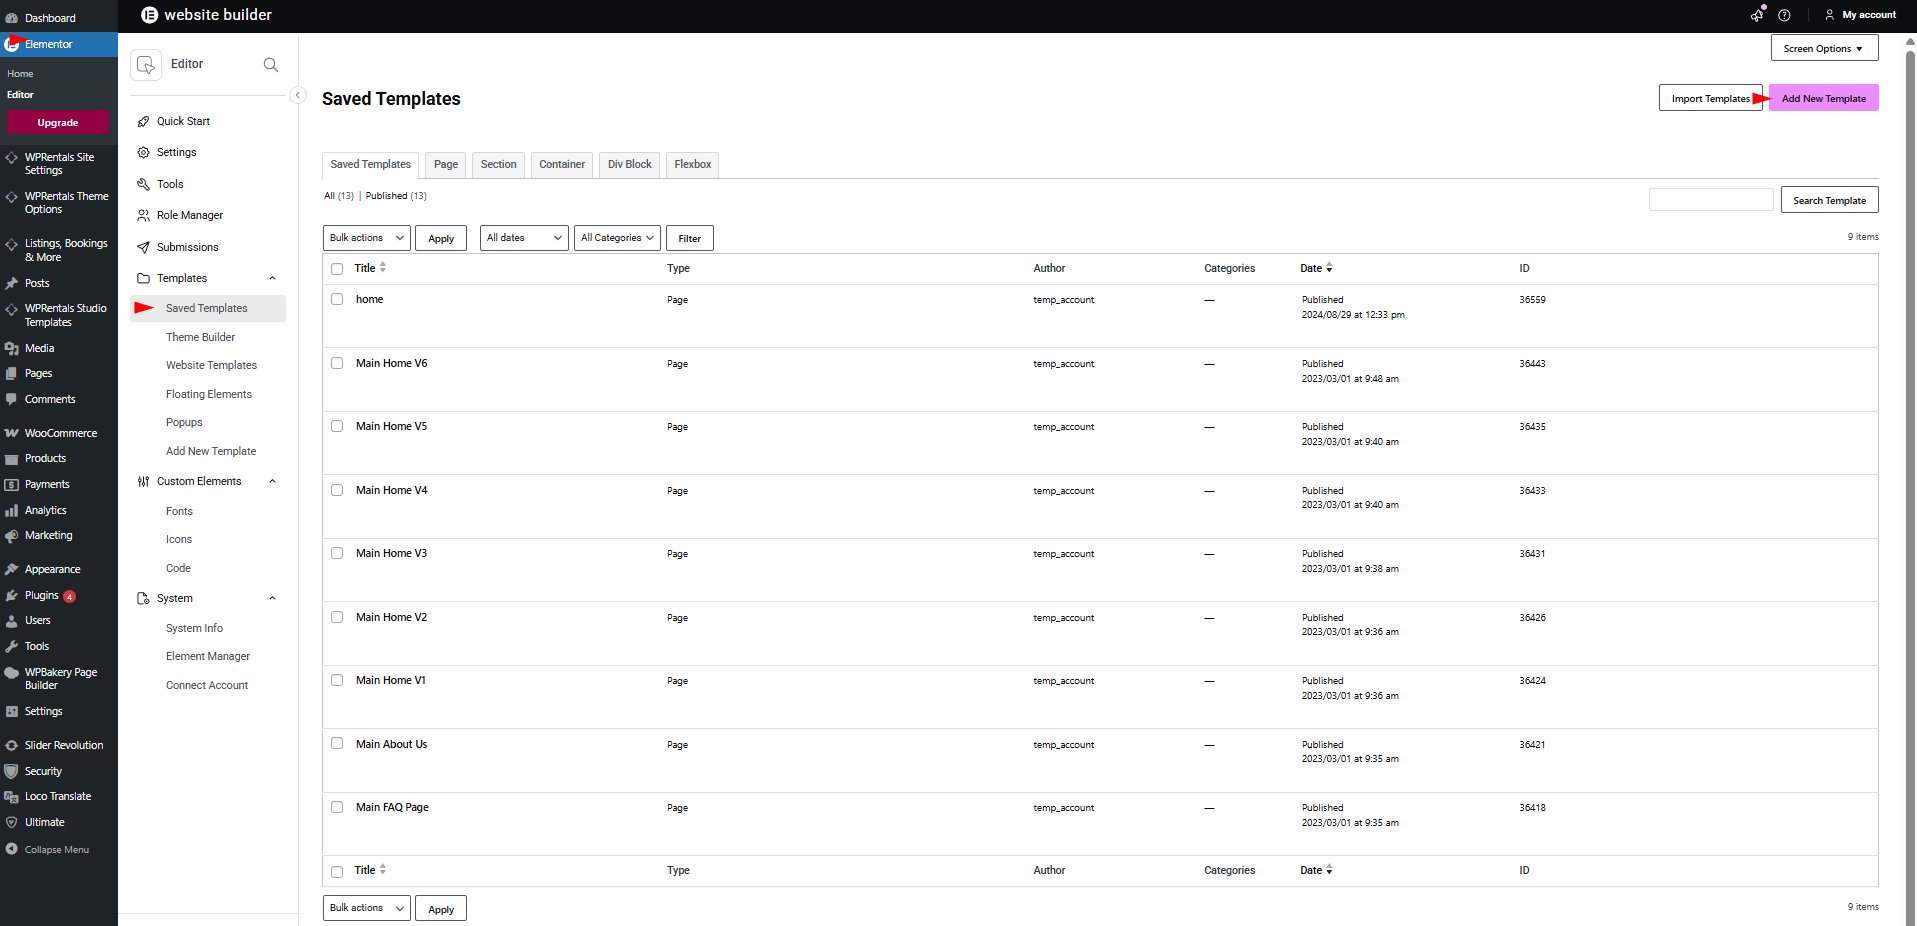
To create a template that can be used inside a tab, go to:
Templates > Saved Templates
Then follow these steps:
- Click Add New Template.
- Select the template type you want to create.
- Add a template name.
- Create the design with Elementor.
- Click Publish or Update.
After the template is saved, return to the page where you added the WPRentals Tabs widget and select the template inside the tab settings.
Import Demo Templates for Tabs
You can also import ready-made templates and use them as tab content.
To import a template:
- Go to Templates > Saved Templates.
- Click Import Templates.
- Select the template file you want to import.
- Import the template.
- Open the imported template and edit it with Elementor if needed.
- Save the template.
After the template is imported and saved, you can assign it to a tab from the WPRentals Tabs widget settings.
Assign a Template to a Tab
After you create or import a template, assign it to a tab.
- Edit the page with Elementor.
- Click the WPRentals Tabs widget.
- Open the tab item you want to edit.
- Find the Template option.
- Select the saved Elementor template you want to show inside that tab.
- Repeat the same steps for the other tabs, if needed.
- Click Update.
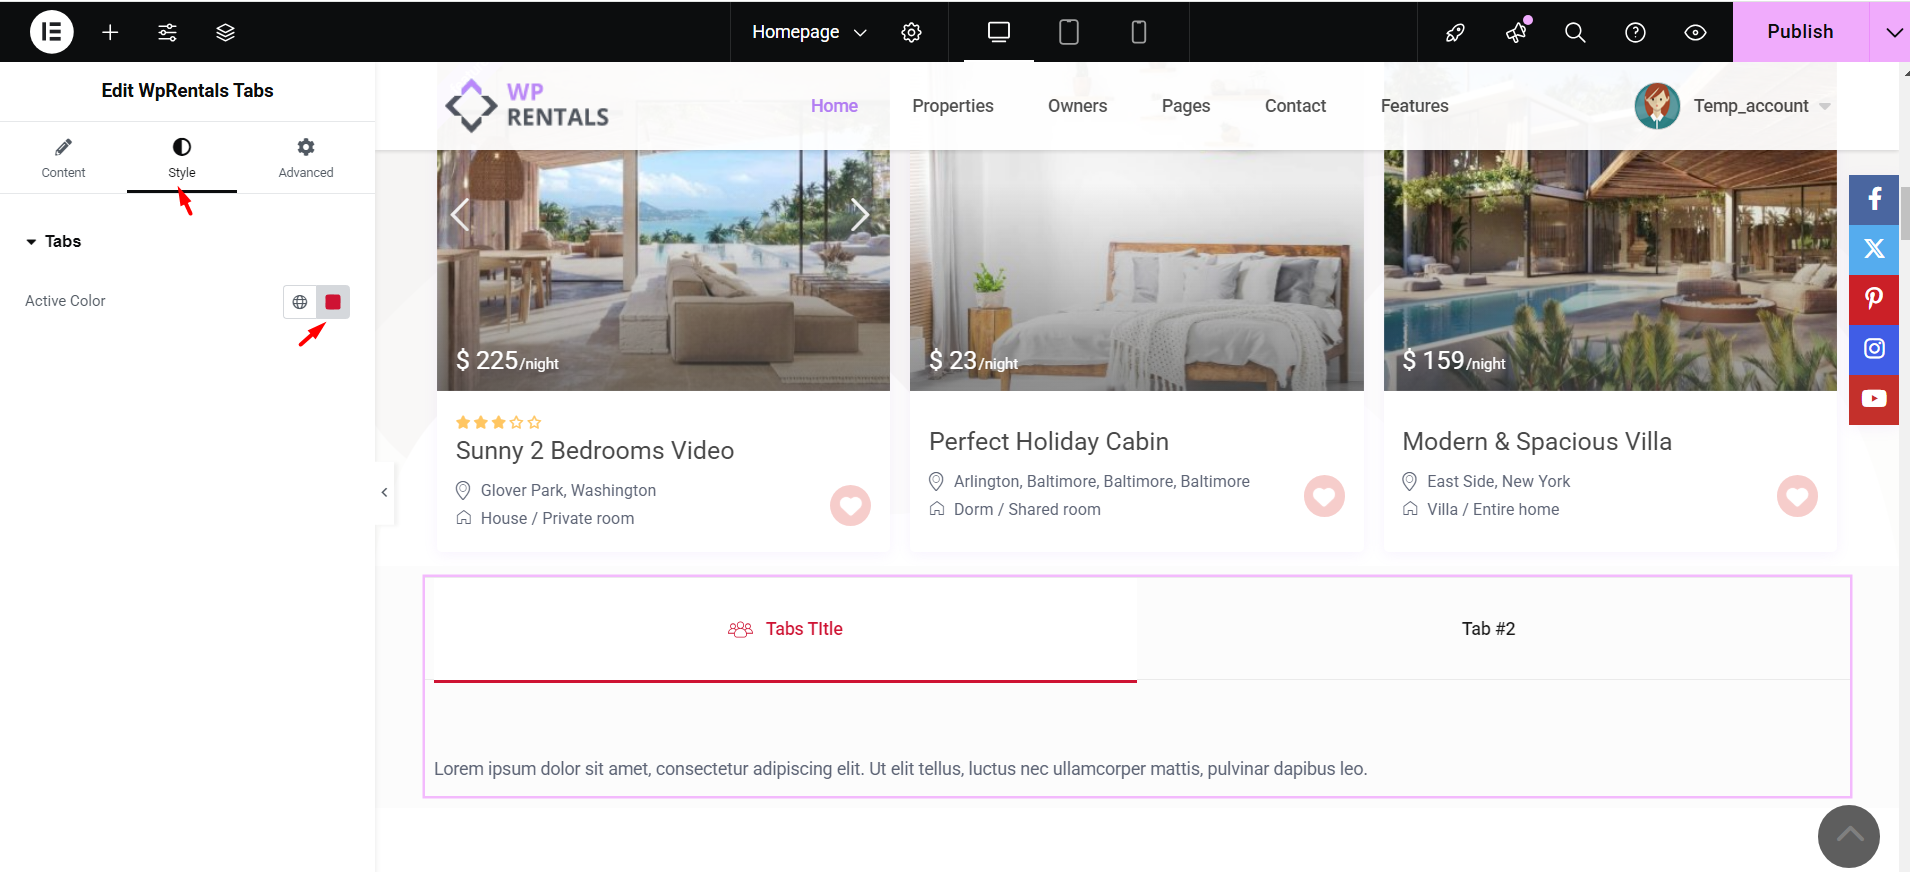
Style the Tabs Widget
The tabs design is managed from the Elementor widget settings.
Change the Active Tab Color
- Click the WPRentals Tabs widget.
- Open the Style tab.
- Change the Active Color option.
Adjust Spacing and Margins
To adjust spacing around the widget:
- Open the Advanced tab.
- Change the Margin or Padding values.
- Check the layout on desktop, tablet, and mobile.
Save and Test the Tabs
After editing the widget, test the tabs on the front end.
- Click Update in Elementor.
- Open the page on the front end.
- Click each tab.
- Check that each tab opens the correct text or template.
- Check that the layout works on desktop, tablet, and mobile.
Important Notes
- The WPRentals Tabs widget is an Elementor widget.
- The widget is available when Elementor and the WPRentals Elementor Widgets plugin are active.
- Tabs can display simple text or saved Elementor templates.
- Use text content for simple tabs.
- Use templates when a tab needs a custom layout or advanced design.
- Templates are created or imported from Templates > Saved Templates.
- After creating or importing a template, assign it from the Template option inside each tab item.
- Imported demo templates should be edited before using them live.
- If a template does not show in the tab, check that it is saved and published.
- If changes do not appear, clear plugin cache, server cache, CDN cache, and browser cache, then test again.