In WPRentals, the recommended way to add Owners is through the front-end registration form.
When Owners register from the front end, their Owner profile and User account are created and linked automatically.
However, if you need to create an Owner manually from the WordPress admin panel, there are a few extra steps required.
You must create both the Owner profile and the User account, then manually sync them.
Step 1: Create the Owner profile
From the WordPress admin panel, go to:
Owners → Add New.
Fill in the Owner profile details such as name, description, contact details, and any additional fields required by your site.
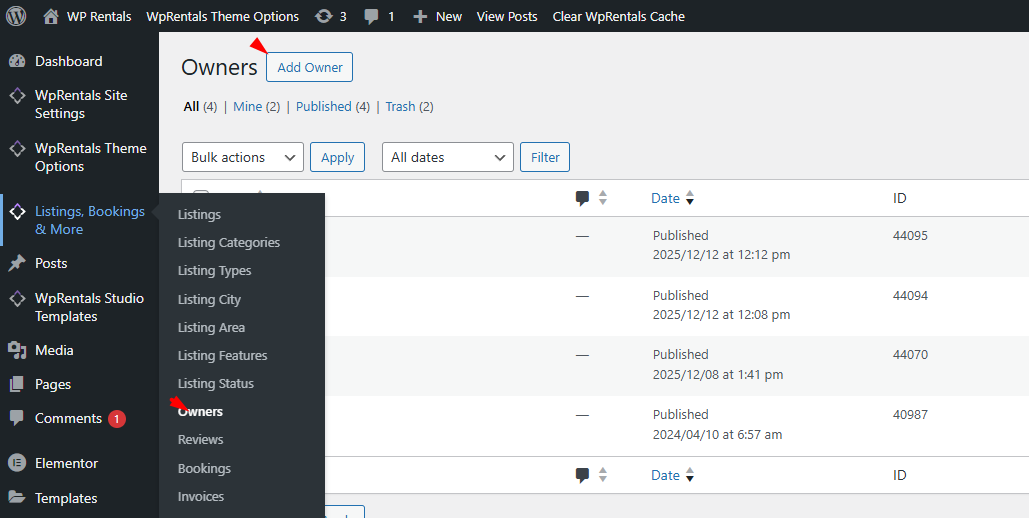
Publish the Owner profile.
Step 2: Create the User account
Next, create the WordPress user account that will be linked to this Owner.
Go to:
Users → Add New.
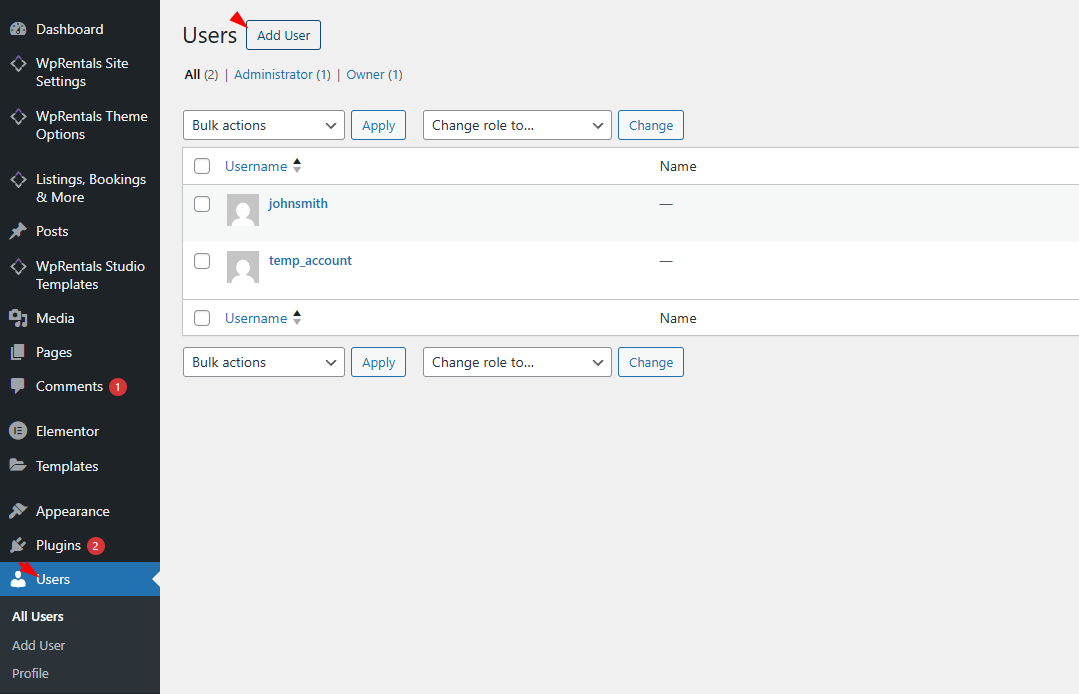
Enter the username, email address, and password for the Owner.
Step 3: Set the User role and User type
When creating or editing the user, make sure to set the correct role and user type.
User Role:
Select the appropriate role for Owners (as required by your WPRentals setup).
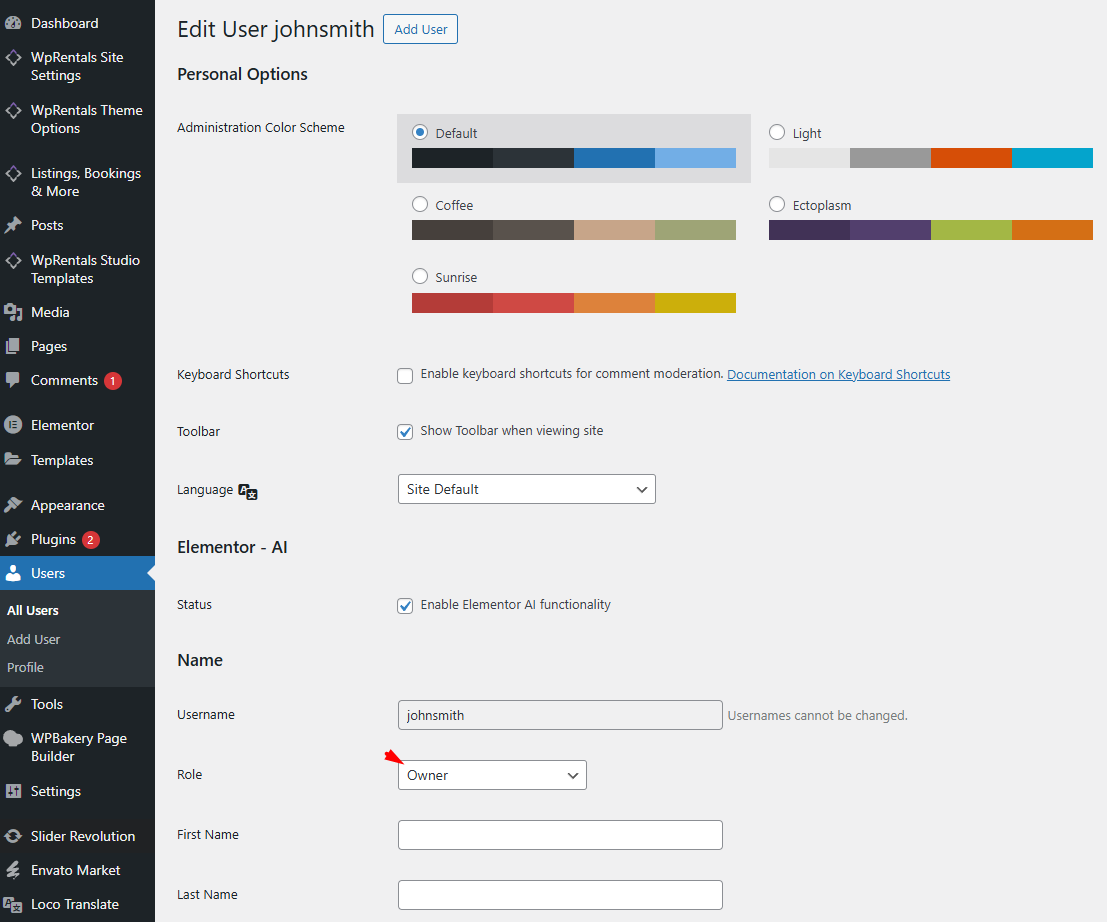
User Type:
Set the User Type to Owner.
Save the user account.
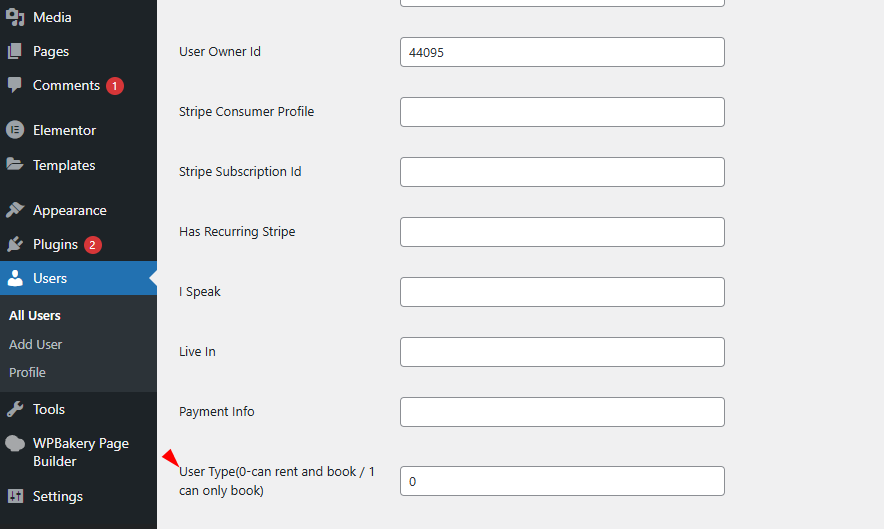
Step 4: Sync the Owner profile with the User account
To complete the setup, the Owner profile and User account must be linked to each other.
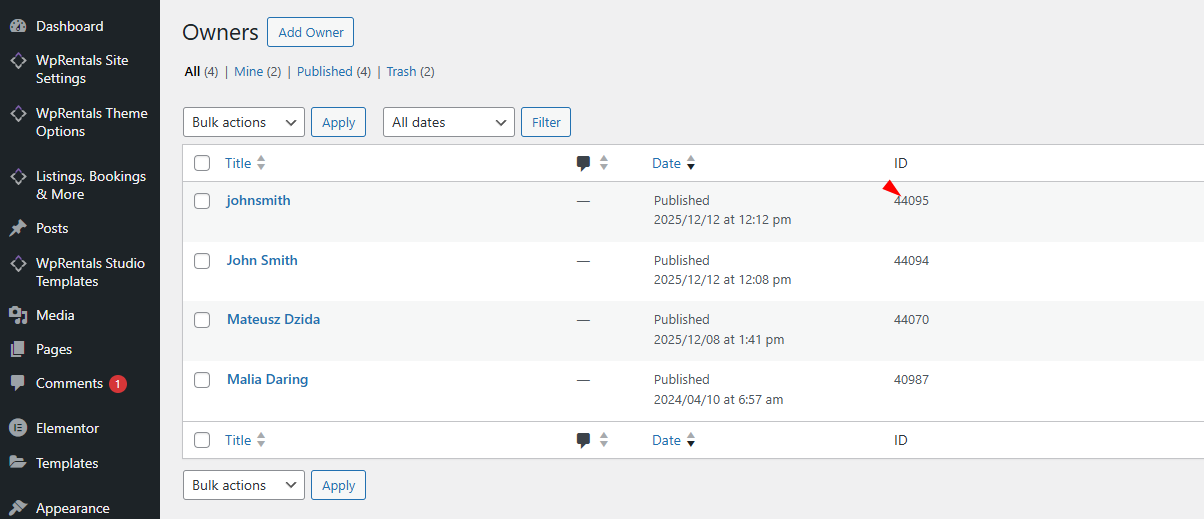
1. Copy the Owner ID
Edit the Owner profile and copy the Owner ID.
2. Paste the Owner ID into the User account
Edit the User account and paste the Owner ID in the corresponding Owner ID field.

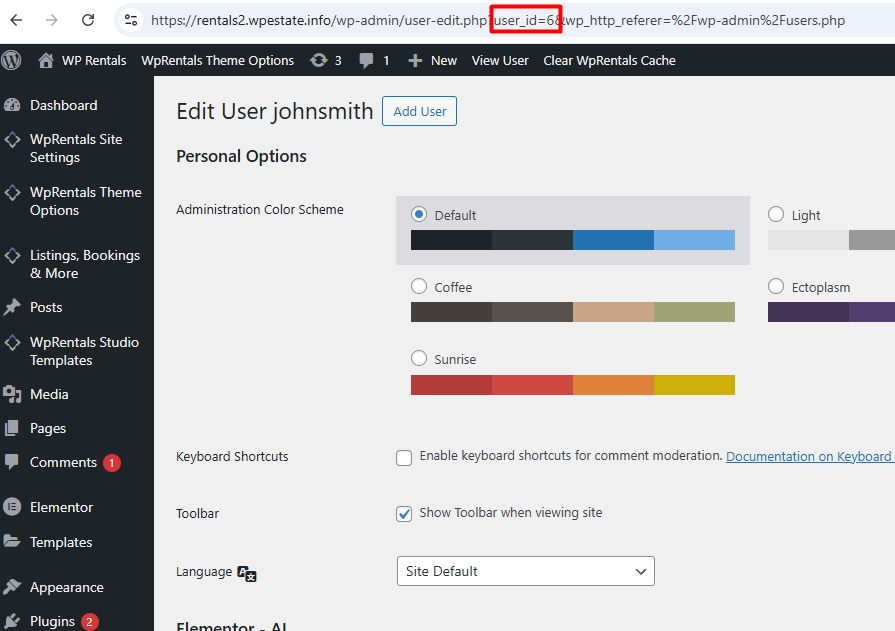
3. Copy the User ID
From the User account screen, copy the User ID.
4. Paste the User ID into the Owner profile
Edit the Owner profile and paste the User ID into the User ID field.
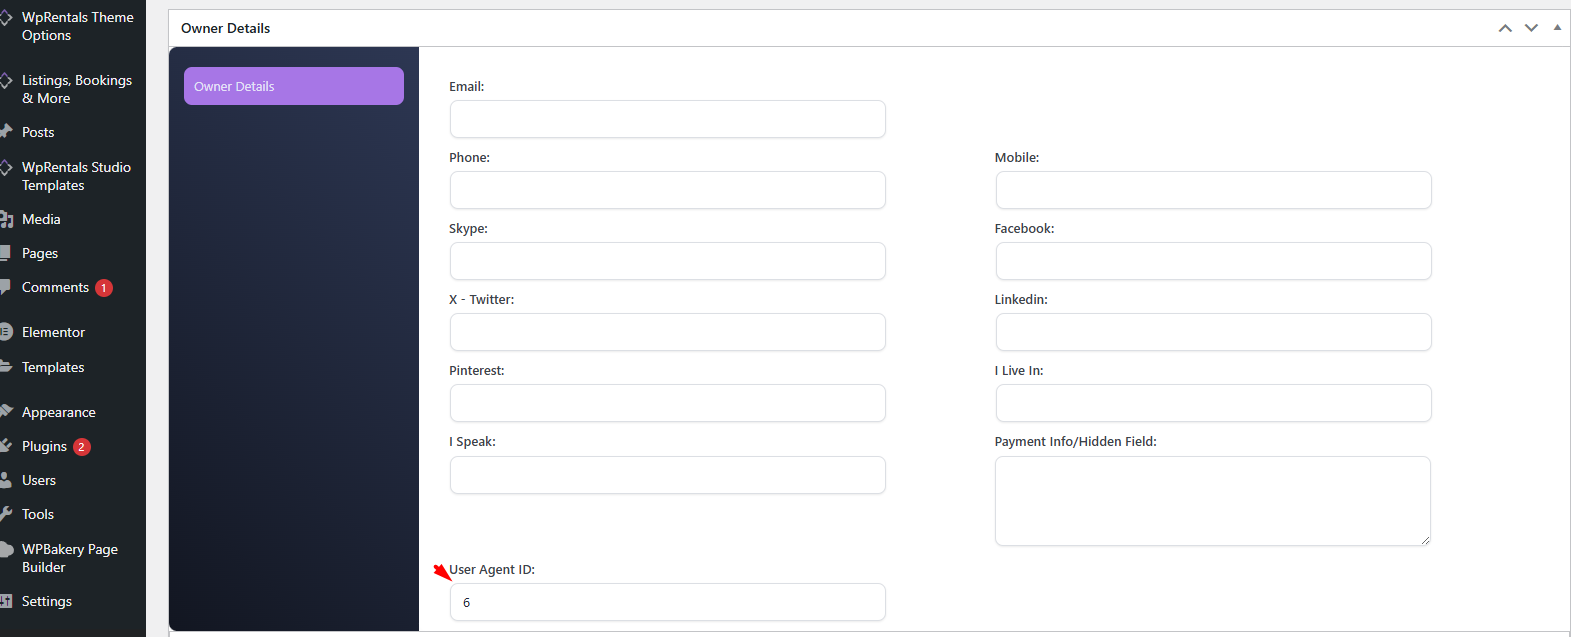
Both IDs must be set correctly. If the Owner profile and User account are not synced, the Owner will not be able to manage listings correctly from the dashboard.