WPRentals v2.7+ supports Stripe SCA (Strong Customer Authentication), required in Europe since WPRentals version 2.7 (2019).
![]()

Can you use Stripe?
- Supported currencies: Check here
- Available countries: Check here
Step 1: Set up the Stripe Processor page
WPRentals uses a dedicated WordPress page with a special template to handle Stripe payment processing and payment confirmations.
If you imported demo content, this page is usually created automatically.
- Go to Pages → Add New
- Set the page template to Stripe Merchant Processor
- Important: Only one page should use this template. Delete any duplicates, including from Trash.
- Copy the URL of this page. You will use it as the webhook endpoint in Stripe.

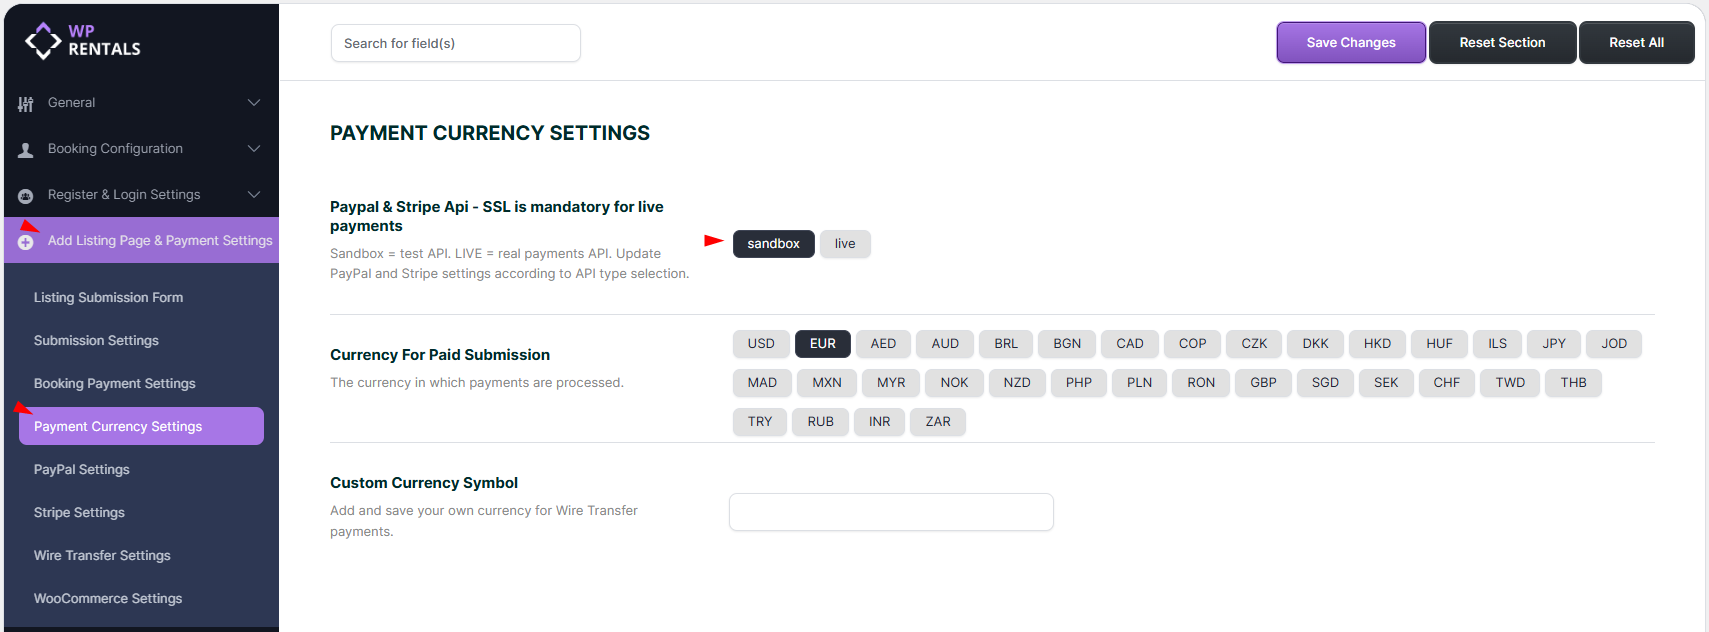
Step 2: Choose your Stripe environment
- Sandbox – for testing
- Live – for real payments
- Important: API keys and webhook secrets are different for Sandbox and Live. Always paste the correct keys for the selected mode.
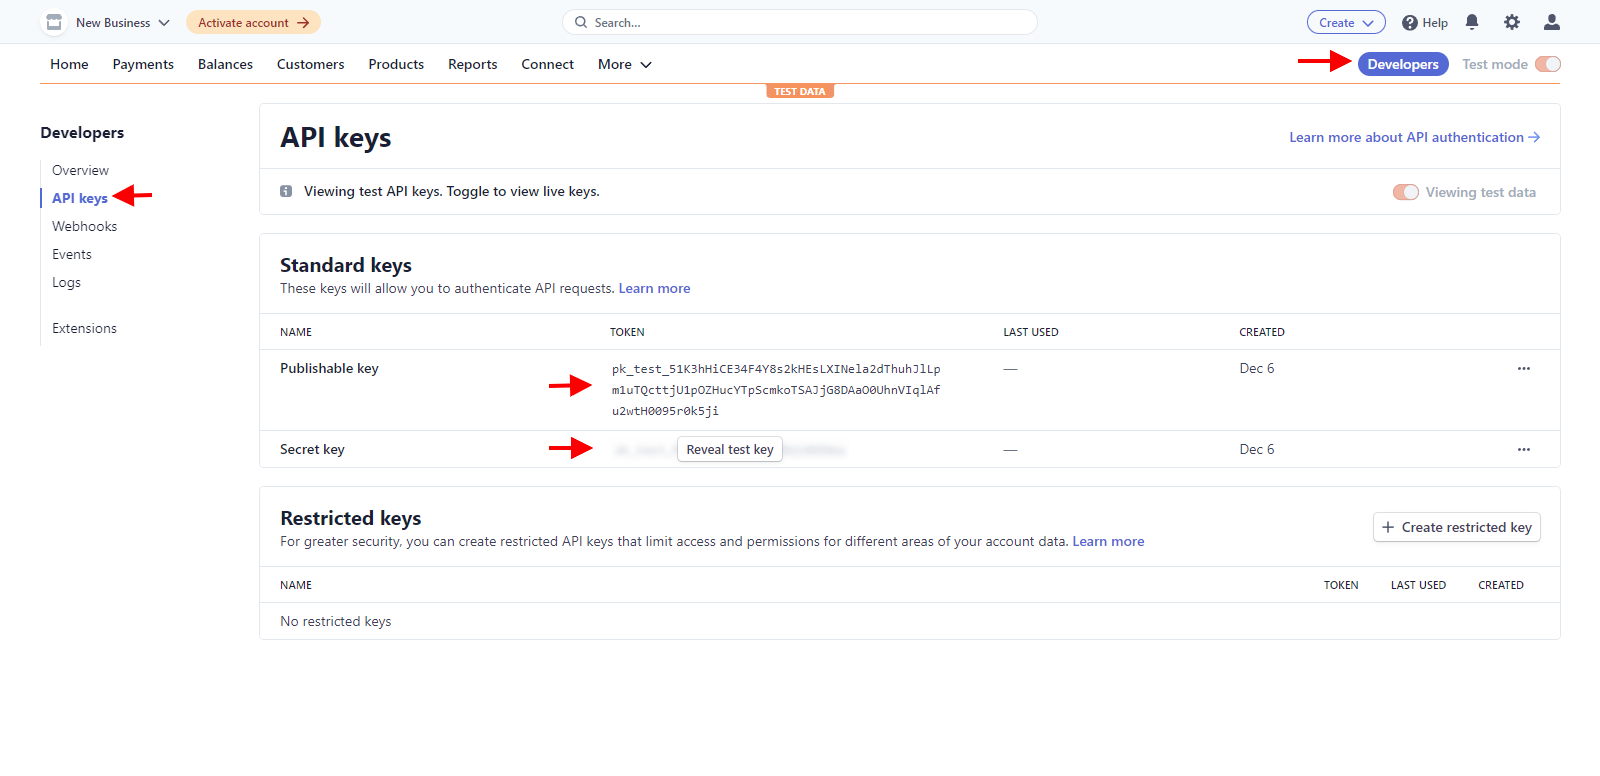
Step 3: Create Stripe keys and webhook
Create and activate your Stripe account
- Create an account at stripe.com
- For Live payments, complete Stripe onboarding so your account can accept real payments.
- For Sandbox, test keys are available automatically.
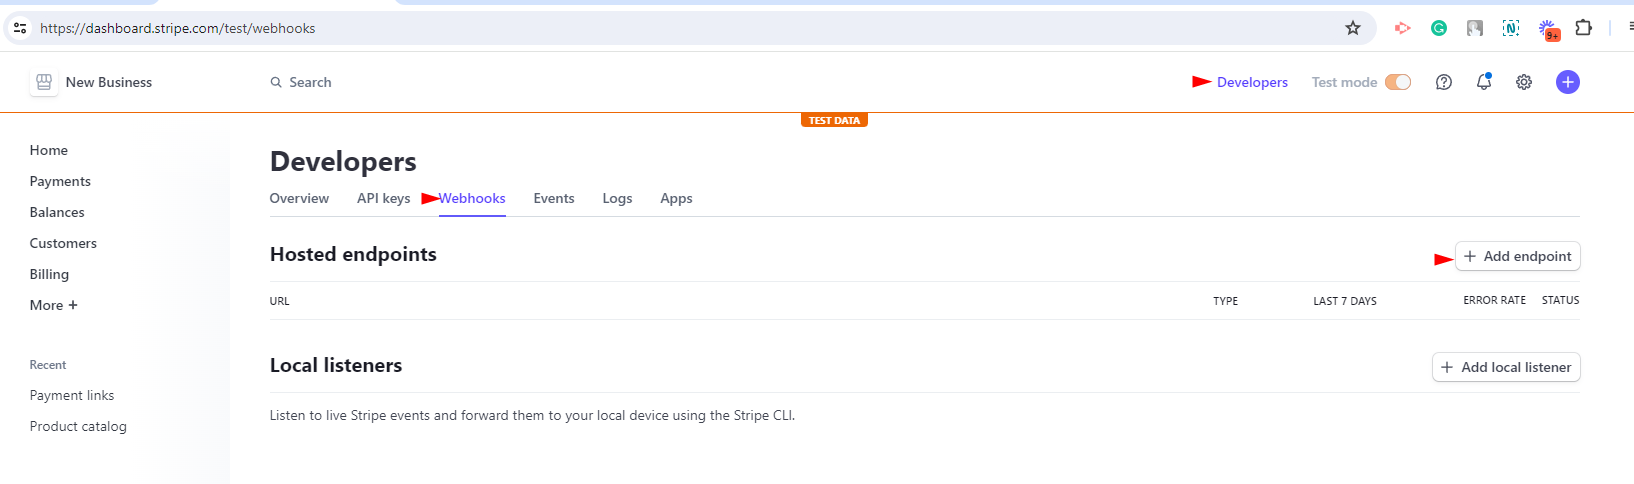
Define the webhook in Stripe
The webhook allows Stripe to notify your website about payment events. WPRentals uses this to validate and confirm transactions.
- Go to Stripe Dashboard → Developers → Webhooks
- Click + Add endpoint or + Add destination
- For Endpoint URL, paste the URL of your Stripe Merchant Processor page

- Select Receive all events
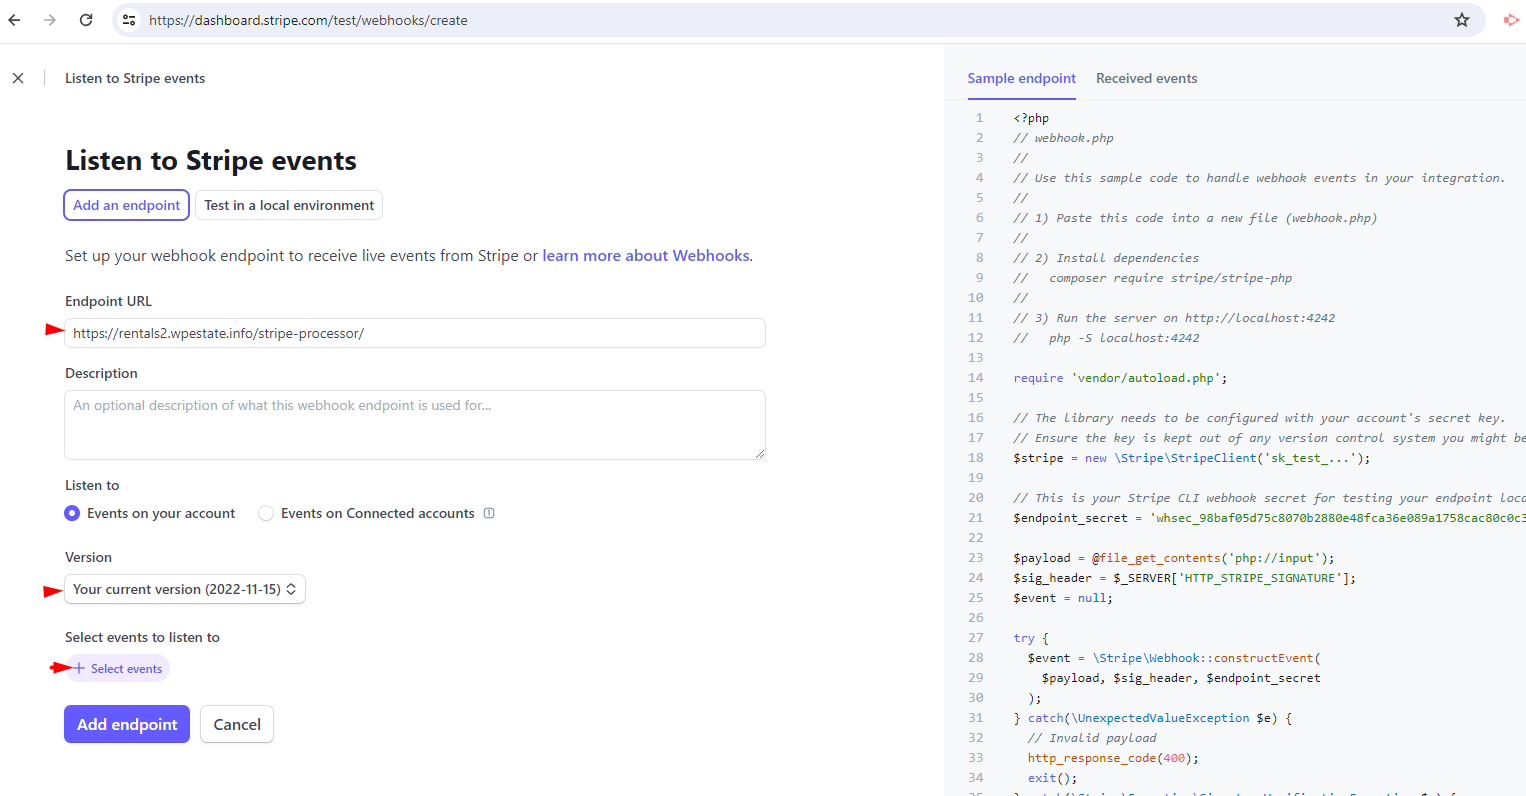
- Save the endpoint
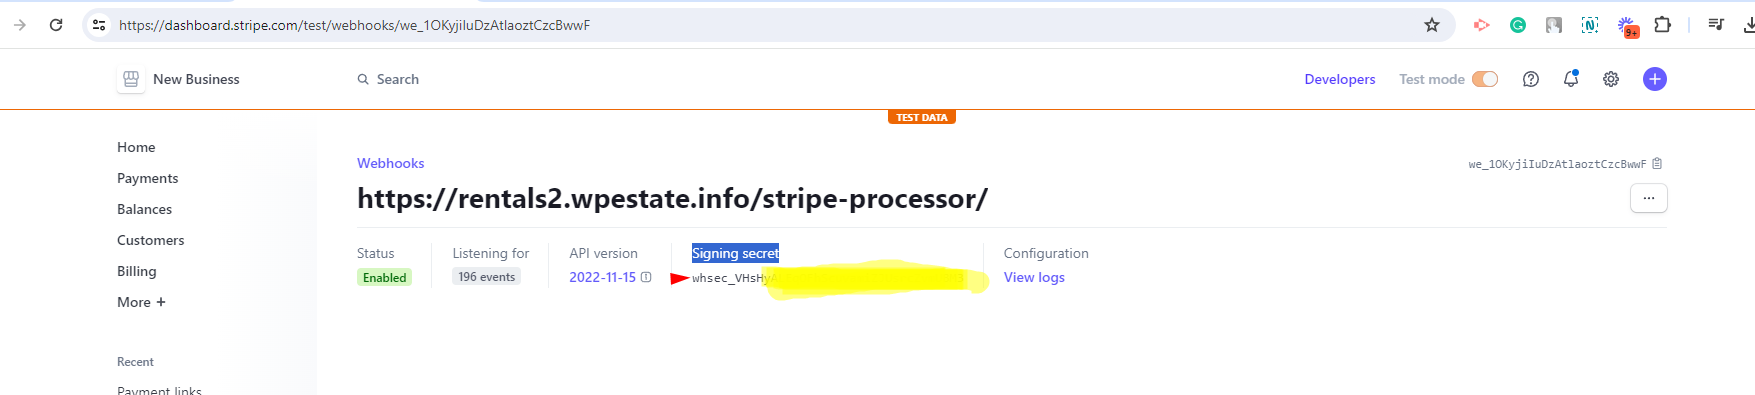
- Copy the Signing secret, also called the Webhook Secret Key
- Paste the webhook secret into: Theme Options → Add Listing Page & Payment Settings → Stripe Settings → Stripe Webhook Secret Key
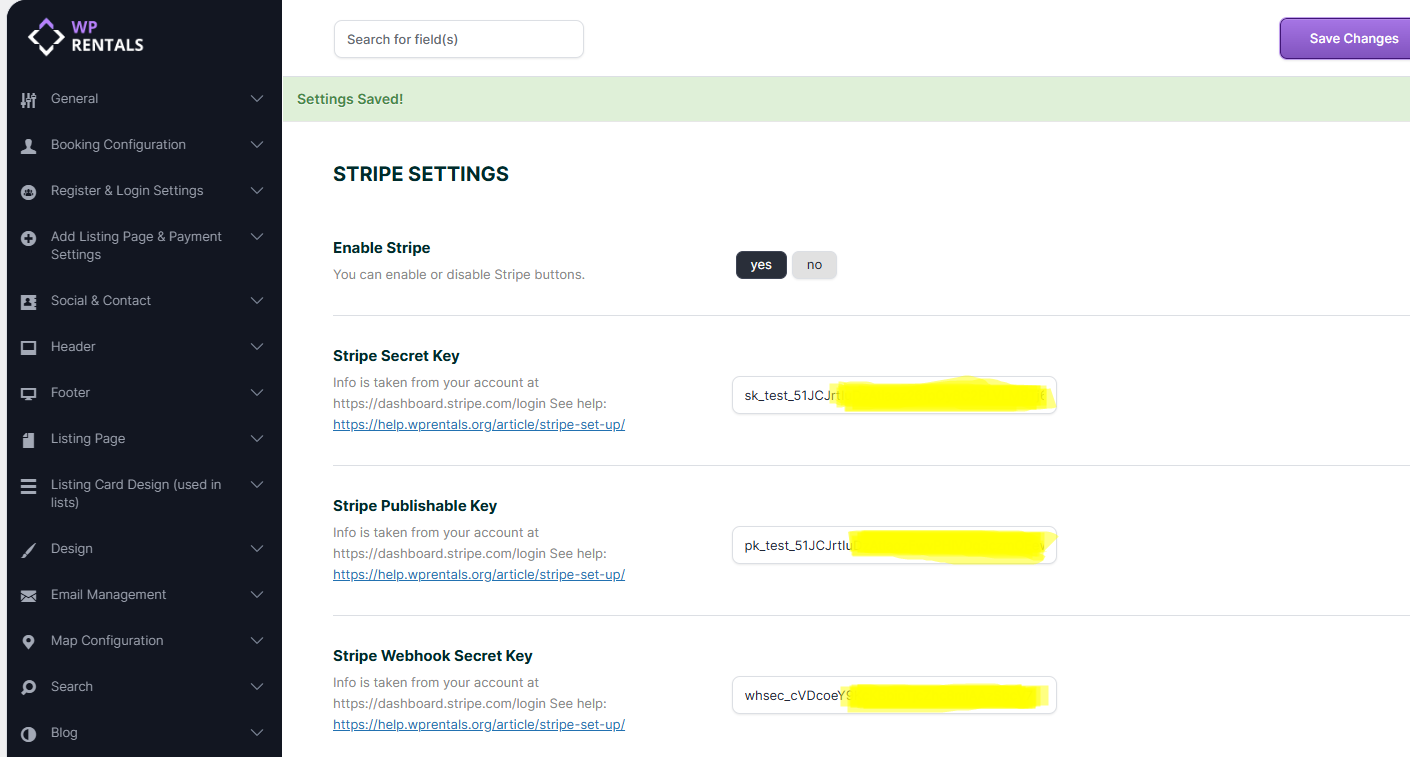
Step 4: Enter API credentials in WPRentals
- Go to Theme Options → Add Listing Page & Payment Settings → Stripe Settings
- Paste the Stripe Publishable Key and Stripe Secret Key
- Make sure the keys match the selected mode, either Sandbox or Live
Stripe and membership-based submission
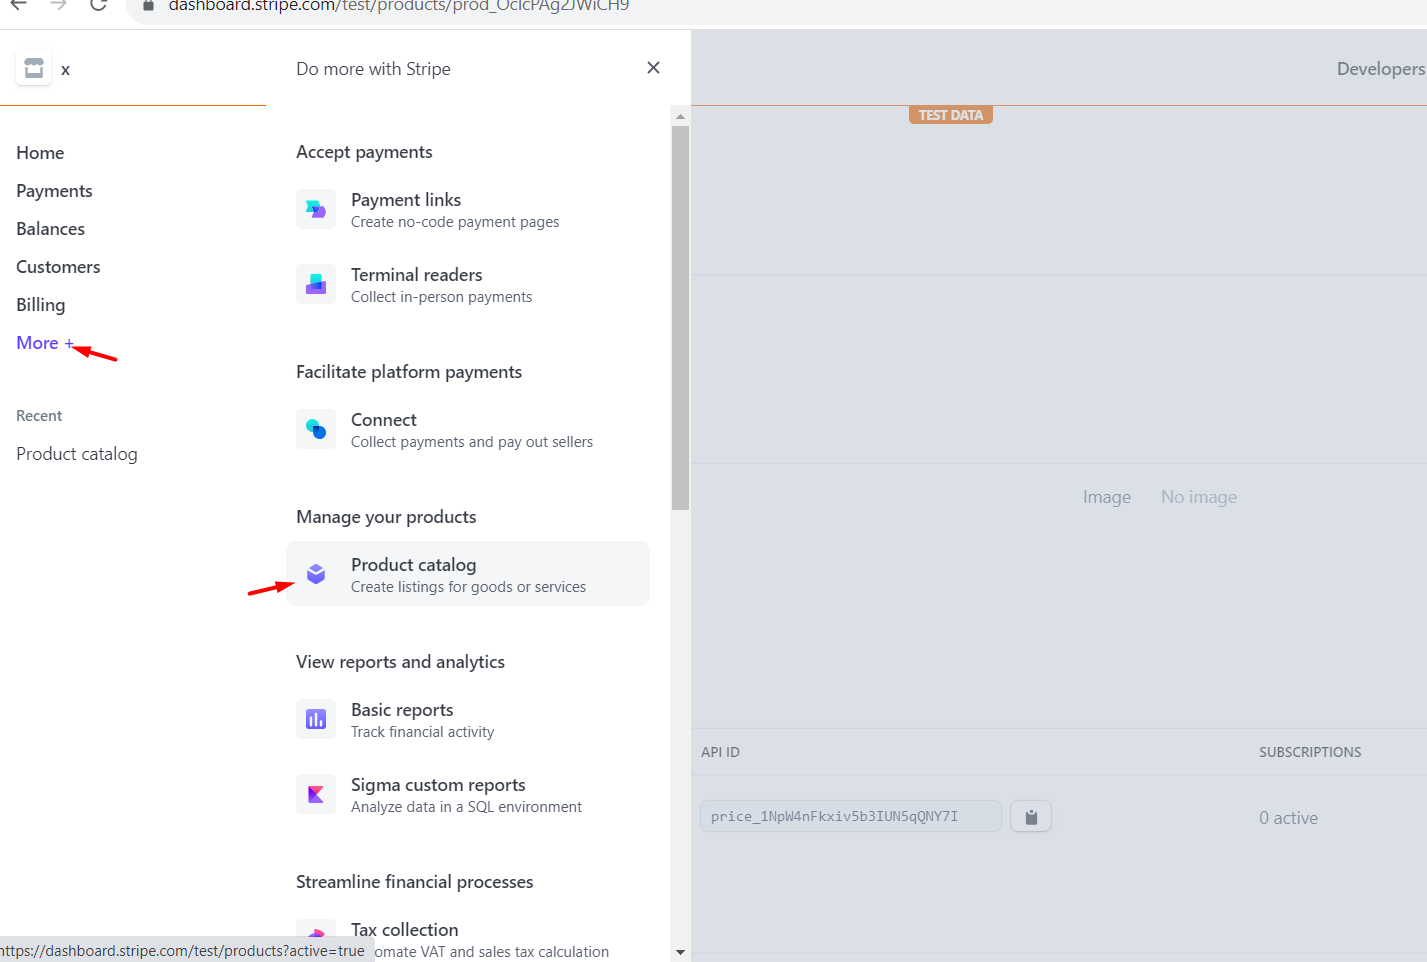
If you use membership-based submission, you must also create matching products in Stripe.
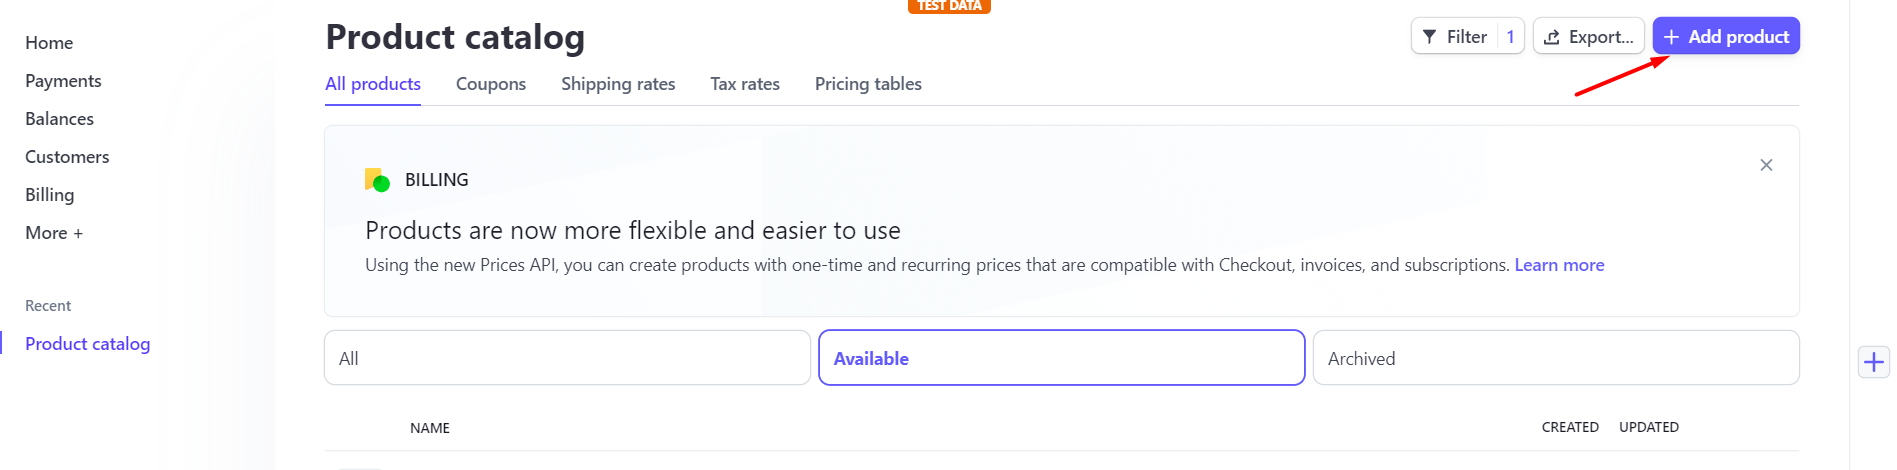
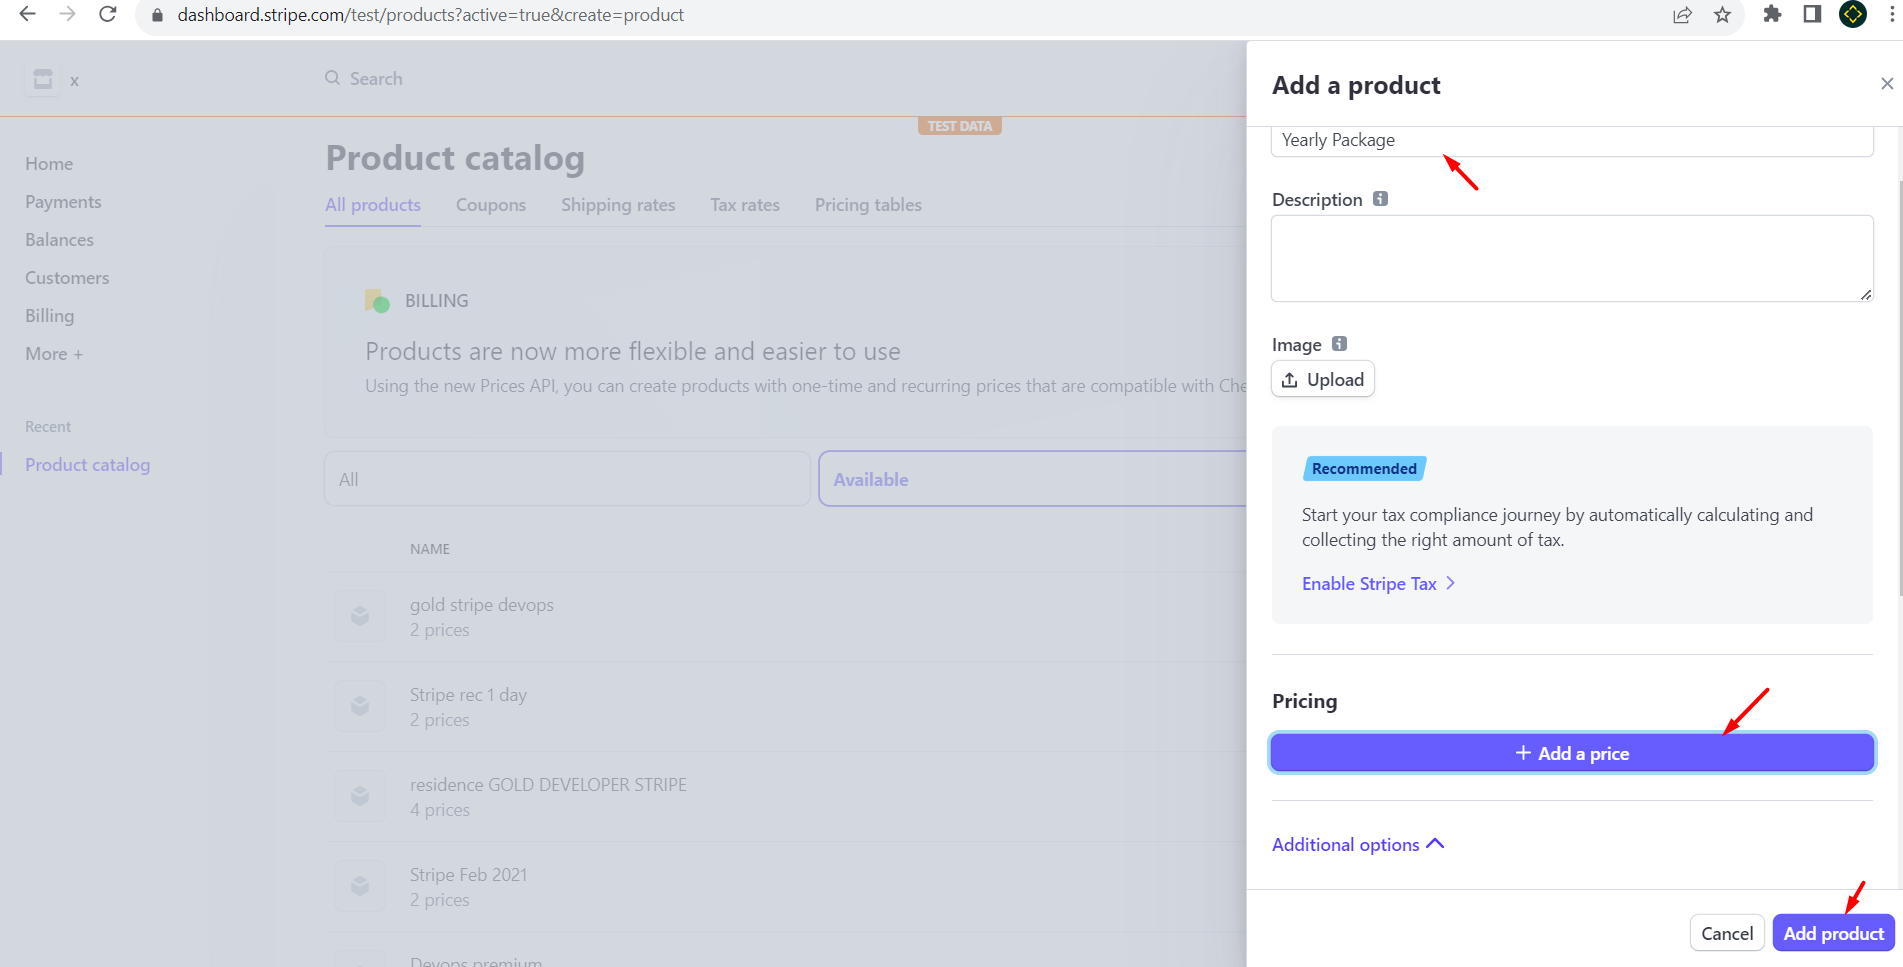
- Go to Stripe → Product Catalog
- Click + Add Product
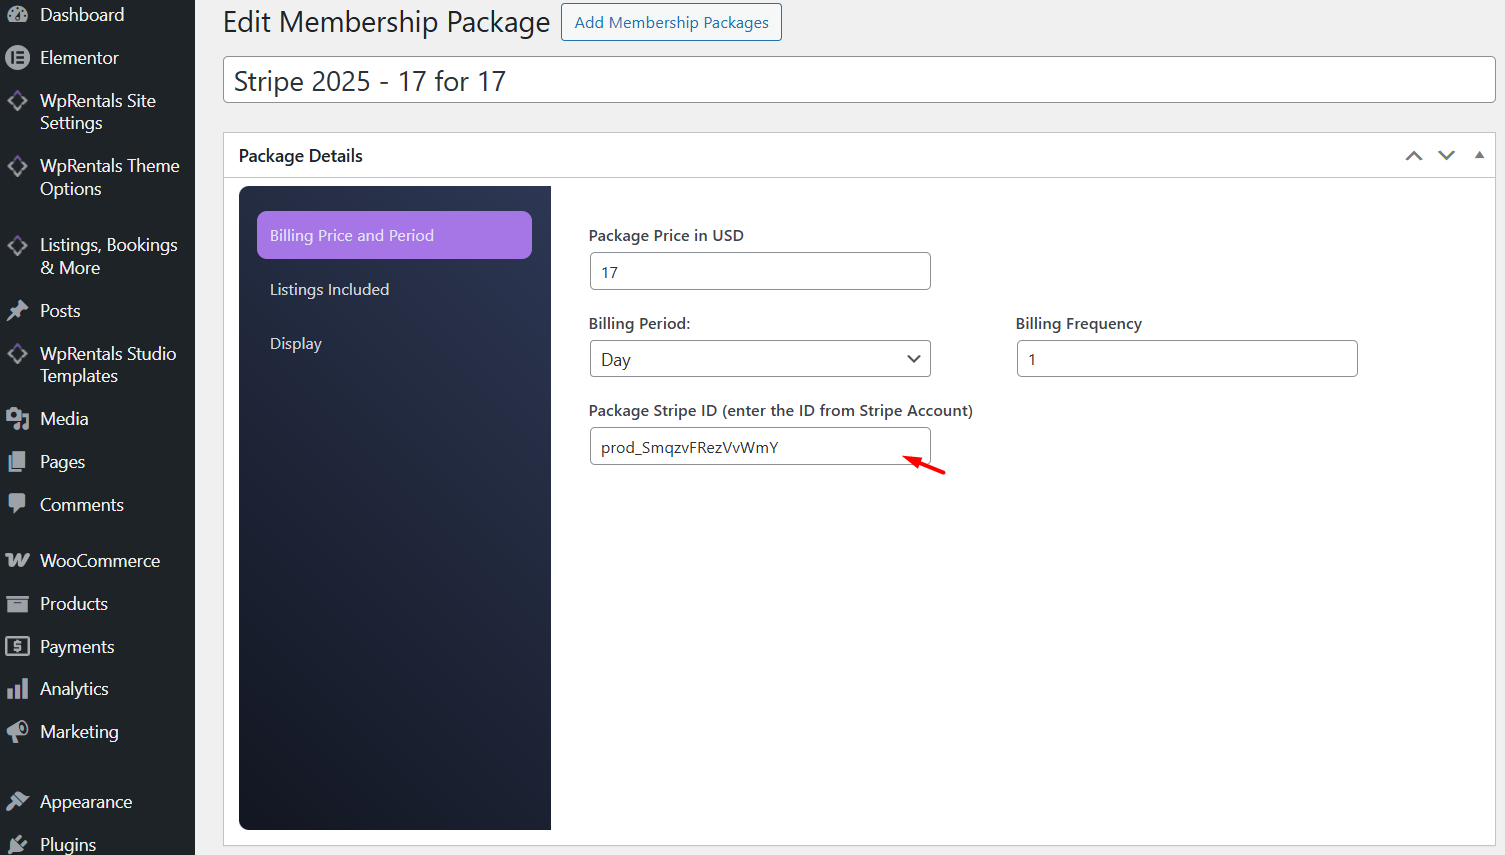
Match the WPRentals membership package:
- Product name = Membership name
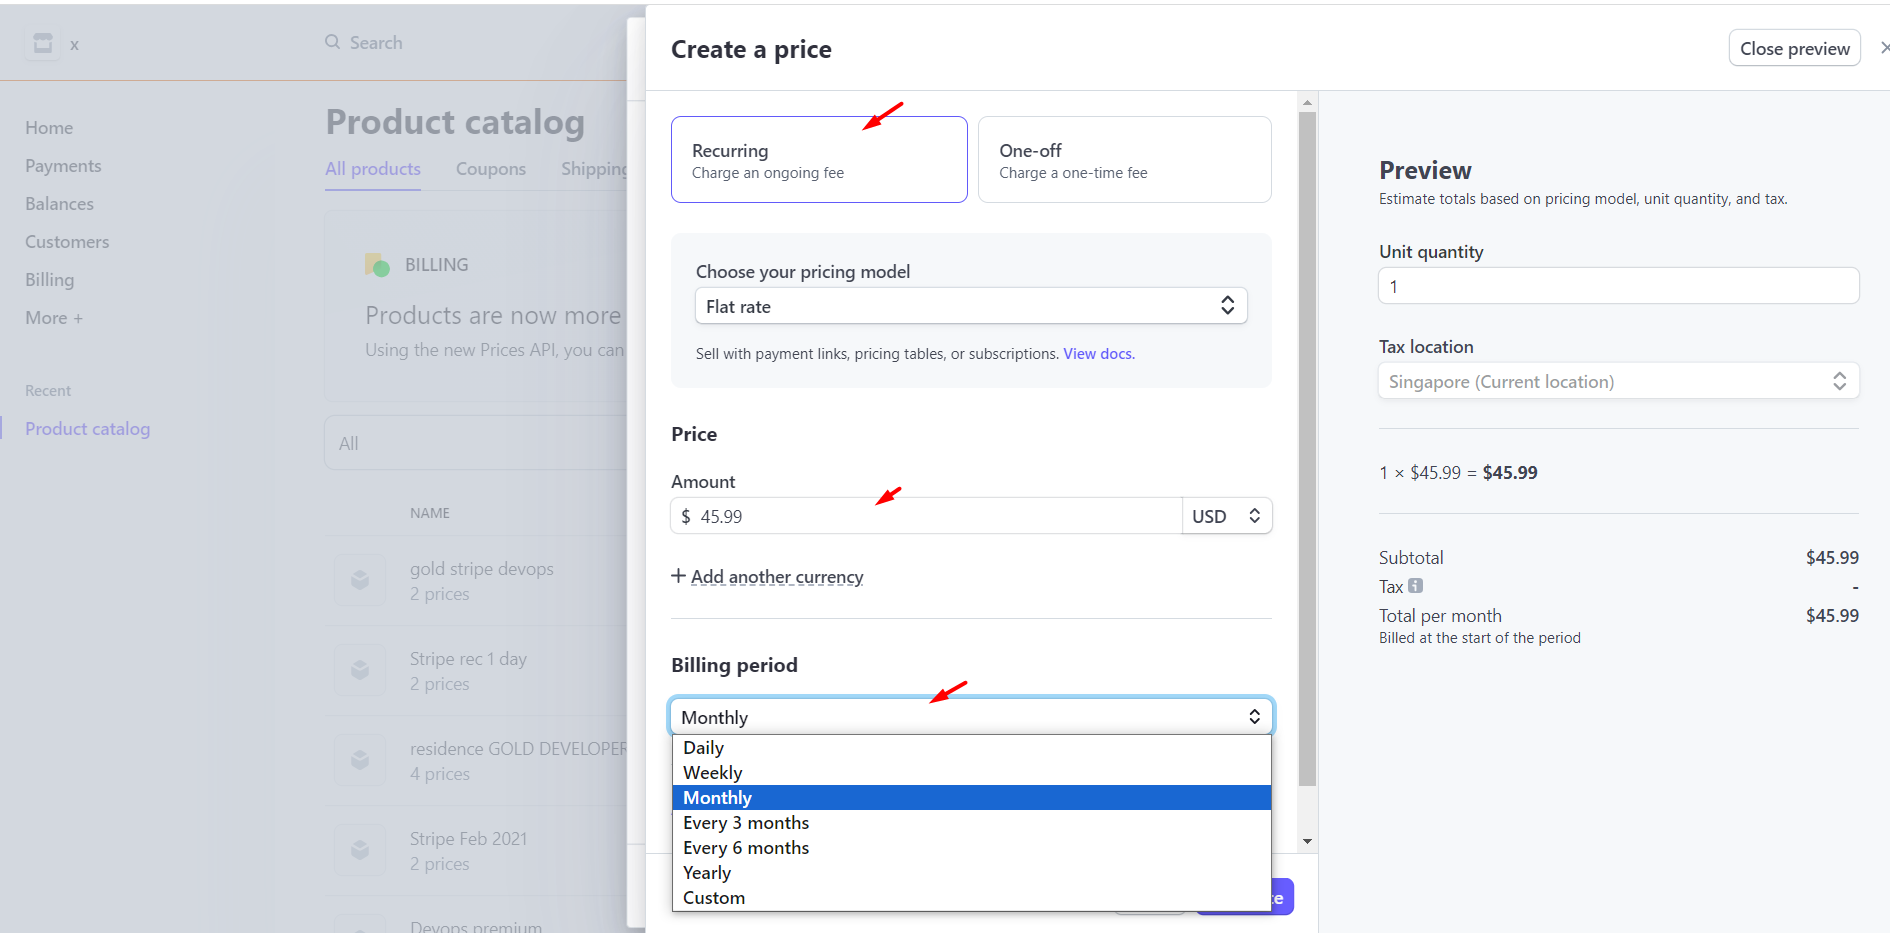
- Price
- Billing interval, such as monthly, yearly, etc.
- Currency, which must match your site currency
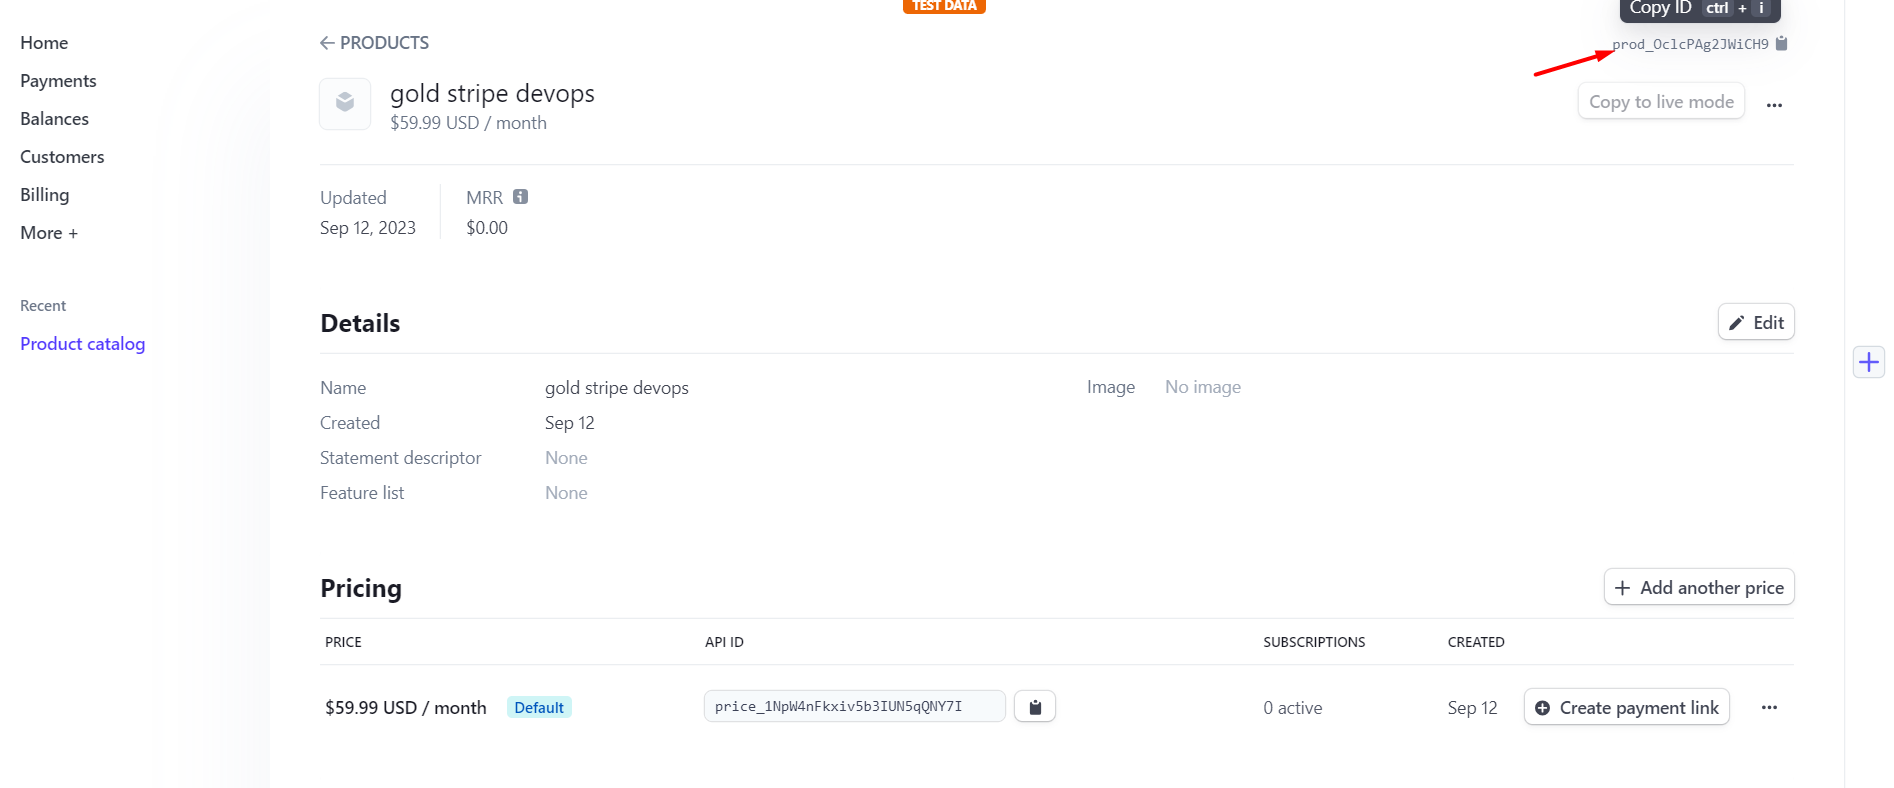
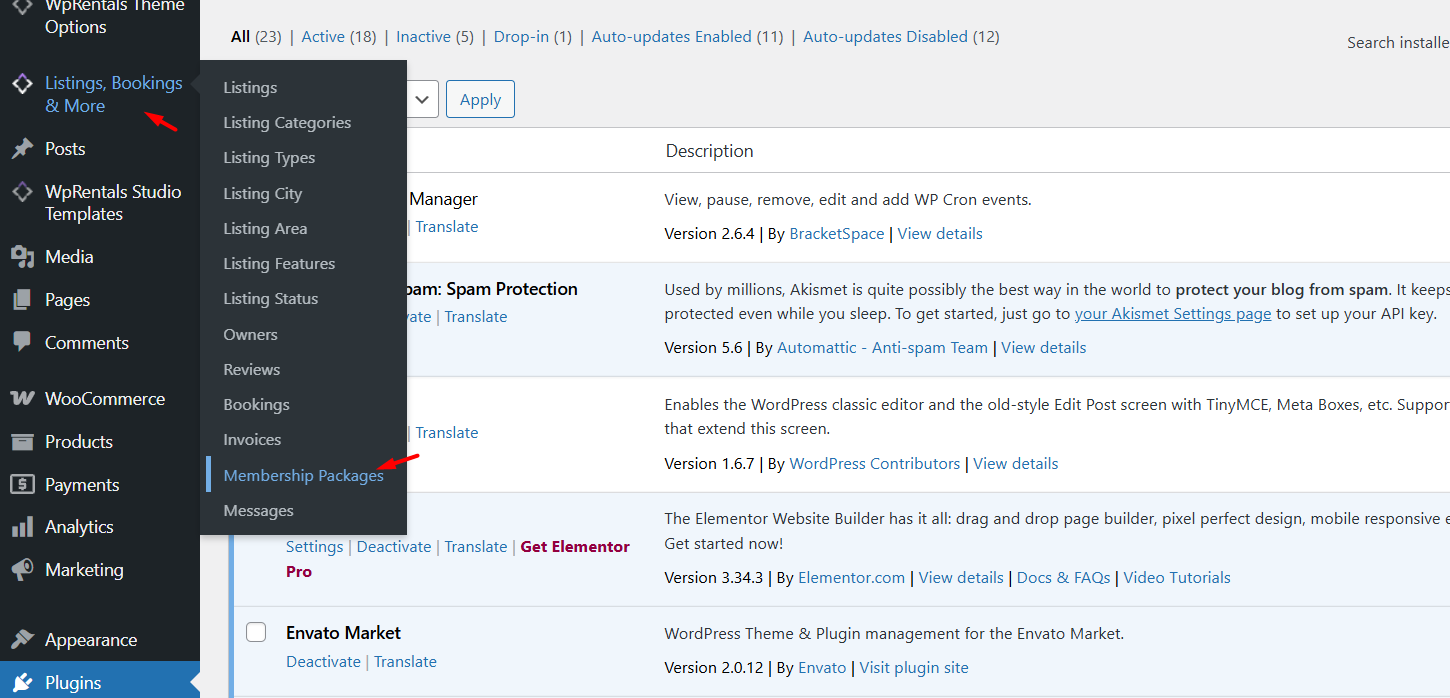
After creating the product, copy the Stripe Product ID and paste it into: WPRentals → Memberships → Edit Membership
How to cancel a subscription
A Cancel Stripe Subscription button automatically appears for users who paid via Stripe.

How to debug Stripe errors
If the payment button stays stuck on messages such as Sending Request…, Processing…, or the page returns a WordPress critical error, this usually means the Stripe payment flow is not completing in the background.
This can be caused by an incorrect Stripe setup, a Test/Live mode mismatch, a missing or incorrect webhook, a duplicated Stripe Processor page, cache/optimization blocking the payment request, or a PHP/JavaScript error.
Before debugging, check these settings
- Make sure the Stripe Processor page exists.
- Make sure only one page uses the Stripe Merchant Processor template.
- Make sure the Stripe Processor page URL is added as the webhook endpoint in Stripe.
- Make sure the Stripe mode in WPRentals matches the keys used in Stripe: Sandbox/Test keys for testing, Live keys for live payments.
- Make sure the webhook secret copied from Stripe is added in WPRentals Stripe settings.
- Make sure cache, minify, JavaScript delay, and security plugins are not blocking Stripe scripts, AJAX requests, or the Stripe Processor page.
- Clear all cache after changing Stripe settings.
Enable WordPress debug to see the exact error
WordPress may show only a generic message such as:
There has been a critical error on this website.This message does not show the real error. To see the exact PHP error, enable WordPress debug from FTP, SFTP, hosting File Manager, or hosting support.
Open the file:
wp-config.phpBefore this line:
/* That's all, stop editing! Happy publishing. */Add or update these lines:
define( 'WP_DEBUG', true );
define( 'WP_DEBUG_LOG', true );
define( 'WP_DEBUG_DISPLAY', false );
@ini_set( 'display_errors', 0 );After enabling debug:
- Repeat the Stripe payment test.
- Wait for the error or stuck payment behavior to happen again.
- Check the debug log file here:
wp-content/debug.logSend us the error lines from the same date and time when the Stripe test failed.
Check browser console errors
If the payment screen stays loading, also check the browser console.
- Open the booking/payment page.
- Right click on the page and select Inspect.
- Open the Console tab.
- Repeat the payment test.
- Take a screenshot of any red JavaScript errors.
If possible, also check the Network tab and look for failed requests related to Stripe, admin-ajax.php, or the Stripe Processor page.
Check Stripe webhook events
Stripe can show if the webhook reached your website or if it failed.
- Go to Stripe Dashboard → Developers → Webhooks.
- Open the webhook endpoint used for WPRentals.
- Check the recent webhook events.
- Open any failed event and check the response/error message.
If a webhook event failed, send us a screenshot of the event status and the response/error message.
What to send to support
To help us guide you correctly, please send the following details:
- Screenshot of Theme Options → Add Listing Page & Payment Settings → Stripe Settings.
- Screenshot showing if WPRentals is set to Sandbox or Live.
- Screenshot of the Stripe webhook endpoint URL.
- Screenshot of the Stripe webhook event status, especially if Stripe shows failed events.
- The URL of the Stripe Processor page.
- Confirmation that only one page uses the Stripe Merchant Processor template.
- The exact steps you followed before the error appeared.
- Screenshot of the frontend error or loading message.
- Screenshot of browser console errors, if any.
- The WordPress debug log error from wp-content/debug.log.
- Hosting/PHP error logs, if your hosting provides them.
Stripe fatal error
Error message – Fatal error: Uncaught exception ‘Exception’ with message ‘Stripe needs the Multibyte String PHP extension.’
Cause
Stripe requires the mbstring PHP extension.
Solution
- Contact your hosting provider and request enabling mbstring
- Reference:
PHP Manual – Multibyte String
Stripe Dashboard (Classic) vs Stripe Workbench
Stripe offers two dashboard interfaces: Classic and Workbench.
They are not different Stripe accounts and do not affect how payments work in WPRentals.
They are simply different layouts of the same Stripe Dashboard. If menu locations look different from the screenshots in this article, see the dedicated guide here: Stripe Workbench – Interface differences explained
WPRentals works identically with both Stripe Classic and Stripe Workbench. No additional configuration is required in the theme.