Overview
WPRentals Studio allows you to create, edit, and manage custom templates for different parts of your WPRentals website using Elementor Free.
You can use WPRentals Studio to design custom templates for the header, footer, single property page, property category pages, owner profile pages, and single blog posts.
What WPRentals Studio Does
WPRentals Studio lets you create reusable templates that control how specific parts of the website look on the front end.
For example, you can create:
- A custom header used across the website.
- A custom footer used across the website.
- A section before or after the custom Studio footer.
- A custom single property page design.
- A custom owner profile page design.
- A custom category page design.
- A custom single blog post design.
Templates are edited with Elementor. This gives you visual control over layout, spacing, typography, colors, widgets, and responsive design.
Before You Start
Before creating WPRentals Studio templates, check the following:
- WPRentals theme is installed and activated.
- The required WPRentals plugins are installed and activated.
- Elementor is installed and activated.
- You know which part of the website you want to replace with a custom template.
- You know where the template should apply, for example all pages, one specific page type, or a specific category.
How to Create a WPRentals Studio Template
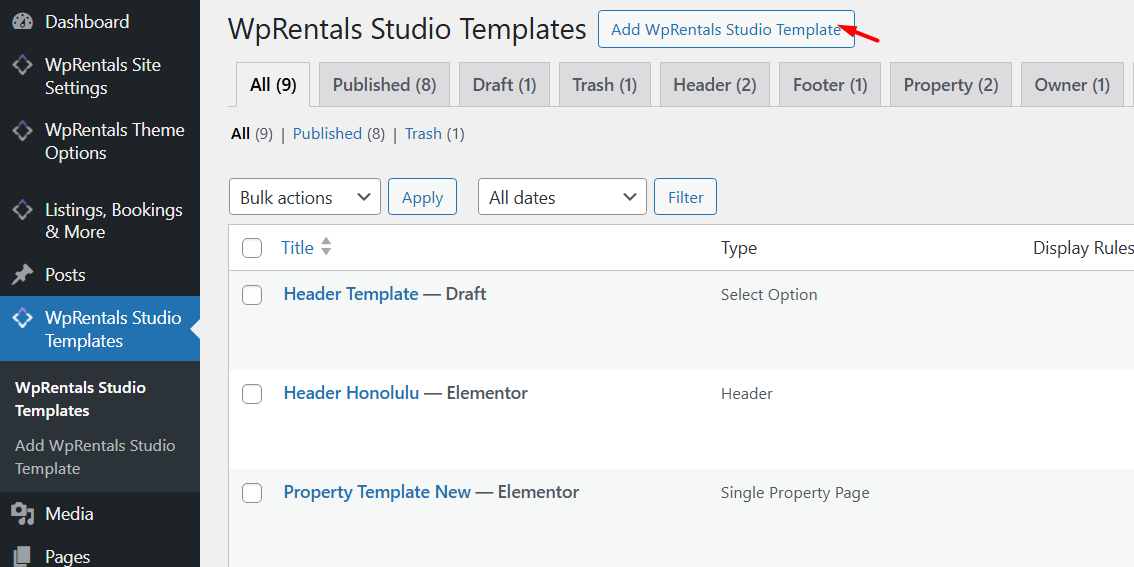
Step 1: Open WPRentals Studio
In your WordPress admin panel, go to:
WPRentals Studio > Templates

Step 2: Add a New Template
Click Add New WPRentals Studio Template to create a new template.
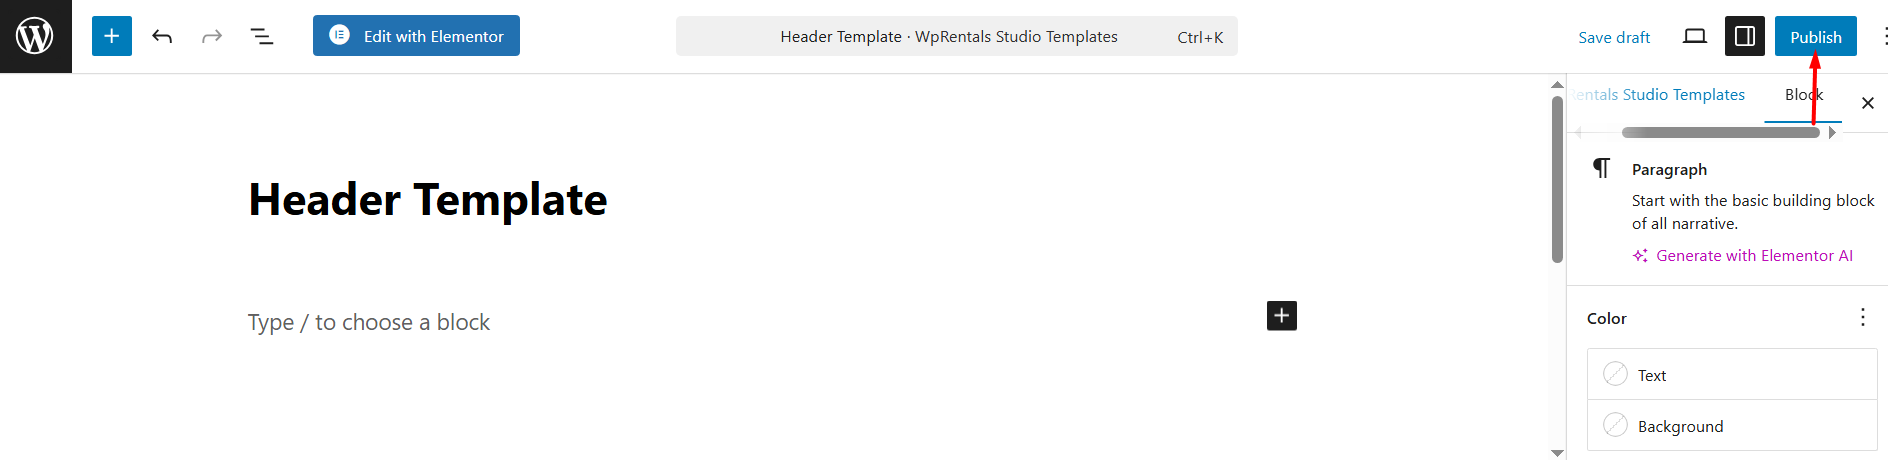
Step 3: Add the Template Name and Type
Enter a template name and select the template type from the dropdown.
Step 4: Publish the Template
Click Publish to save the template.
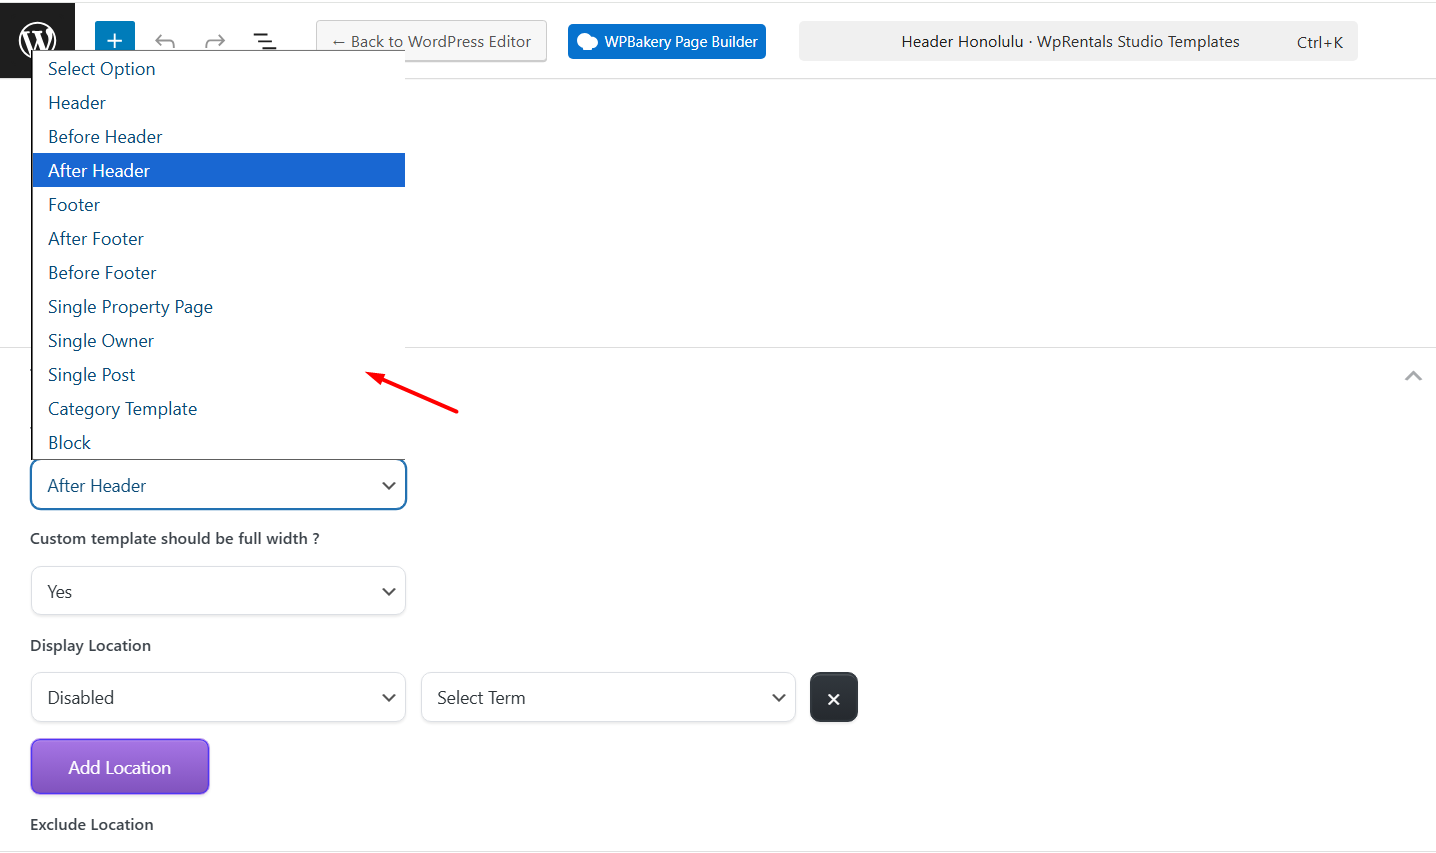
WPRentals Studio Template Types
When you create a new template, you must select what type of template it is. The template type controls where the template can be used.
| Template Type | What It Controls |
|---|---|
| Header | Creates a custom main site header layout. |
| Before Header | Adds content or design elements above the Studio header. |
| After Header | Adds content or design elements below the Studio header. |
| Footer | Creates a custom site footer layout. |
| Before Footer | Adds content or design elements above the Studio footer. |
| After Footer | Adds content or design elements below the Studio footer. |
| Single Property Page | Creates a custom layout for individual property listings. |
| Single Owner | Creates a custom public profile page for property owners. |
| Single Post | Creates a custom layout for individual blog posts. |
| Category Template | Creates a custom layout for listing taxonomy pages, such as category, type, city, or area pages. |
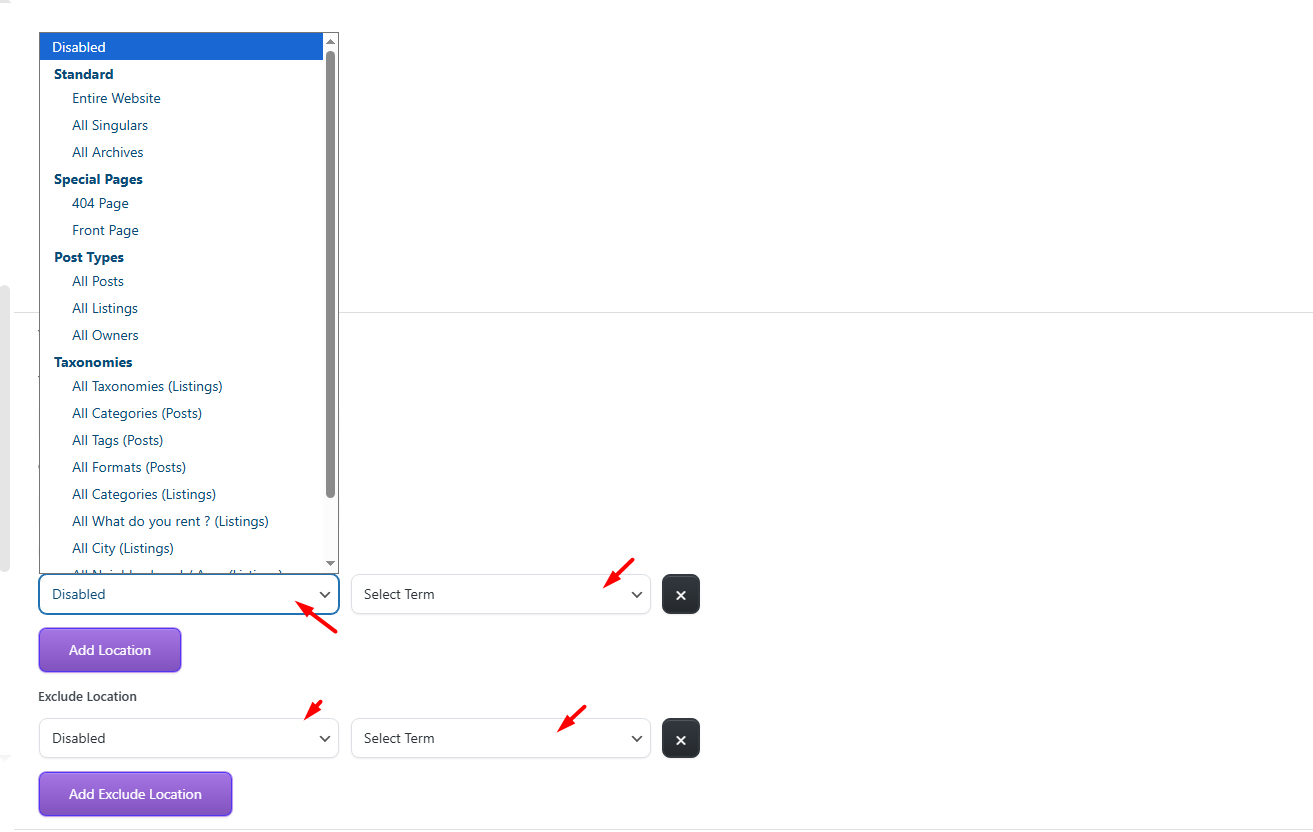
Display Options
After publishing the template, refresh the page. Then use the Display Options area to choose where this template should appear.
- The available Display Options depend on the selected template type.
- A header template can be assigned to header areas.
- A footer template can be assigned to footer areas.
- A Before Footer or After Footer template works with a Studio footer.
- A single property template is used for property listing pages.
- A category template is used for listing category or taxonomy pages.
- A single owner template is used for owner profile pages.
- A single post template is used for blog post pages.
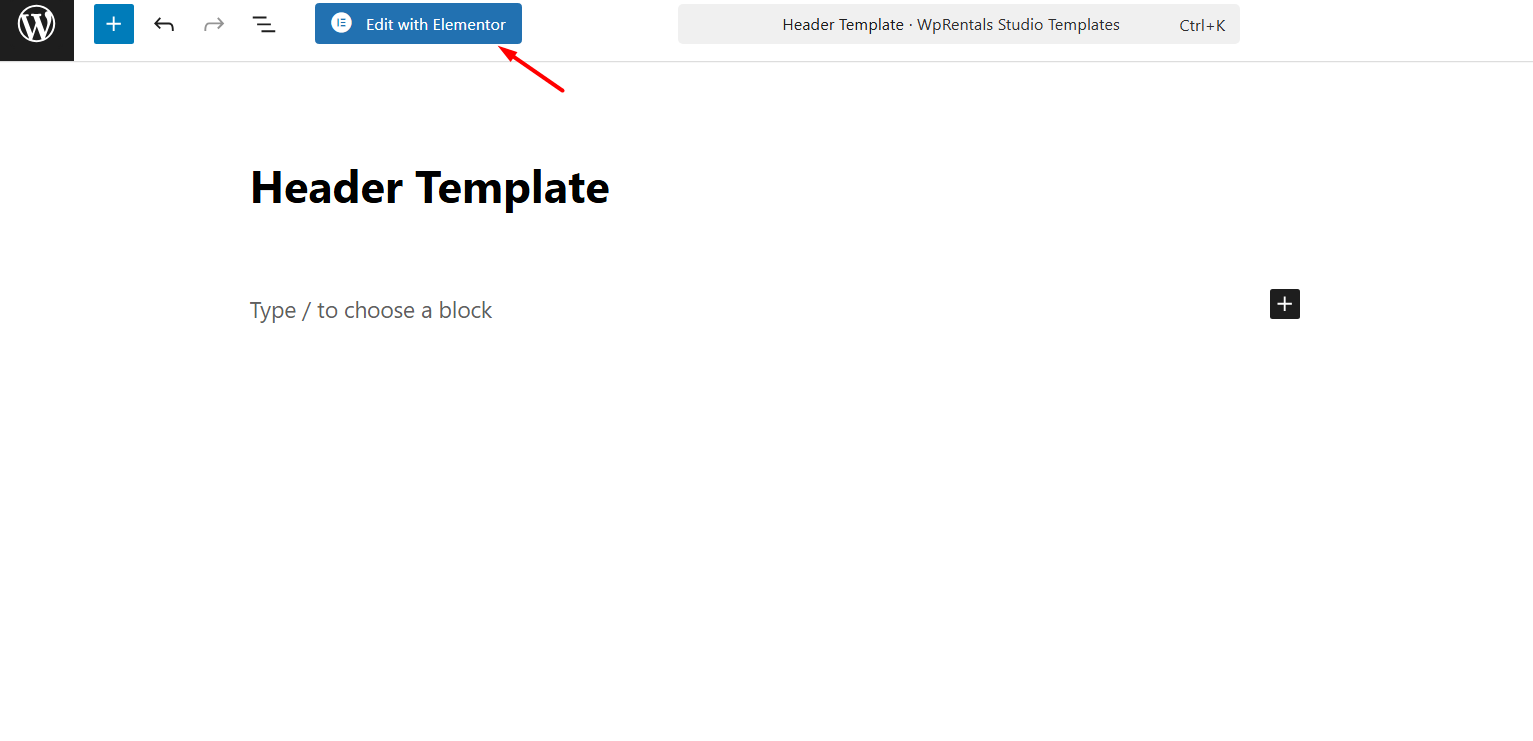
Edit the Template with Elementor
After the template is created and published, click Edit with Elementor.
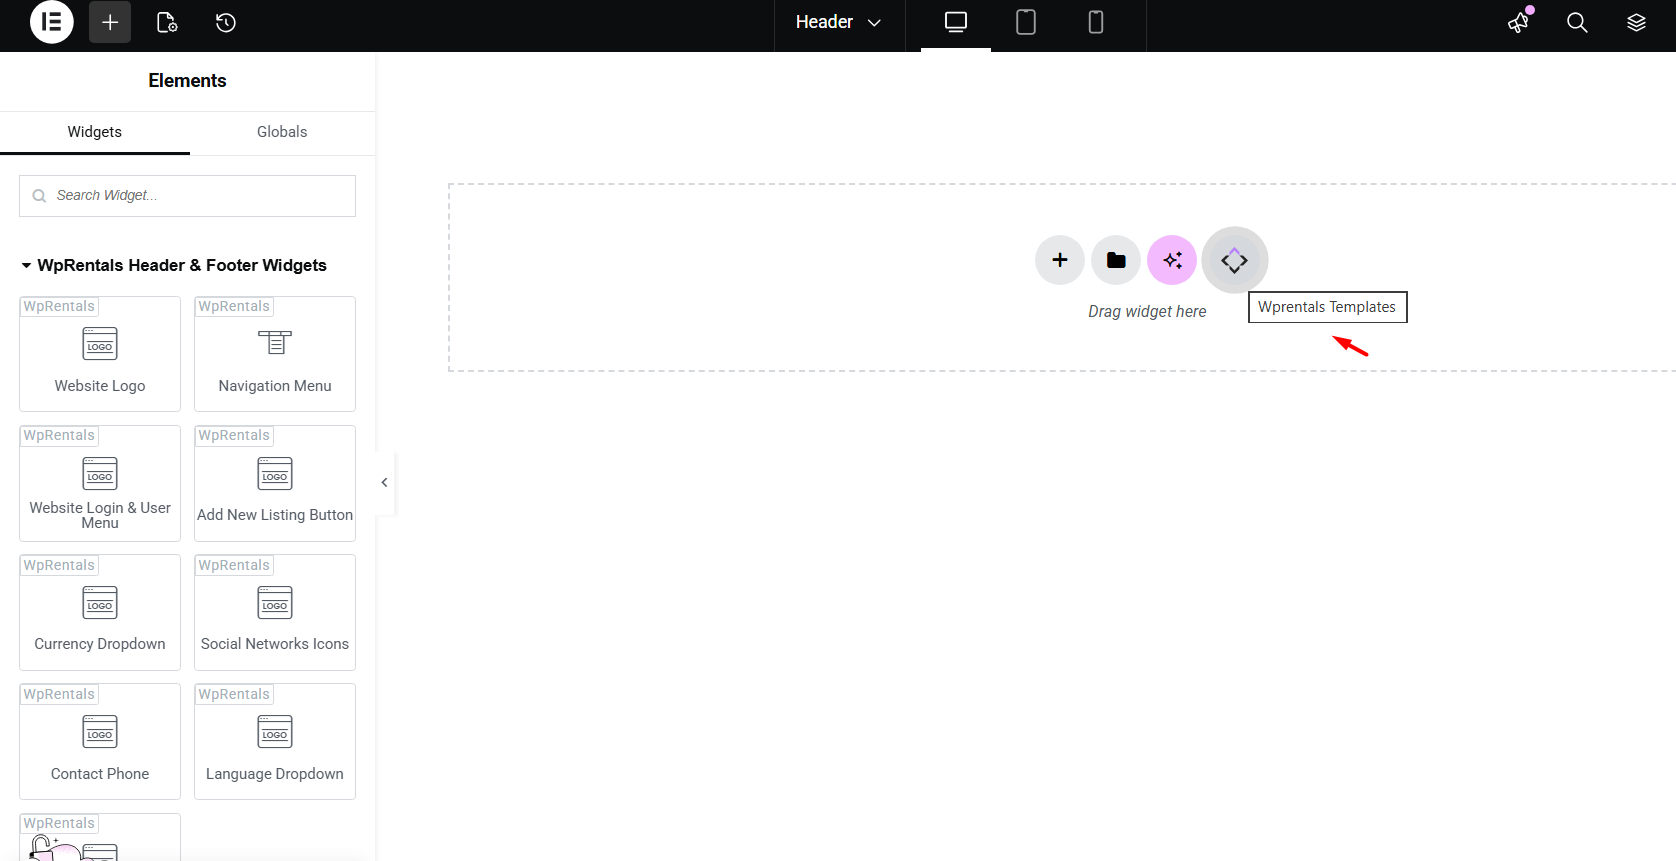
- Use the drag-and-drop editor to customize the layout.
- Add Elementor widgets and WPRentals-specific widgets.
- Adjust colors, fonts, spacing, margins, and alignment.
- Check the design on desktop, tablet, and mobile.
- Click Update when you finish editing.
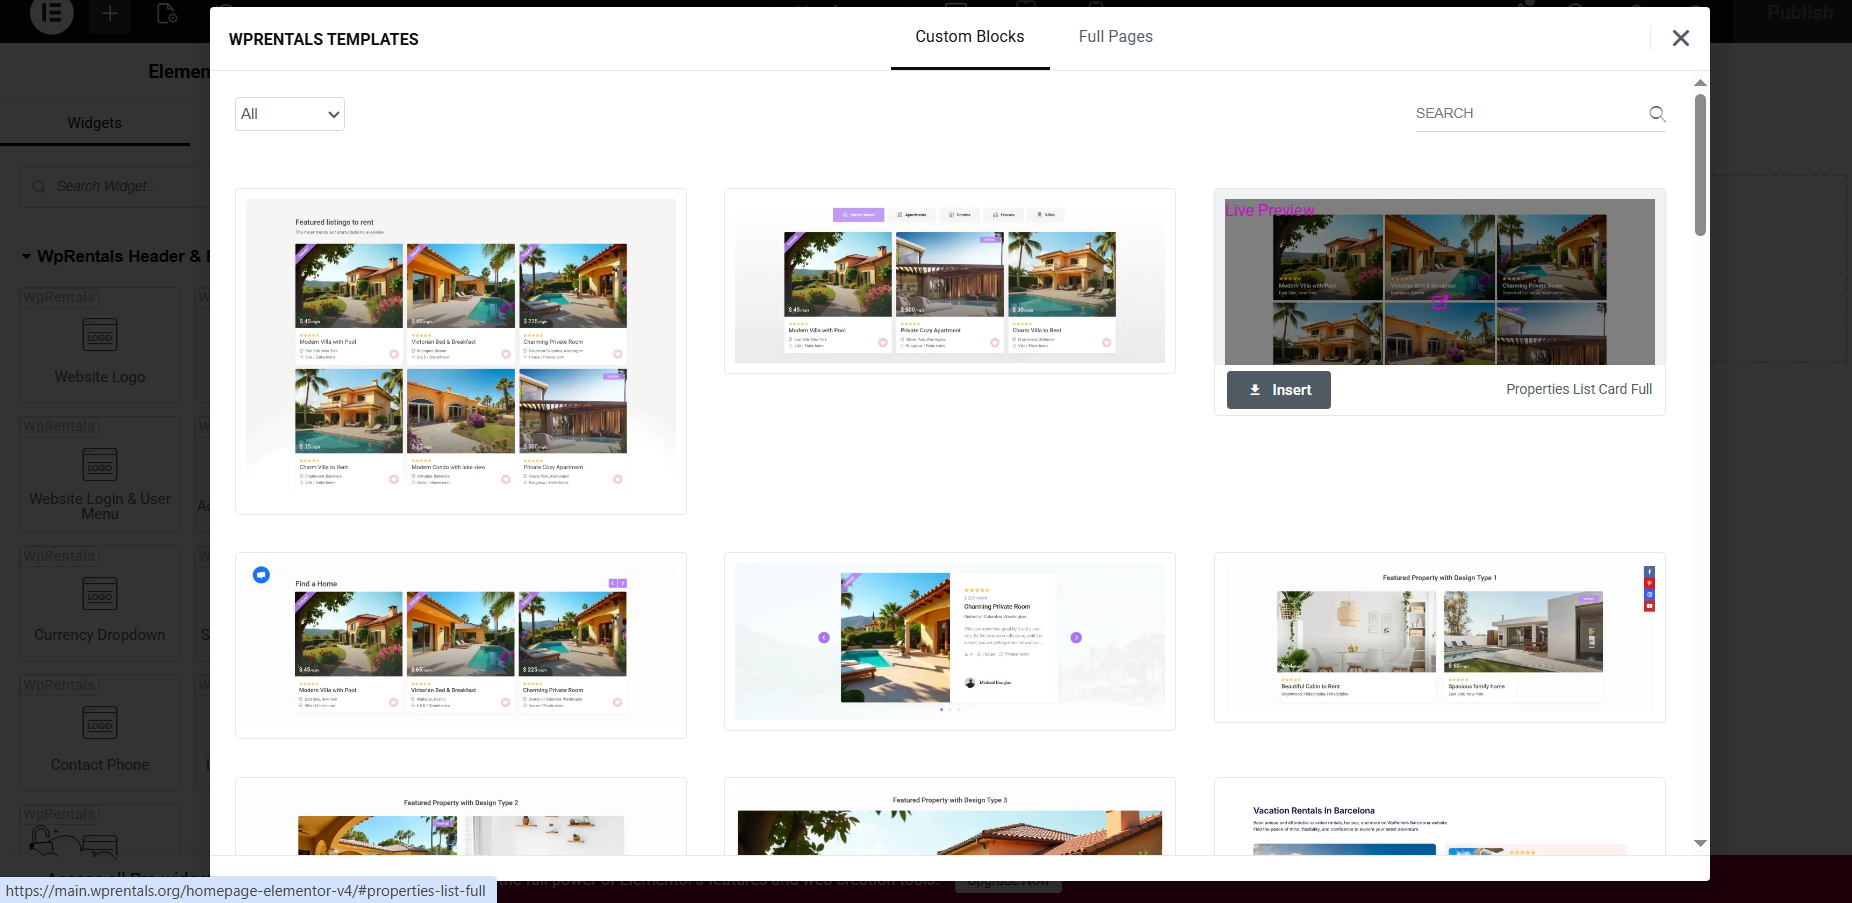
Import or Use Pre-built Studio Designs
You can create your design manually with the available widgets, or you can import a pre-built WPRentals Studio design and then customize it with Elementor.
This is useful when you want to start from an existing design and change the content, colors, spacing, and widgets instead of building the layout from zero.
WPRentals Studio Presentation
This video presents WPRentals Studio and shows how custom templates work compared to the default WPRentals layouts.
Use this video if you are new to WPRentals Studio and want to understand the general workflow before creating your own templates.
WPRentals Studio – Header & Footer

This tutorial explains how to work with the default WPRentals header and footer settings, and how to create custom header and footer templates with WPRentals Studio.
Use a custom header or footer template when you want full visual control over the site header or footer design.
Header and Footer Template Widgets
- Website Logo
- Navigation Menu
- Website Login & User Menu
- Add New Listing Button
- Currency Dropdown
- Social Networks Icons
- Contact Phone
- Language Dropdown
- Properties By Category
Before Footer and After Footer Templates
The Before Footer and After Footer Studio templates are used together with a custom footer created in WPRentals Studio / Elementor.
They do not replace the default theme footer by themselves.
If you create a Before Footer template, publish it, and assign it to the entire site, but it does not show on the front end, check if the active footer is also created with WPRentals Studio.
If the website uses the default WPRentals footer, the Before Footer template will not display by itself.
To use this setup, follow this order:
- Create a Footer template in WPRentals Studio > Templates.
- Publish the footer template.
- Set the Display Options so the footer applies where needed, for example the entire site.
- Edit the footer template with Elementor and save it.
- Create the Before Footer or After Footer Studio template.
- Publish it and set its Display Options.
- Edit it with Elementor and save it.
- Clear the WPRentals cache, plugin cache, server cache, CDN cache, and browser cache.
- Check the front end again.
If you want to keep using the default WPRentals footer, the easier solution is to add your text directly in the footer widget areas or inside the footer area you already use.
For the default footer, use:
Appearance > Widgets
or the default footer settings from:
WPRentals Options > Footer
Use a separate Before Footer or After Footer Studio template only when the footer is also managed through WPRentals Studio.
WPRentals Studio – Category Pages
This tutorial explains how to work with WPRentals category pages and how to design custom category templates with WPRentals Studio.
Use a Category Template when you want to customize listing taxonomy pages, such as category, type, city, neighborhood, or area pages.
Property Category Template Widgets
- Term Title
- Term Description
- Term Parent
- Term City or County/State
- Term Featured Image
- Term Gallery
- Term Tagline
- Term Custom Field
- Term Map
- Term Breadcrumbs
- Term Header
- Term Property Count
- Term Documents
- Listings per Term
WPRentals Studio – Property Page
This tutorial explains how the default WPRentals property page layout works and how to create a custom single property template with WPRentals Studio.
Use a Single Property Page template when you want to control the layout of individual listing pages directly in Elementor.
Single Property Template Widgets
- WPRentals Property Breadcrumbs
- WPRentals Property Title
- Property Page Status
- WPRentals Property Featured Image
- Property Page Header Section
- Property Page Overview Section
- Property Page Description Section
- Property Page Address Section
- Property Page Details Section
- Property Page Features Section
- Property Page Sleeping Arrangements Section
- Property Page Terms and Conditions Section
- Property Page Availability Section
- Property Page Map Section
- Property Page Video Section
- Property Page Virtual Tour Section
- Property Page Yelp Section
- Property Page Owner Section
- Property Page Reviews Section
- Property Page Similar Listings Section
- Property Page Booking Form
- Property Page Featured Image Header
- Property Classic Slider
- Property Masonry Gallery
- Property Masonry Gallery v2
- Property Multi Image Slider
- Property Page Add to Favorites
- Property Page Contact Owner Section
- Owner Detail
- Property Page Price Section
- Property Single Detail
WPRentals Studio – Owner Profile
This tutorial explains the owner system in WPRentals and how to create a custom owner profile template with WPRentals Studio.
Use a Single Owner template when you want to customize the public profile page for owners.
Single Owner Template Widgets
- WPRentals Owner Name
- WPRentals Owner Featured Image
- WPRentals Owner Status
- Owner Detail
- WPRentals Owner Contact Button
- WPRentals Owner Header
- WPRentals Owner Reviews
- WPRentals Owner Property Listings
WPRentals Studio – Blog Post
WPRentals Studio can also be used to create a custom design for single blog posts.
Use a Single Post template when you want to control how individual blog articles appear on the front end.
Single Blog Post Template Widgets
- WPRentals Single Post Title
- WPRentals Single Post Content
- WPRentals Single Post Featured Image
- WPRentals Single Post Excerpt
- WPRentals Single Post Meta Info
- WPRentals Single Post Breadcrumbs
- WPRentals Single Post Slider
- WPRentals Single Post Social
- WPRentals Single Post Comments
- WPRentals Single Post Related Posts
- WPRentals Single Post Author Box
Important Notes
- WPRentals Studio templates are managed from WPRentals Studio > Templates.
- Each template must have the correct template type selected.
- After publishing a template, refresh the page and select the Display Options.
- Display Options control where the template appears on the front end.
- Templates are edited with Elementor.
- WPRentals Studio changes the design of template areas. It does not create listings, categories, owners, or blog posts.
- If you use a custom Studio header, edit the header design from the Elementor template, not from the default Theme Options header design settings.
- If you use a custom Studio footer, edit the footer design from the Elementor template, not from the default Theme Options footer/widget settings.
- Before Footer and After Footer templates work with a Studio footer. If the site uses the default theme footer, these templates may not show by themselves.
- If you use a custom Studio property template, edit the property layout from the Elementor template.
- If a template does not show on the front end, check the template type, Display Options, publish status, active footer/header setup, and cache.
- Always check custom templates on desktop, tablet, and mobile.
- If changes do not appear immediately, clear plugin cache, server cache, CDN cache, and browser cache, then test again.
Related Help
- WPRentals Studio and Elementor Free
- How to Work With the WPRentals Elementor Widgets Plugin and Import Pre-built Elementor Templates
- Theme Options – Header
- Property Taxonomies: Category, Types, City and Area
- How to Work With the Listing Page Layout Manager
- How to Add and Manage Blog Posts in WPRentals