How to Enable HTTPS / SSL on Your WordPress Website
HTTPS is the secure version of HTTP. It encrypts the connection between your visitors’ browsers and your website server.
This helps protect data sent between the visitor and the website, such as login details, forms, booking details, and account information.
To use HTTPS, your domain must have a valid SSL/TLS certificate installed on the hosting server.
Step 1: Ask Hosting to Install or Enable SSL
Before changing anything in WordPress, make sure SSL is active for your domain.
Many hosting providers offer free SSL certificates through Let’s Encrypt. If you are not sure how to enable SSL, contact your hosting provider and ask them to install or activate an SSL certificate for your domain.
Step 2: Test the HTTPS URL
After hosting confirms SSL is active, open your website manually with https://.
Example:
https://yourdomain.comIf the website opens correctly with HTTPS, you can continue with the WordPress settings.
If the website does not open with HTTPS, do not change the WordPress URL yet. Ask your hosting provider to fix the SSL installation first.
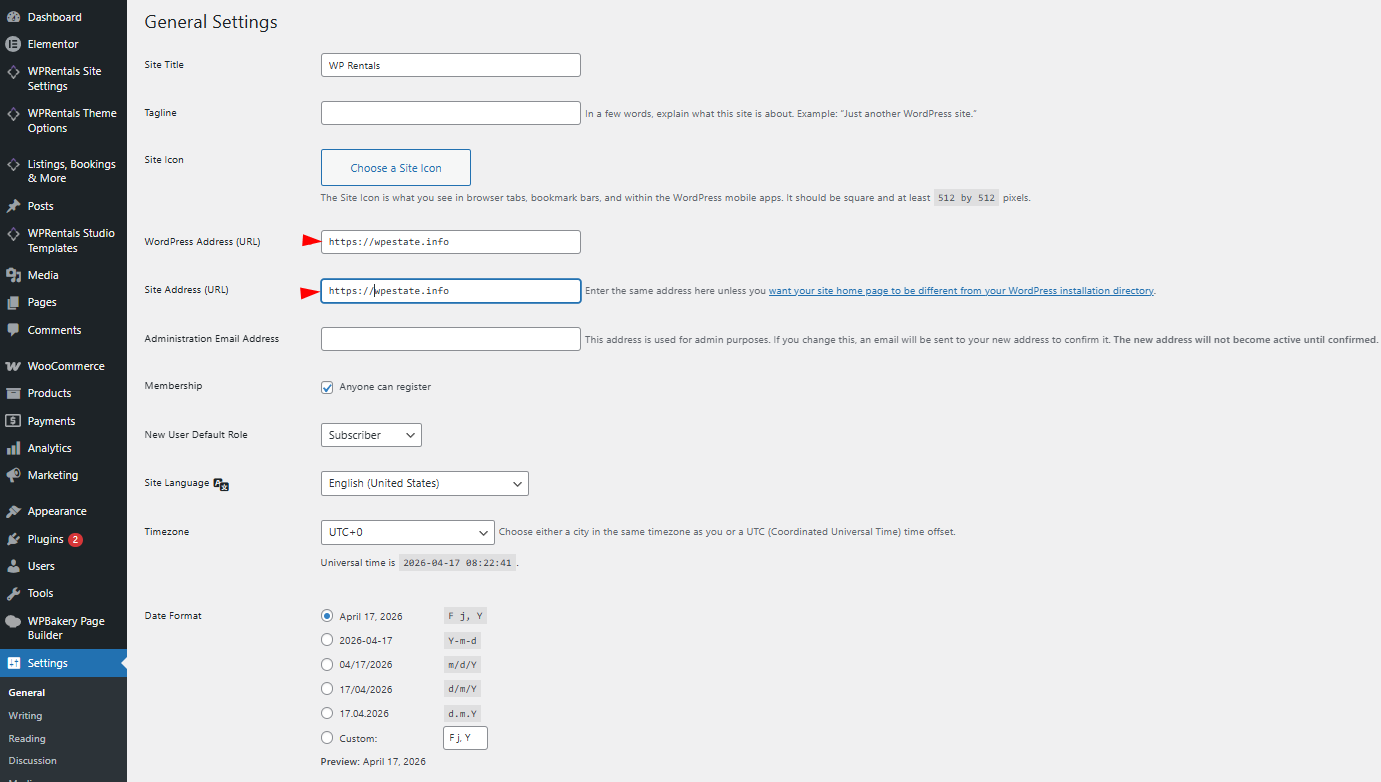
Step 3: Update WordPress URL Settings
In your WordPress admin panel, go to:
Settings > GeneralUpdate both fields to use https:// instead of http://:
- WordPress Address (URL)
- Site Address (URL)
Example:
https://yourdomain.com
Click Save Changes.
After saving, WordPress may log you out. Log in again using the HTTPS admin URL.
https://yourdomain.com/wp-admin/Step 4: Enable HTTPS Redirect
After the site works with HTTPS, all HTTP traffic should be redirected to HTTPS.
This can usually be done from the hosting panel, CDN settings, or server configuration.
Ask your hosting provider to enable a full HTTP to HTTPS redirect for your domain.
Step 5: Check for Mixed Content
After switching to HTTPS, check your website pages in the browser.
If the browser still shows a “Not secure” warning, the site may have mixed content.
Mixed content means the page is loaded with HTTPS, but some files are still loading with HTTP.
This can happen with:
- images
- CSS files
- JavaScript files
- logo URLs
- background images
- old links saved in the database
- third-party scripts
If you see mixed content warnings, clear all cache first. If the issue continues, ask your hosting provider or developer to help replace old http:// URLs with https:// URLs where needed.
Step 6: Clear Cache
After enabling HTTPS, clear all cache layers:
- website cache
- theme cache, if enabled
- server cache
- CDN cache
- browser cache
Then test the website again in an incognito/private browser window.
Step 7: Update External Services
If you use external services, update the website URL there as well.
Examples:
- Google Search Console
- Google Analytics
- Google Maps API restrictions
- payment gateway return URLs
- Facebook / Meta app URLs
- email templates
- newsletter tools
- booking or calendar sync tools
Important Notes
- Do not change the WordPress URL to HTTPS before SSL is active on the server.
- If SSL is not active and you change the WordPress URL, you may lose access to wp-admin.
- Always make a full website backup before changing site URLs.
- If your website uses Cloudflare or another CDN, make sure SSL is configured correctly there too.
- If you use both www and non-www versions, choose one main version and redirect the other version to it.